Designing a 3 Piece Jacket Collection

This video and post captures my design process from sketching, sampling, and producing a three jacket collection.
Phase 1: Design
Define the framework + concept
Research design details
Brainstorm sketches
Edit and drop ideas
Present final ideas
Phase 2: Prototype Samples
Tech Packs
Sourcing Materials
Drafting Patterns
Sewing Samples
Photoshoot + Lookbook
Phase 3: Final Production Samples
PHASE 1: DESIGN
DEFINE
The first step was to define a clear framework for my collection and identify the brand, target customer, season, line plan, and concept.
Brand: Shein x Amiko (this collection was for a design competition called "Shein x 100K challenge.")
Target Customer: 18-35 trend-forward, mass-market
Season: Fall/ Winter 2021 (Shein selected season)
Line Plan: 3 jackets (I specialize in outerwear design, so I wanted to focus on an area I was passionate about.)
Concept: Reinvent modern sports outerwear w/ 1950s evening jacket inspiration.
RESEARCH
With the basic framework of the collection defined, I did more research to find inspiration for silhouettes and details. Because 1950s style silhouettes heavily influenced the concept of this collection, I researched the design archives of Jacques Fath, Christian Dior, and Balenciaga. I also collected inspiration for sporty details to provide a modern thread through the collection. My inspiration board on Pinterest balanced sophisticated silhouettes, elegant draping, and sporty details like color blocking, mesh lining, and neon reflective cording.
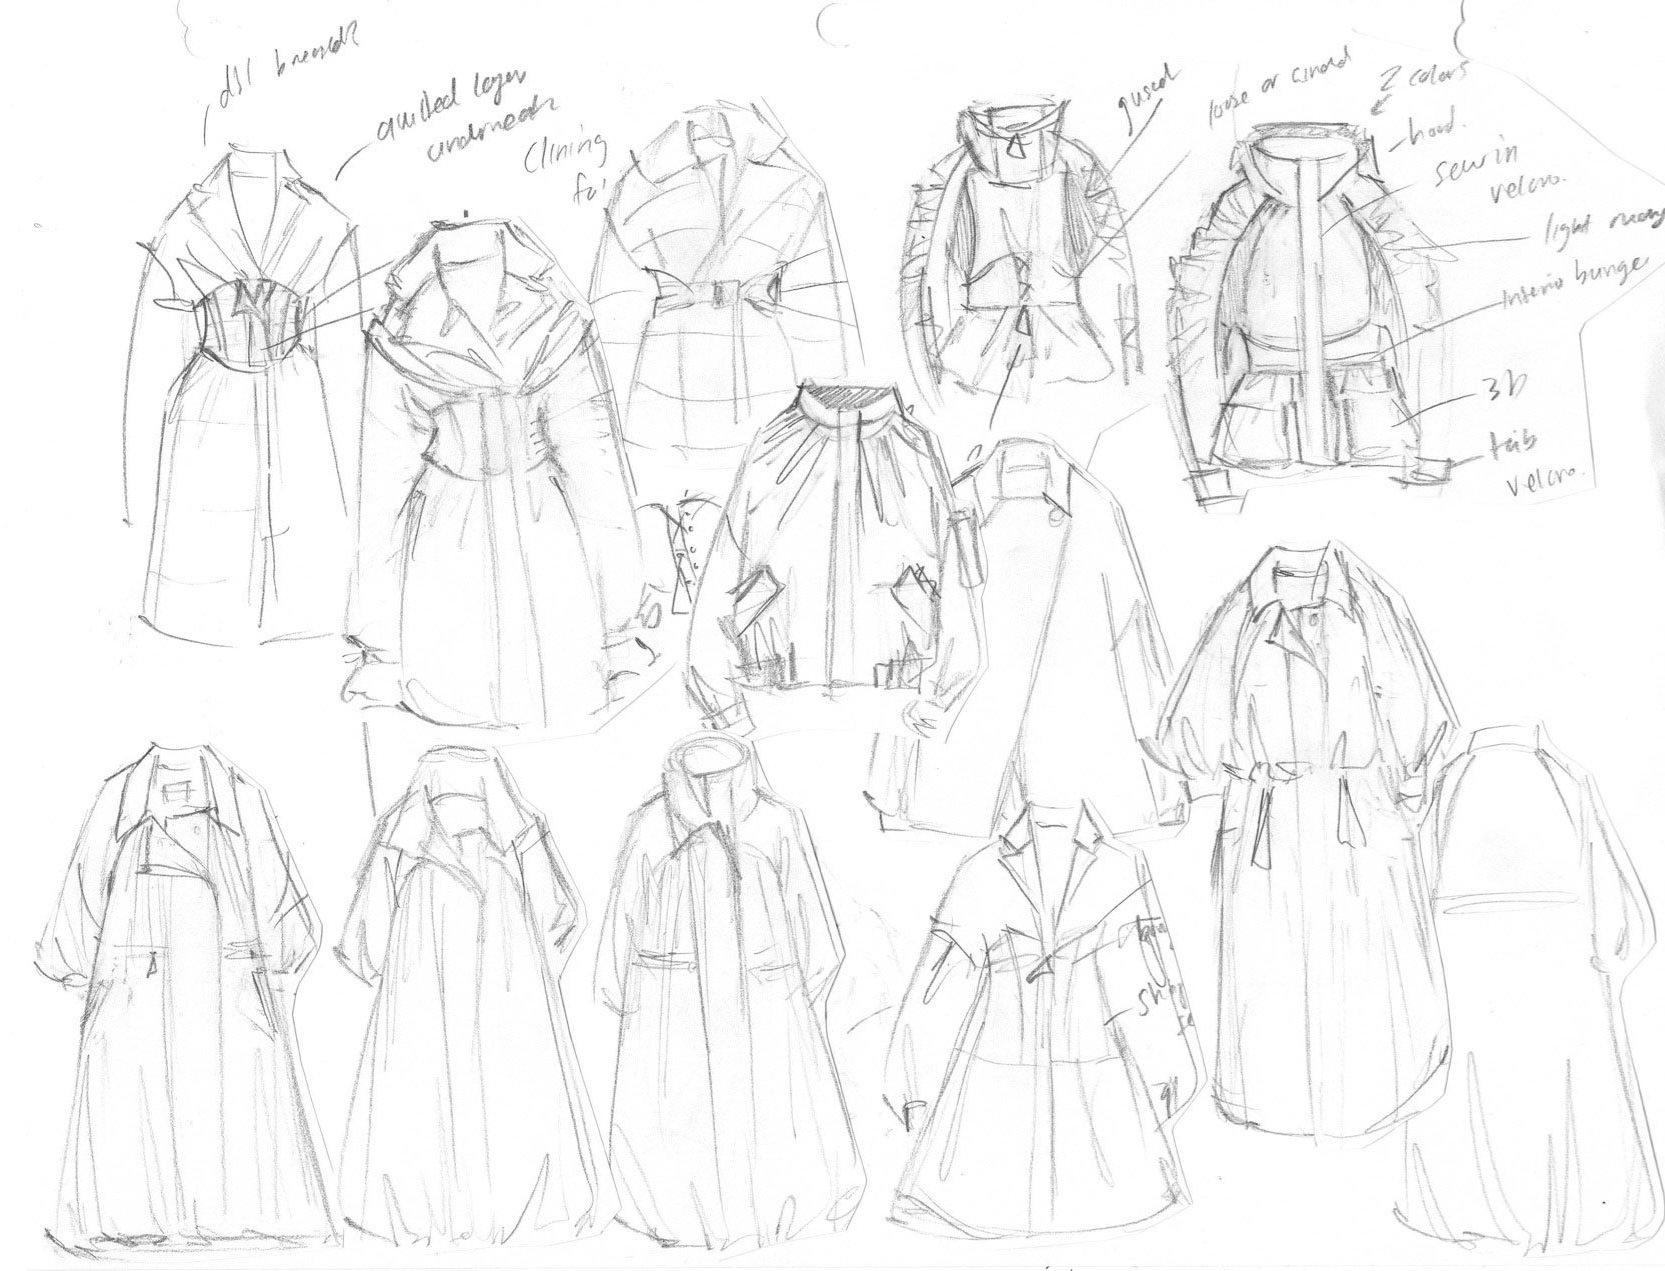
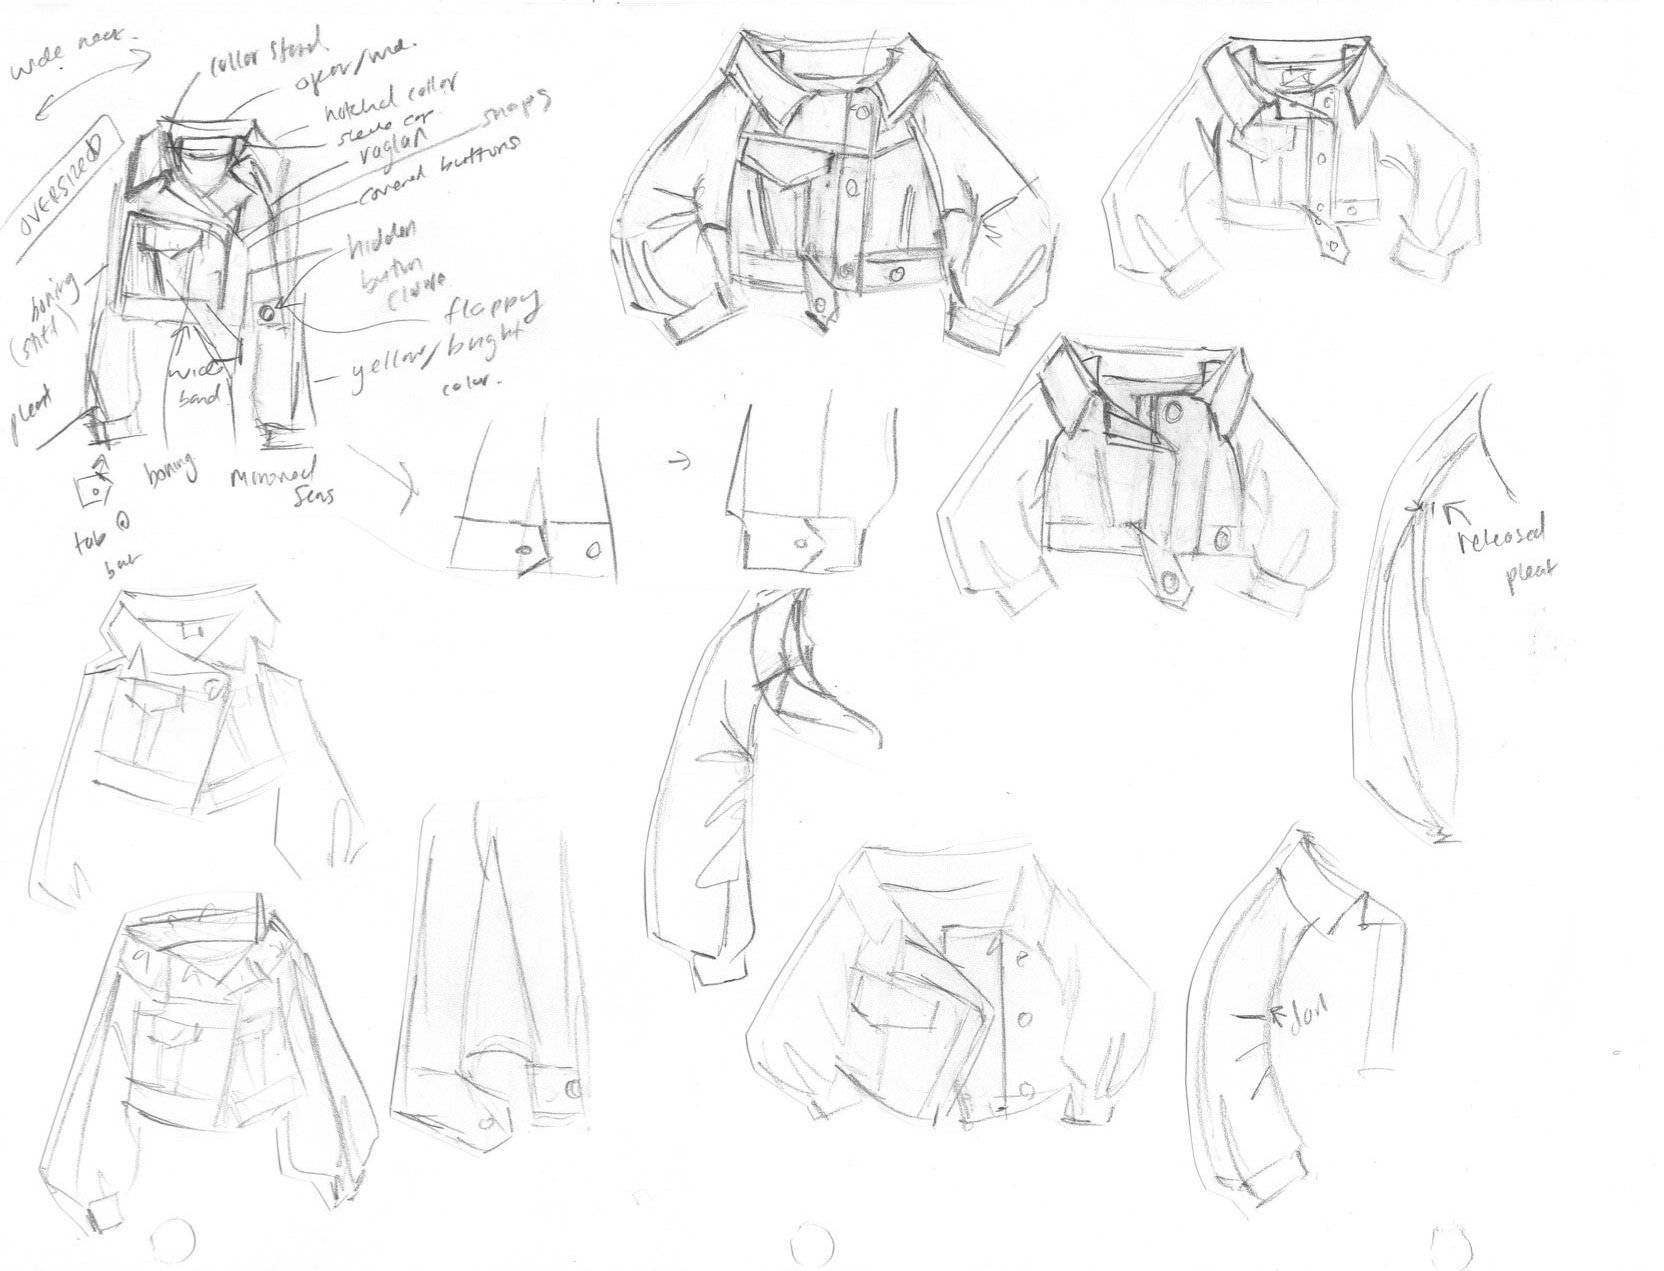
BRAINSTORM
With a clear framework and sense of direction for my collection, I started the brainstorming process. My brainstorming process consisted of rapid sketching on any piece of paper I could get my hands on. At this point, I've already been thinking of designs and was eager to secure them on paper. I couldn't be bothered to worry about the quality or consistency of sketches.
EDIT
Once I'd exhausted my creativity, I stepped away to clear my head. Then I came back with renewed energy to edit + drop ideas that weren't cutting it. To finalize the collection, I selected ideas that were:
1) Aligned with the framework and concept of the collection
2) Cohesive but diversified across silhouette and details
3) Achievable given the timeline
4) Feasible for production in terms of cost and execution
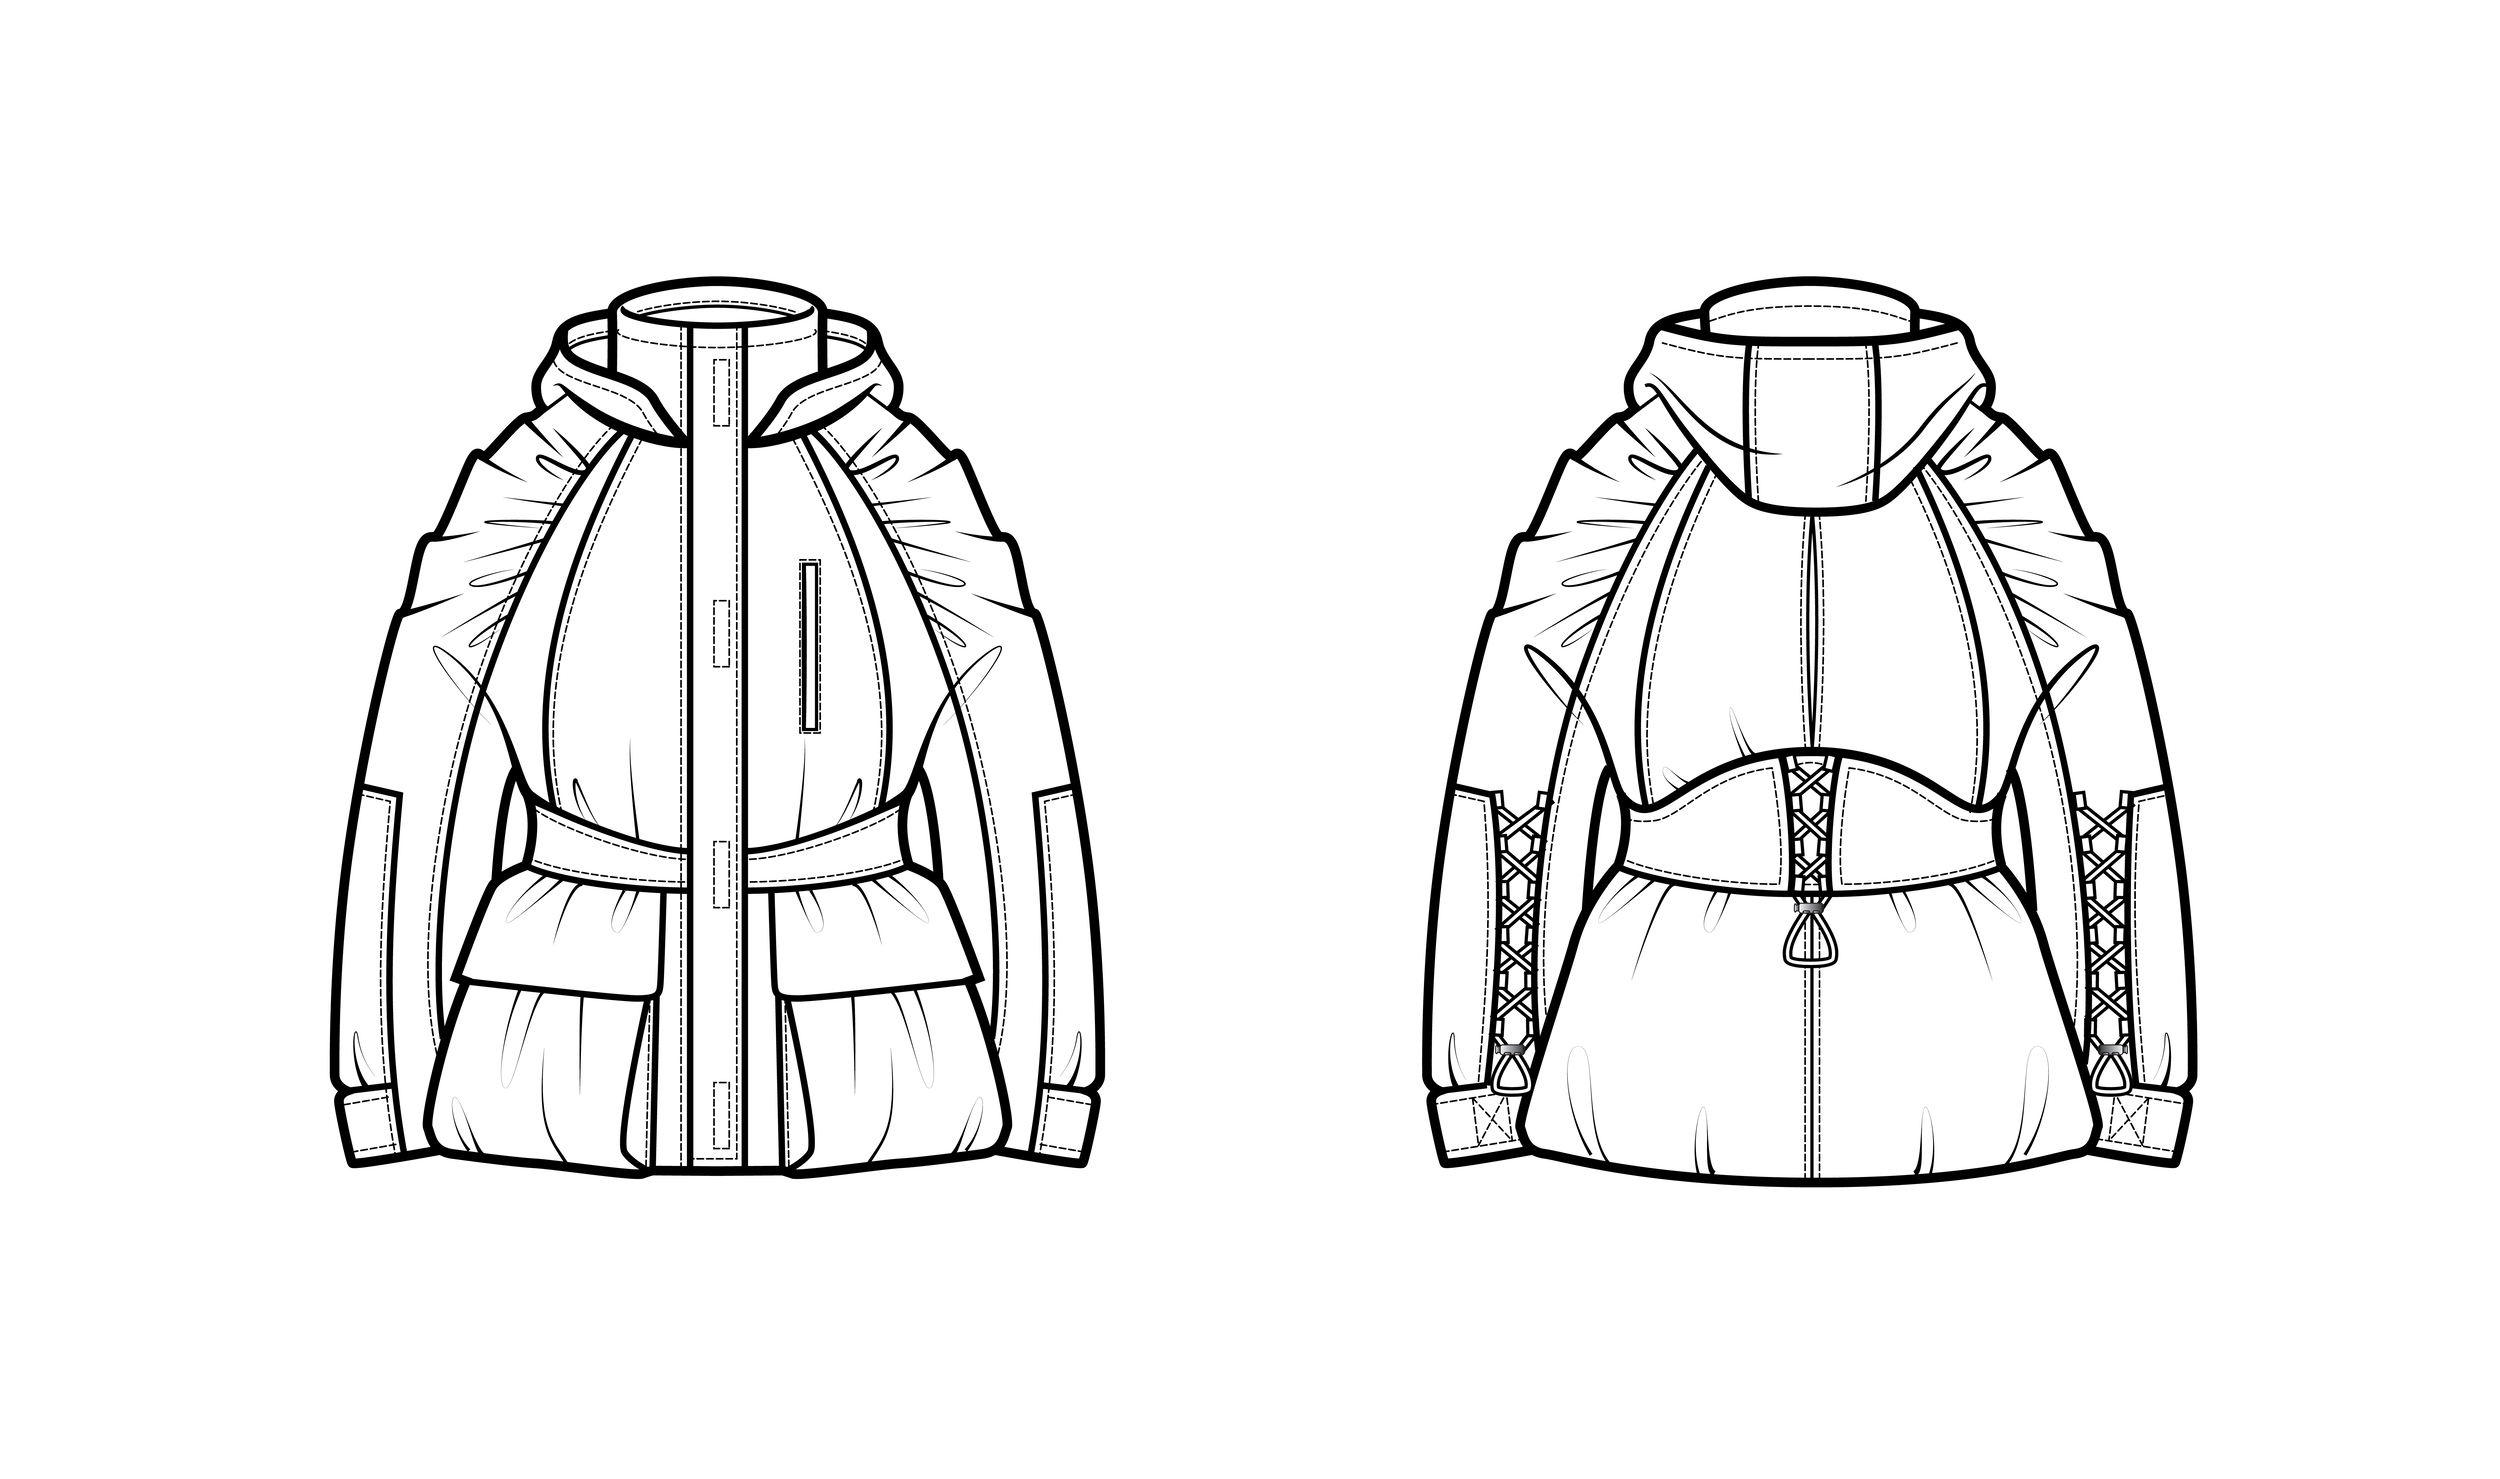
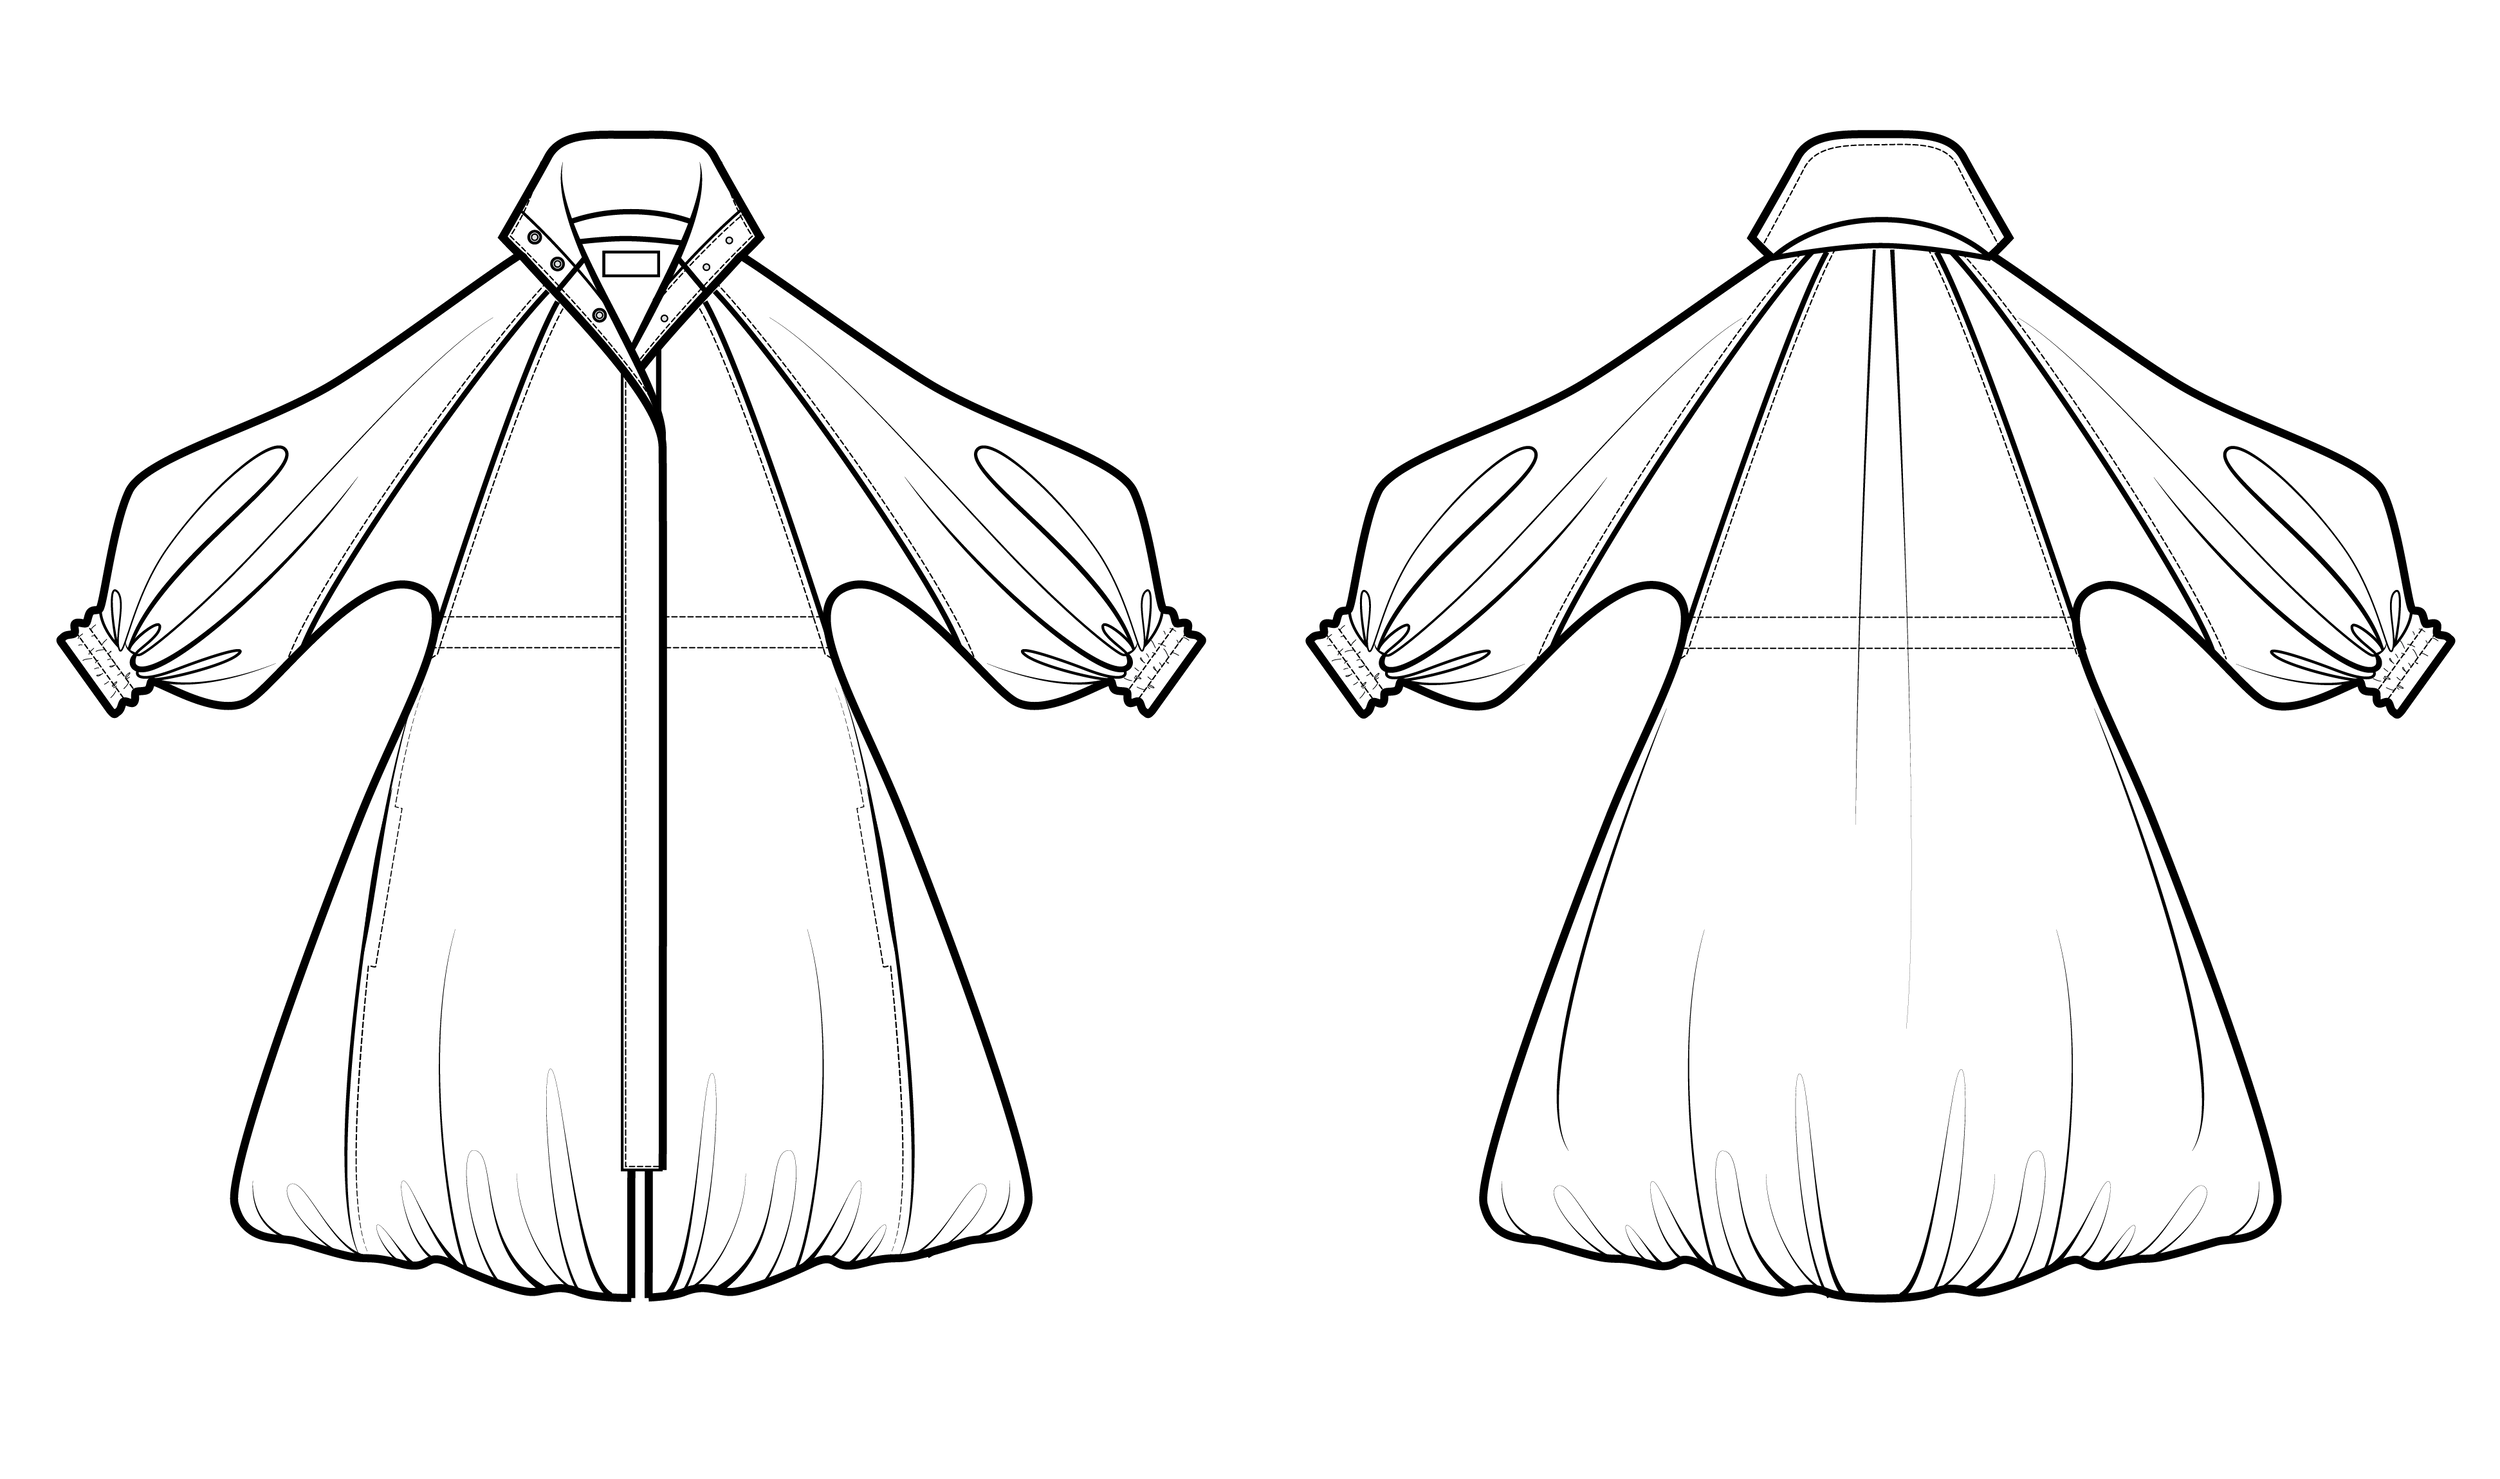
PRESENT
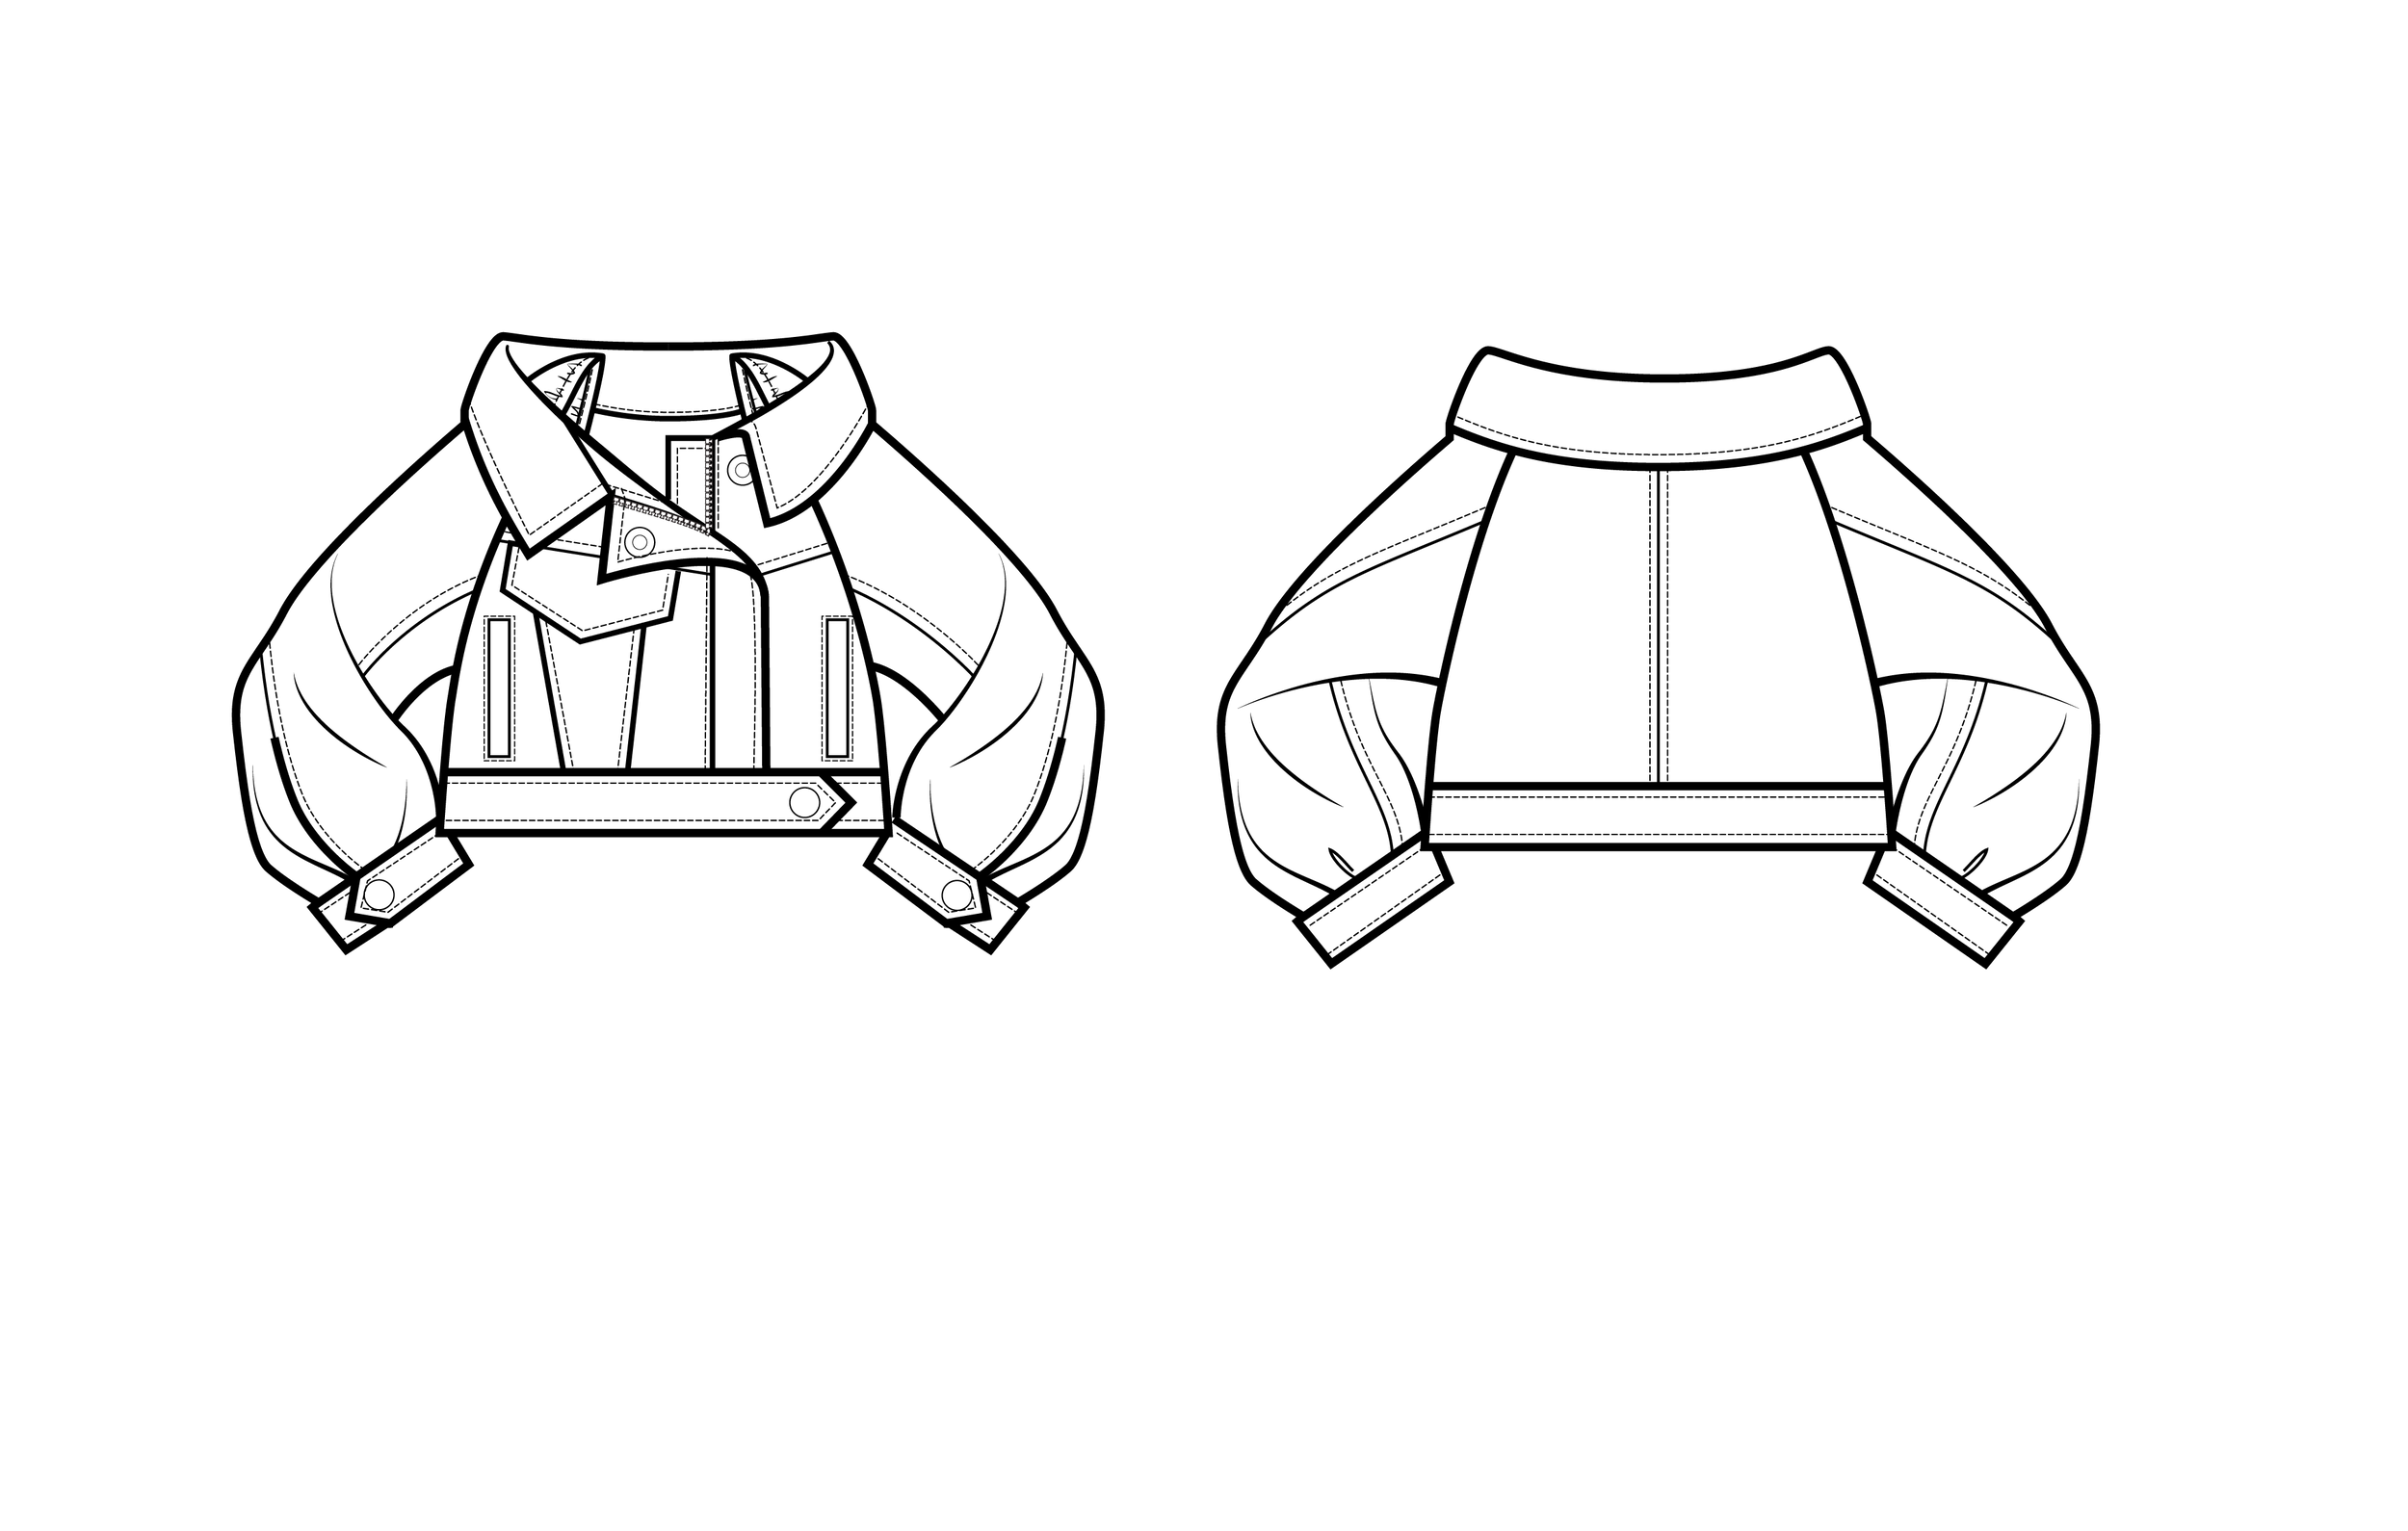
With my final 3 designs selected, it was time to create an appealing presentation. The contest asked for CAD sketches which I made in Procreate, then polished to a vector format in Adobe Illustrator. Here are my 3 designs:
PHASE 2: PROTOTYPE SAMPLES
To my delight, I was selected for the next round of the competition. Meaning, I had to create the prototypes and produce a lookbook.
Tech Packs
The first stage of the sampling process was to create Tech Packs. A Tech Pack (short for "Technical Package") is the instruction manual with all design, construction, and materials information. Here's an example of one of the TPs I made in Google Sheets:


With my TPs complete, I could focus on securing the materials to make the sample.
Sourcing Materials
Usually, I would go into the city and buy all my fabric and trim together, but with COVID, I ordered everything online. The challenging part was keeping track of arrival dates to ensure I had all my materials in time to start sewing.
Finding suitable fabric and color was critical. I ordered a ton of swatches online and picked this memory fabric and sports mesh lining.

Because all three of my designs were jackets, there was A LOT of trim details—zippers in multiple lengths and types, buttons, bungee cord, snaps, velcro, elastic, etc. Meticulously following the BOM pages in my tech packs was essential to ensure I didn't miss anything.
I was pleasantly surprised by how well the materials looked together.

Drafting Patterns
While waiting for my fabric and trim to arrive, I began the pattern-making process. My process is a bit unusual, but it works for me.
Step 1: Drape the pattern on a half-scale dress form


Step 2: Scan the pattern into 3D software
Step 3: Scale the pattern to fit my personal avatar and make corrections as needed

Step 4: Print completed patterns through PDF Pattern Plotter.

Sewing the Samples
I find sewing to be tedious. I wish I loved it, but it is what it is. What got me through was watching entire seasons of reality tv.
The fabric was extremely tightly woven and difficult to sew. The needle on my machine wouldn't budge in instances where there were multiple layers of material. I hadn't planned on this lol but I sucked it up.


The highlight of the sample-making process was trying new things like making covered buttons and setting snaps.
Overall, I was delighted with how the samples turned out!


Photoshoot + Lookbook
With all my samples complete, I was ready to focus on the photo shoot. Here were the steps I took to create the Lookbook:
1) Create the lookbook concept: I did a lot of research to figure out the vibe of the Lookbook, including the lighting, background, and styling of the shoot.
2) Style the looks + create the shot list: I created a document with the specific outfits I wanted to capture on the day of the shoot. I shared this and the concept with my photographer before the shoot.
3) Hire the photographer: I booked the amazingly talented Natalie Black.
4) Book the studio: Once I had an idea of the type of shoot I wanted, I booked a studio that met my requirements. Mainly I wanted to find a space that was accessible, with enough equipment and colored backdrops.
5) Showtime! Since I'm not a professional model, I researched poses and practiced in the mirror before the day of the shoot lol. I brought my husband for emotional support and to help out with moving equipment etc.


My photographer, Natalie Black, did an incredible job. I had so much fun, and the photos turned out amazing. It was challenging to pick, but here are some photos I submitted for the contest:


PHASE 3: PRODUCTION SAMPLES
The next stage was passing these three designs to Shein to produce. Overall I'm pleased with the final production samples.
After all that hard work, I'm grateful to be able to share these pieces with others. They will be available to purchase for a limited time.
Here are the links to shop:


CONCLUSION
Out of 30 semi-finalists, my designs made it to the top 5 finalists in the competition!
Sadly, I didn't win the competition, but I had an amazing experience, met new friends, and learned new skills along the way.
I actively avoid sewing and making samples so I was grateful for the opportunity to push outside of my comfort zone. Even though I find sewing tedious, It's undeniably meditative and a chance for reflection.
This project gave me a sense of fulfillment. The ability to take an idea, nurture it to production, and ultimately share it with others... is an honor.


If you enjoyed this blog post, check out my FREE e-book:
Fashion Strategy + Tactics
This e-book includes an email series with the below info:
1.) Defining a brand with a unique mission, purpose, communication style, and visual identity that resonates with your target customer
2.) Finding opportunity to provide value to a specific group of people or target market
3.) Researching and learning more about your target market or customer
4.) Defining a concept for your collection including season, line plan, theme, color, fabric, prints, embellishments, silhouettes, and other design details.
5.) Brainstorming design ideas that are consistent with your brand and create value for your customer
6.) A beginner's road map to learning how to draw fashion designs including links to free courses and tools