Drawing Fashion Figures—Day 2: Methods for Constructing Poses
Over the next 5 days, I will be sharing step-by-step tutorials on drawing poses using the rules of figure construction outlined in Anatomy of a Pose.
Let's review them:
Shoulders and hips angle in opposite directions
Place weight near the center of gravity
The ribcage, pelvis, and supporting leg(s) make up the essential structures of the pose
None essential/ non-weight bearing structures are free to move
Structures in the foreground of the image will appear larger than ones in the background.
Let's do a practice tutorial showing two different methods of constructing poses:
A) Cut and paste
B) Skeleton method
A) Cut and Paste Method
For this method, you will need paper, pencil, scissors and tape.
Before beginning, draw guidelines for the croquis by following the steps in this article, or print this page.

Find a reference photo
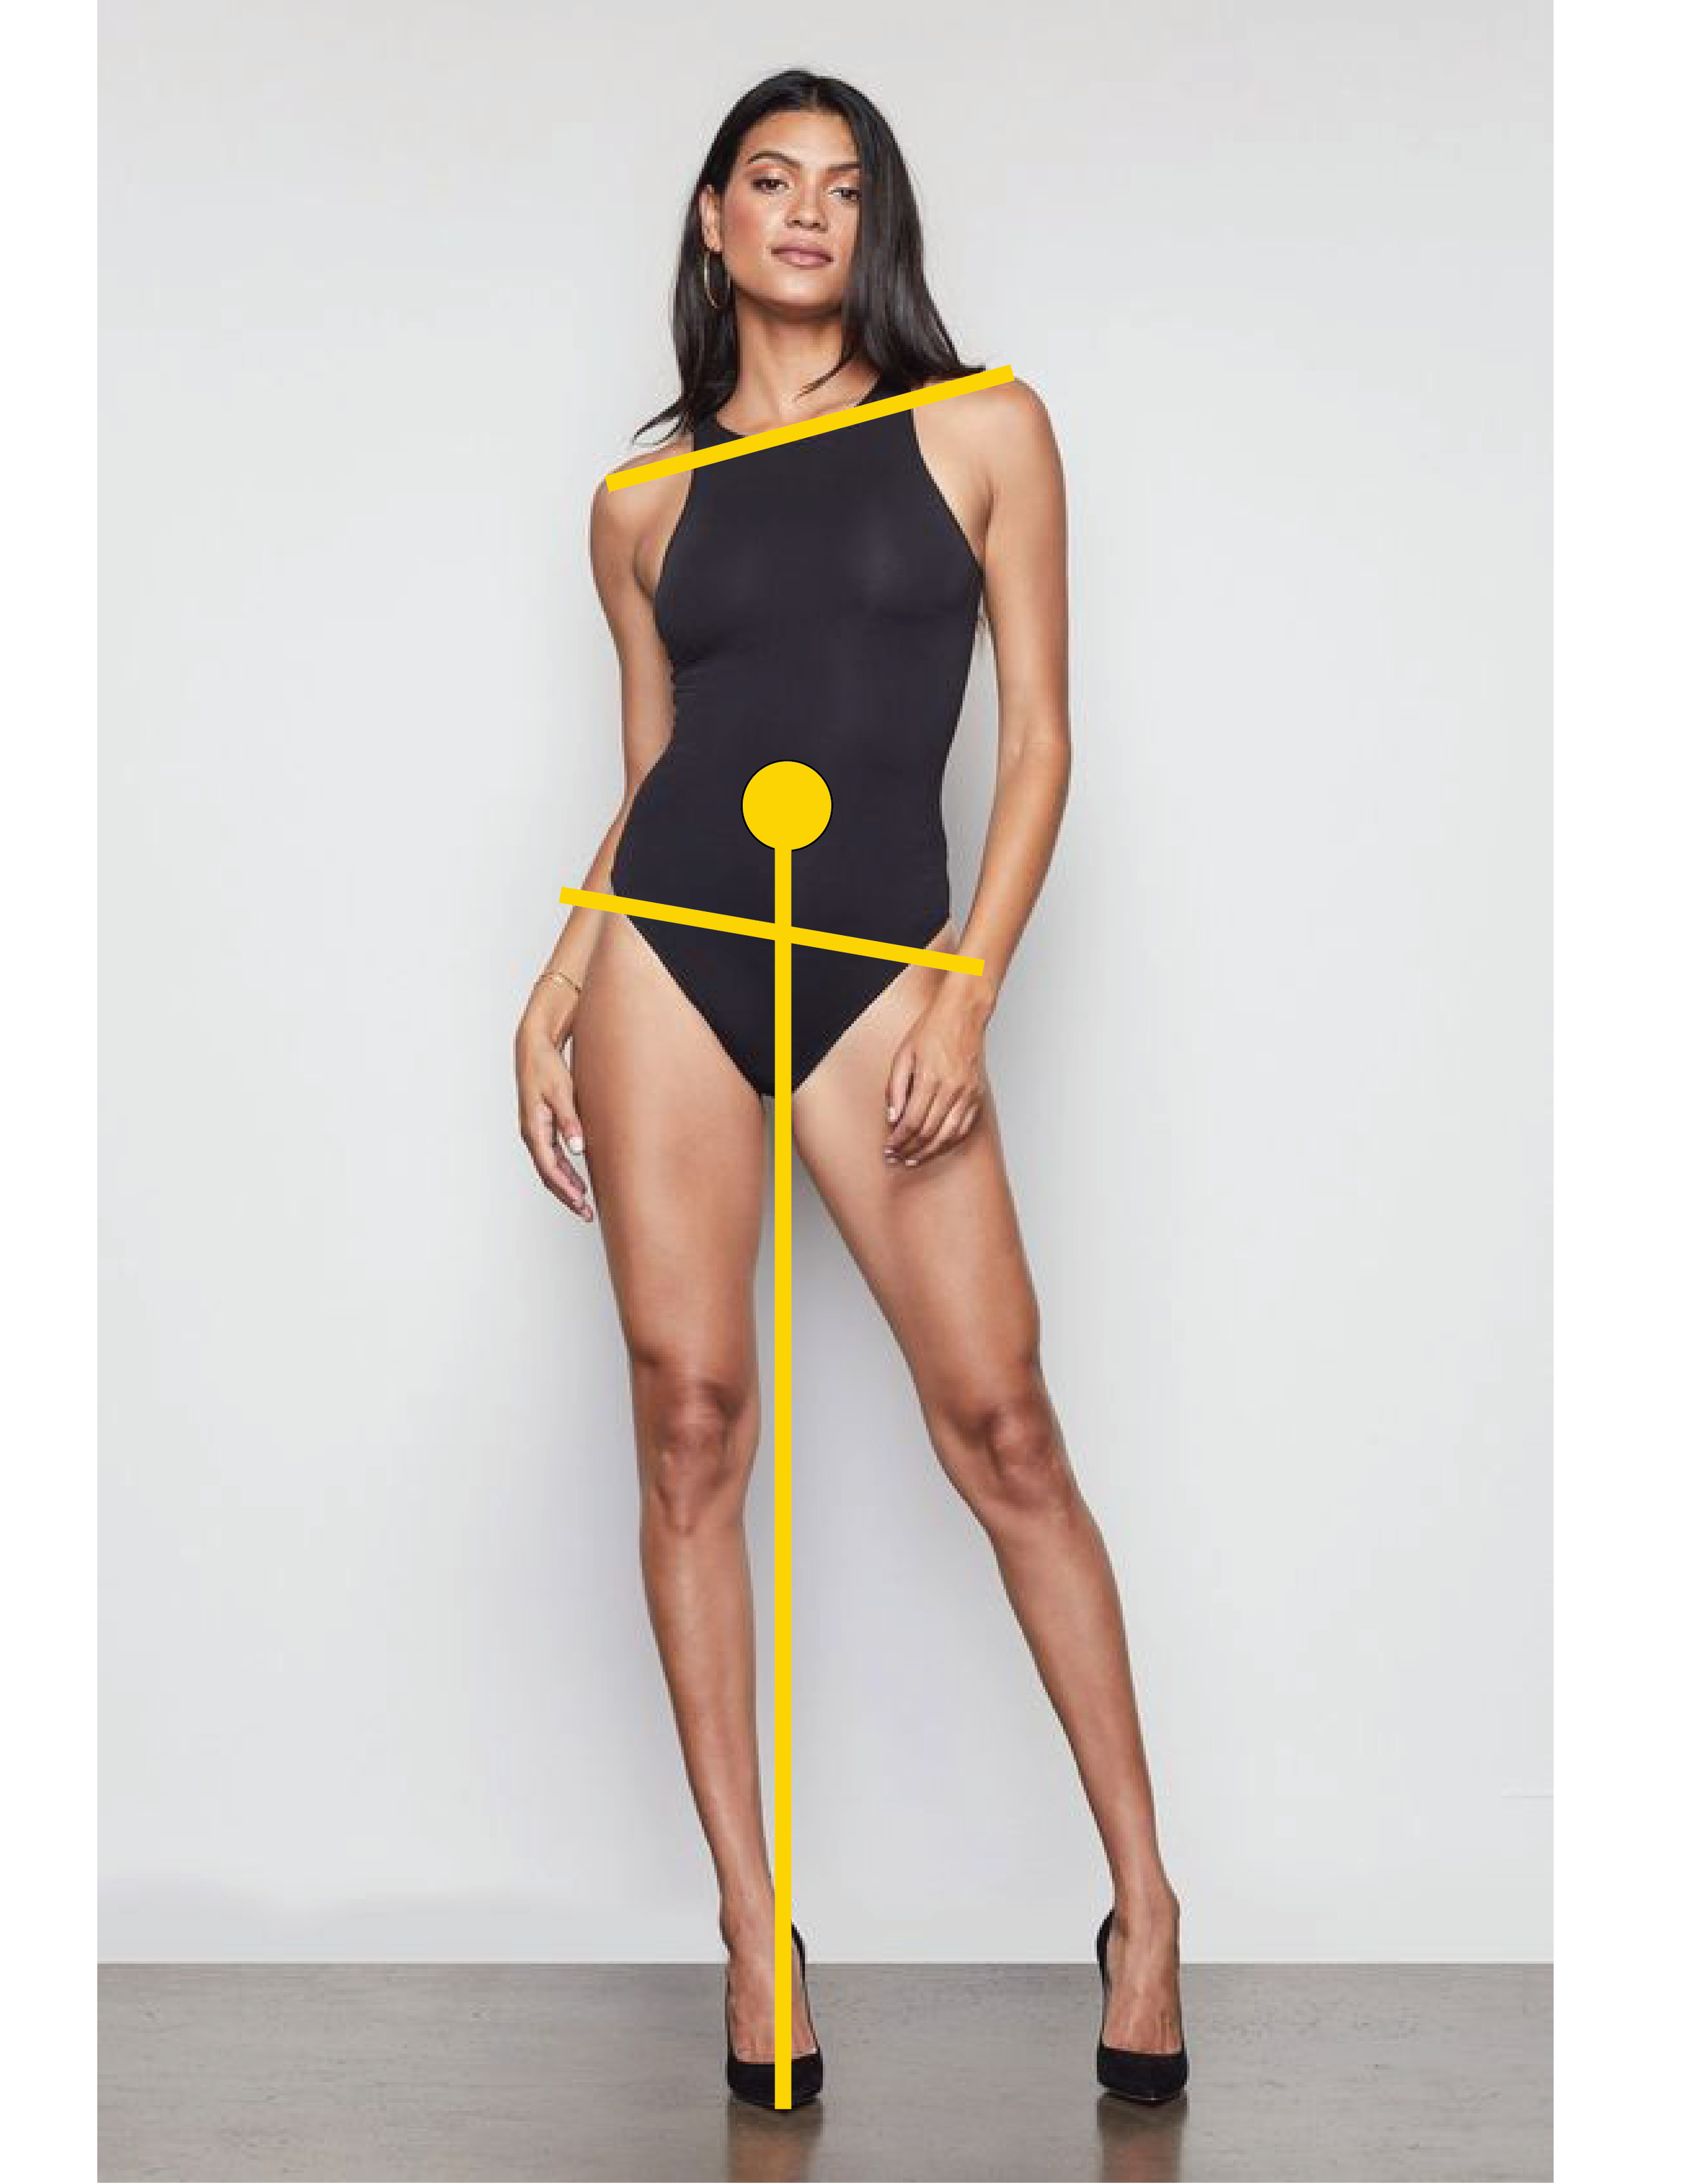
For this example, let's use the below as a photo reference.
(You can find many more references on my Pinterest board.)

Photo by Good American
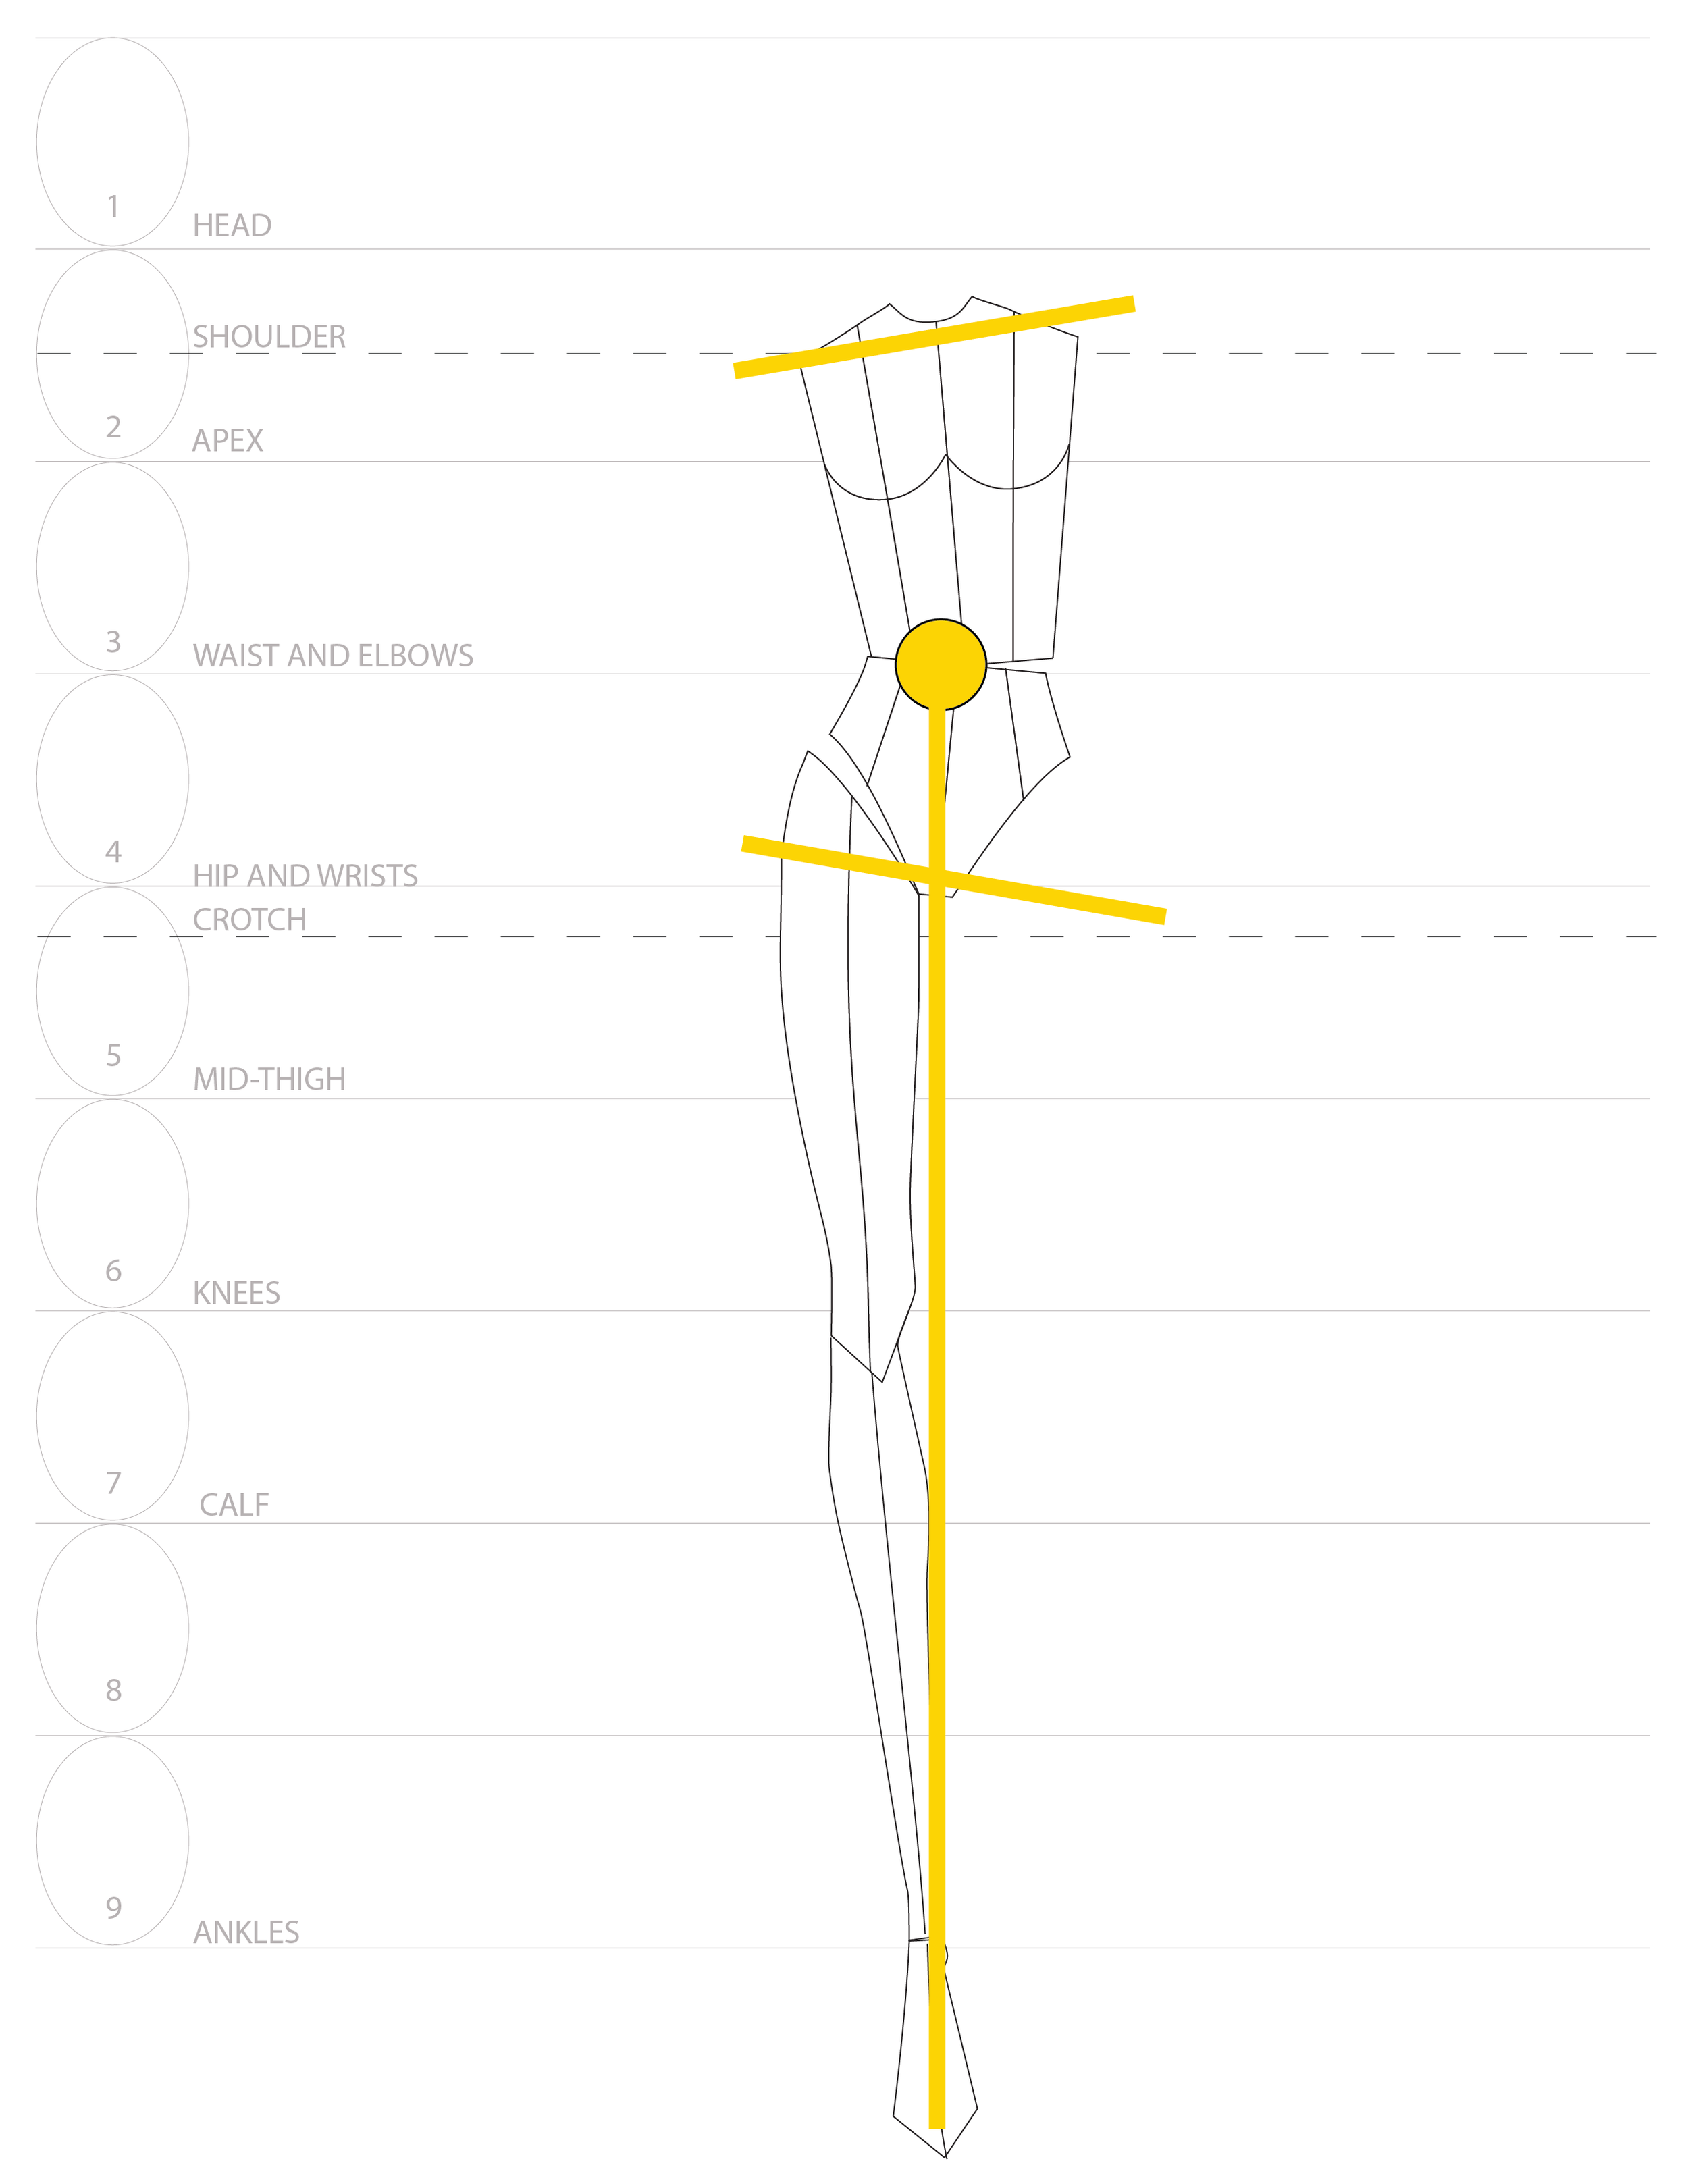
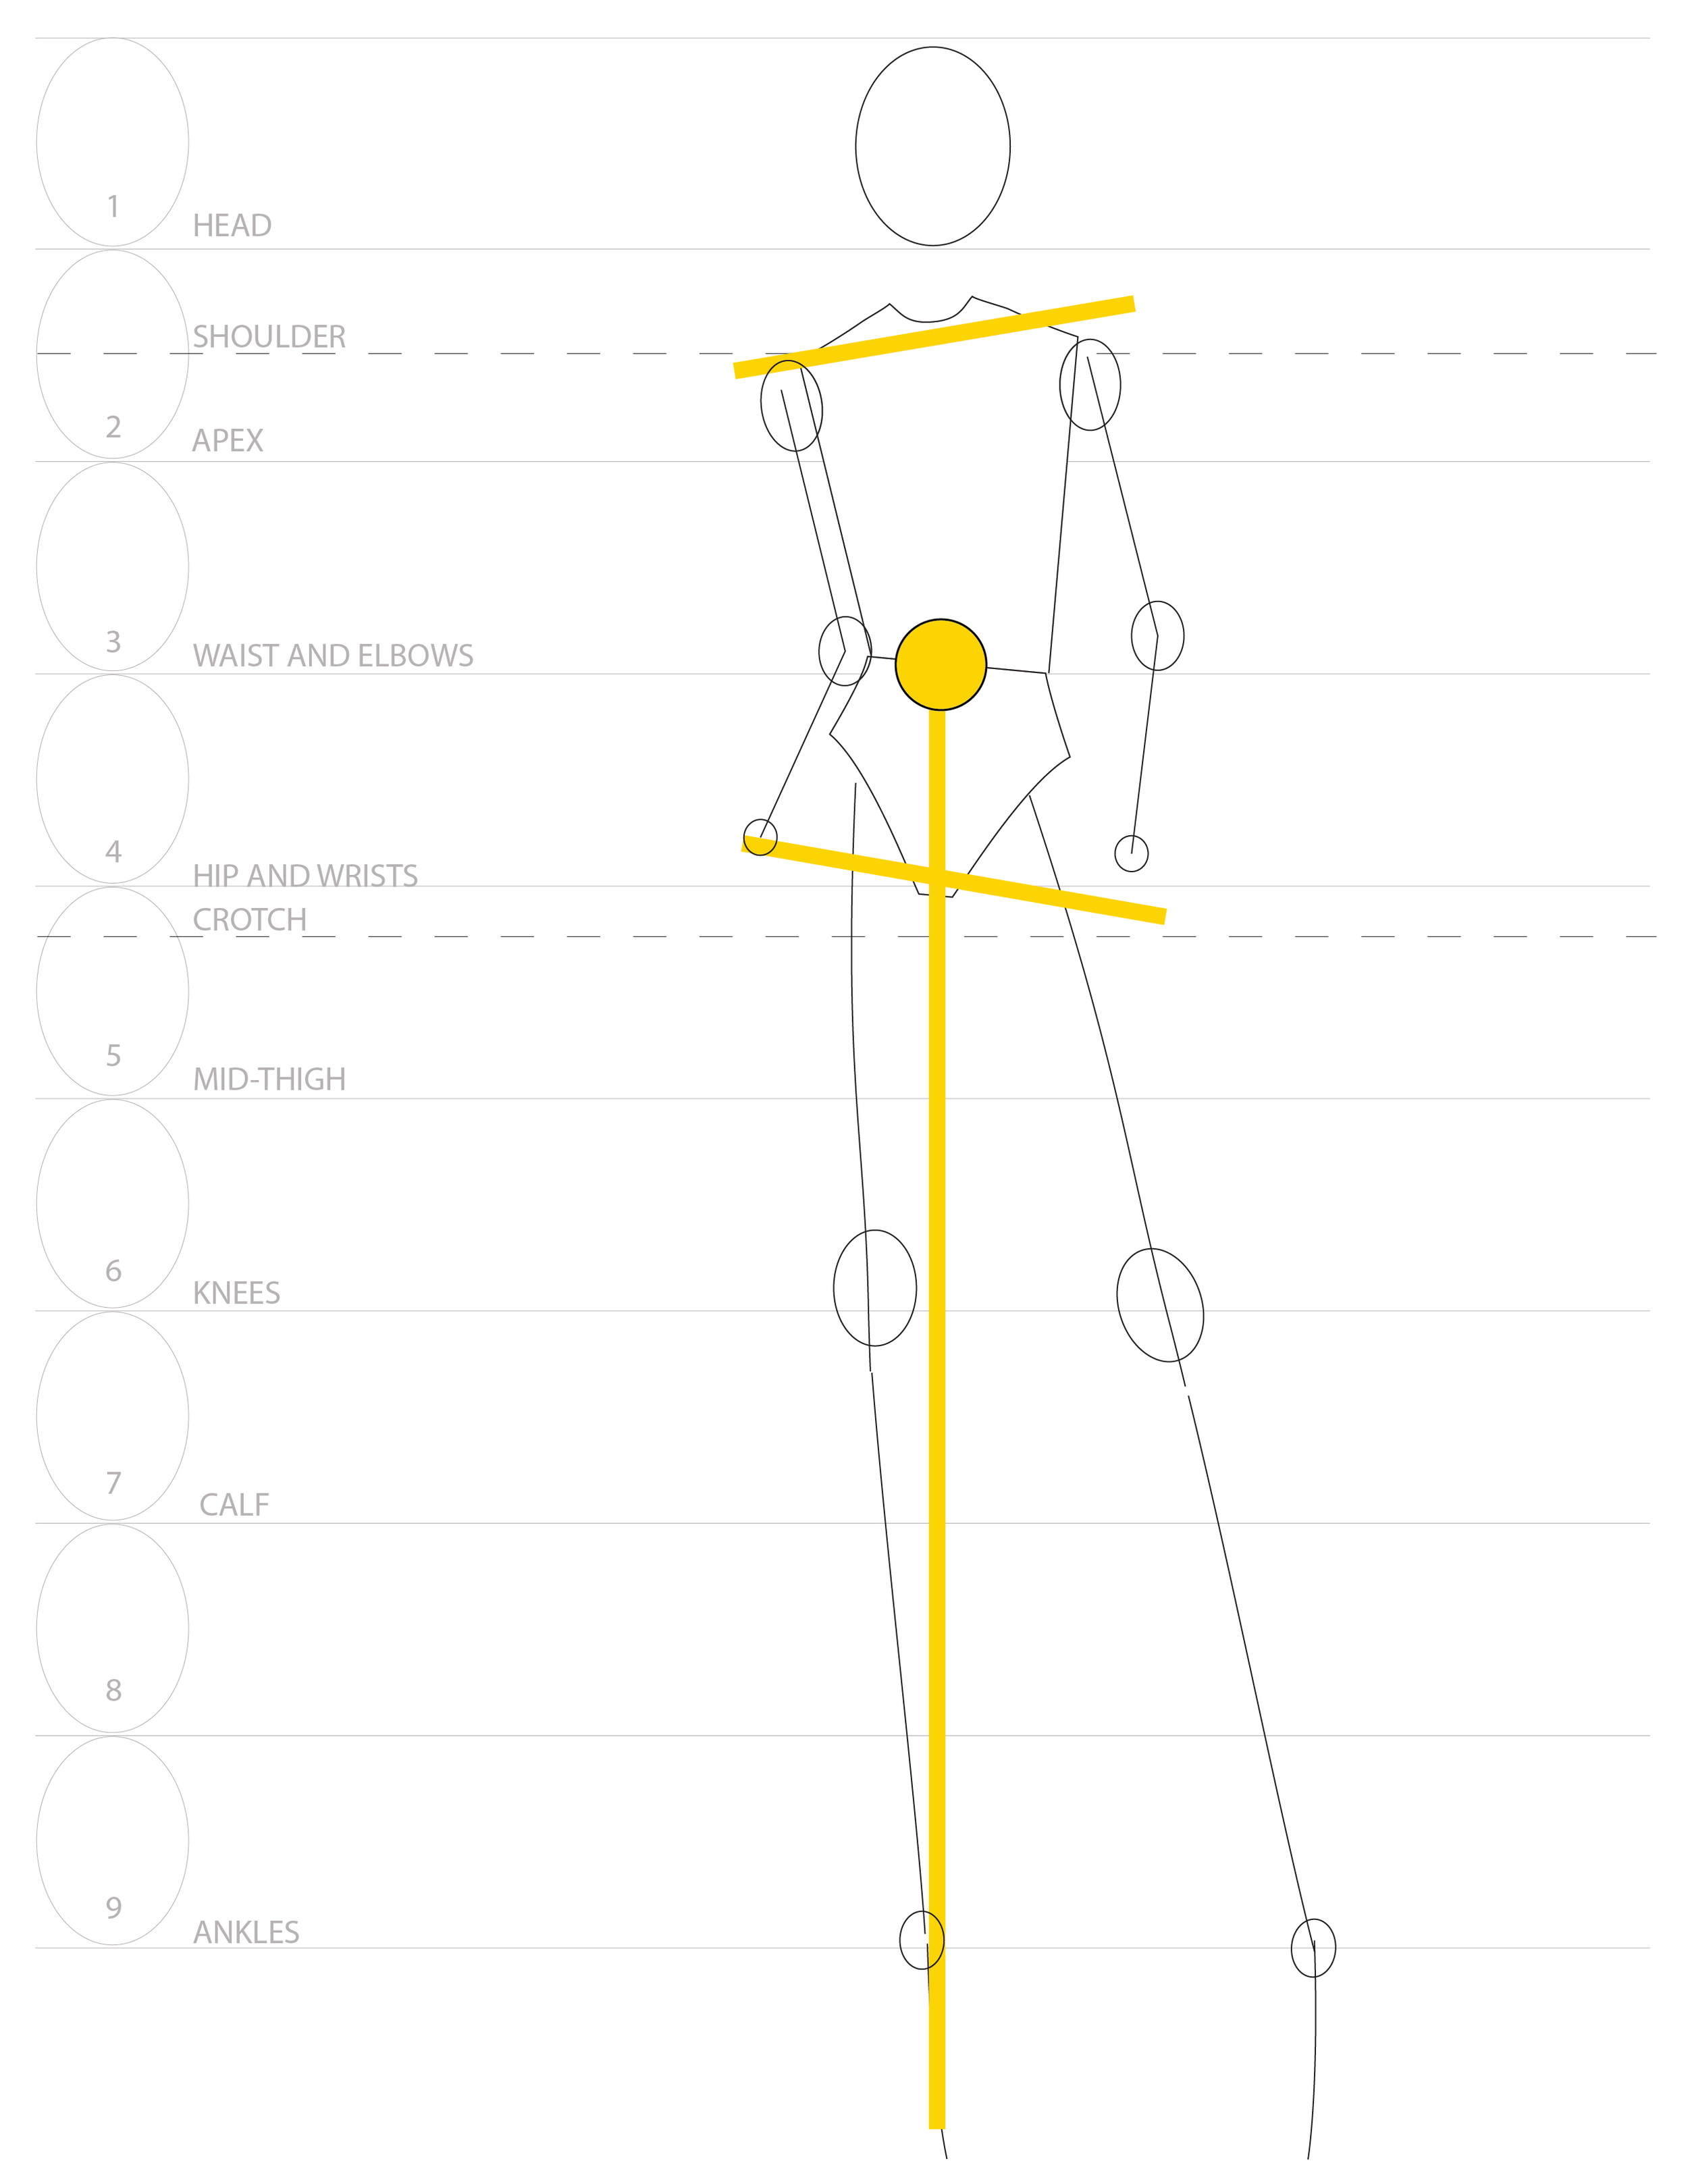
Step 1: Draw the angles of the shoulders and hips
Remember the shoulders angle opposite to the hips.


Step 2: Draw the center line of gravity (also called the "balance line")
The figure’s center of gravity is located between the two largest masses of the body— the rib cage and pelvis.

Step 3: Make a copy of your croquis and cut it up at the joints. (see below)
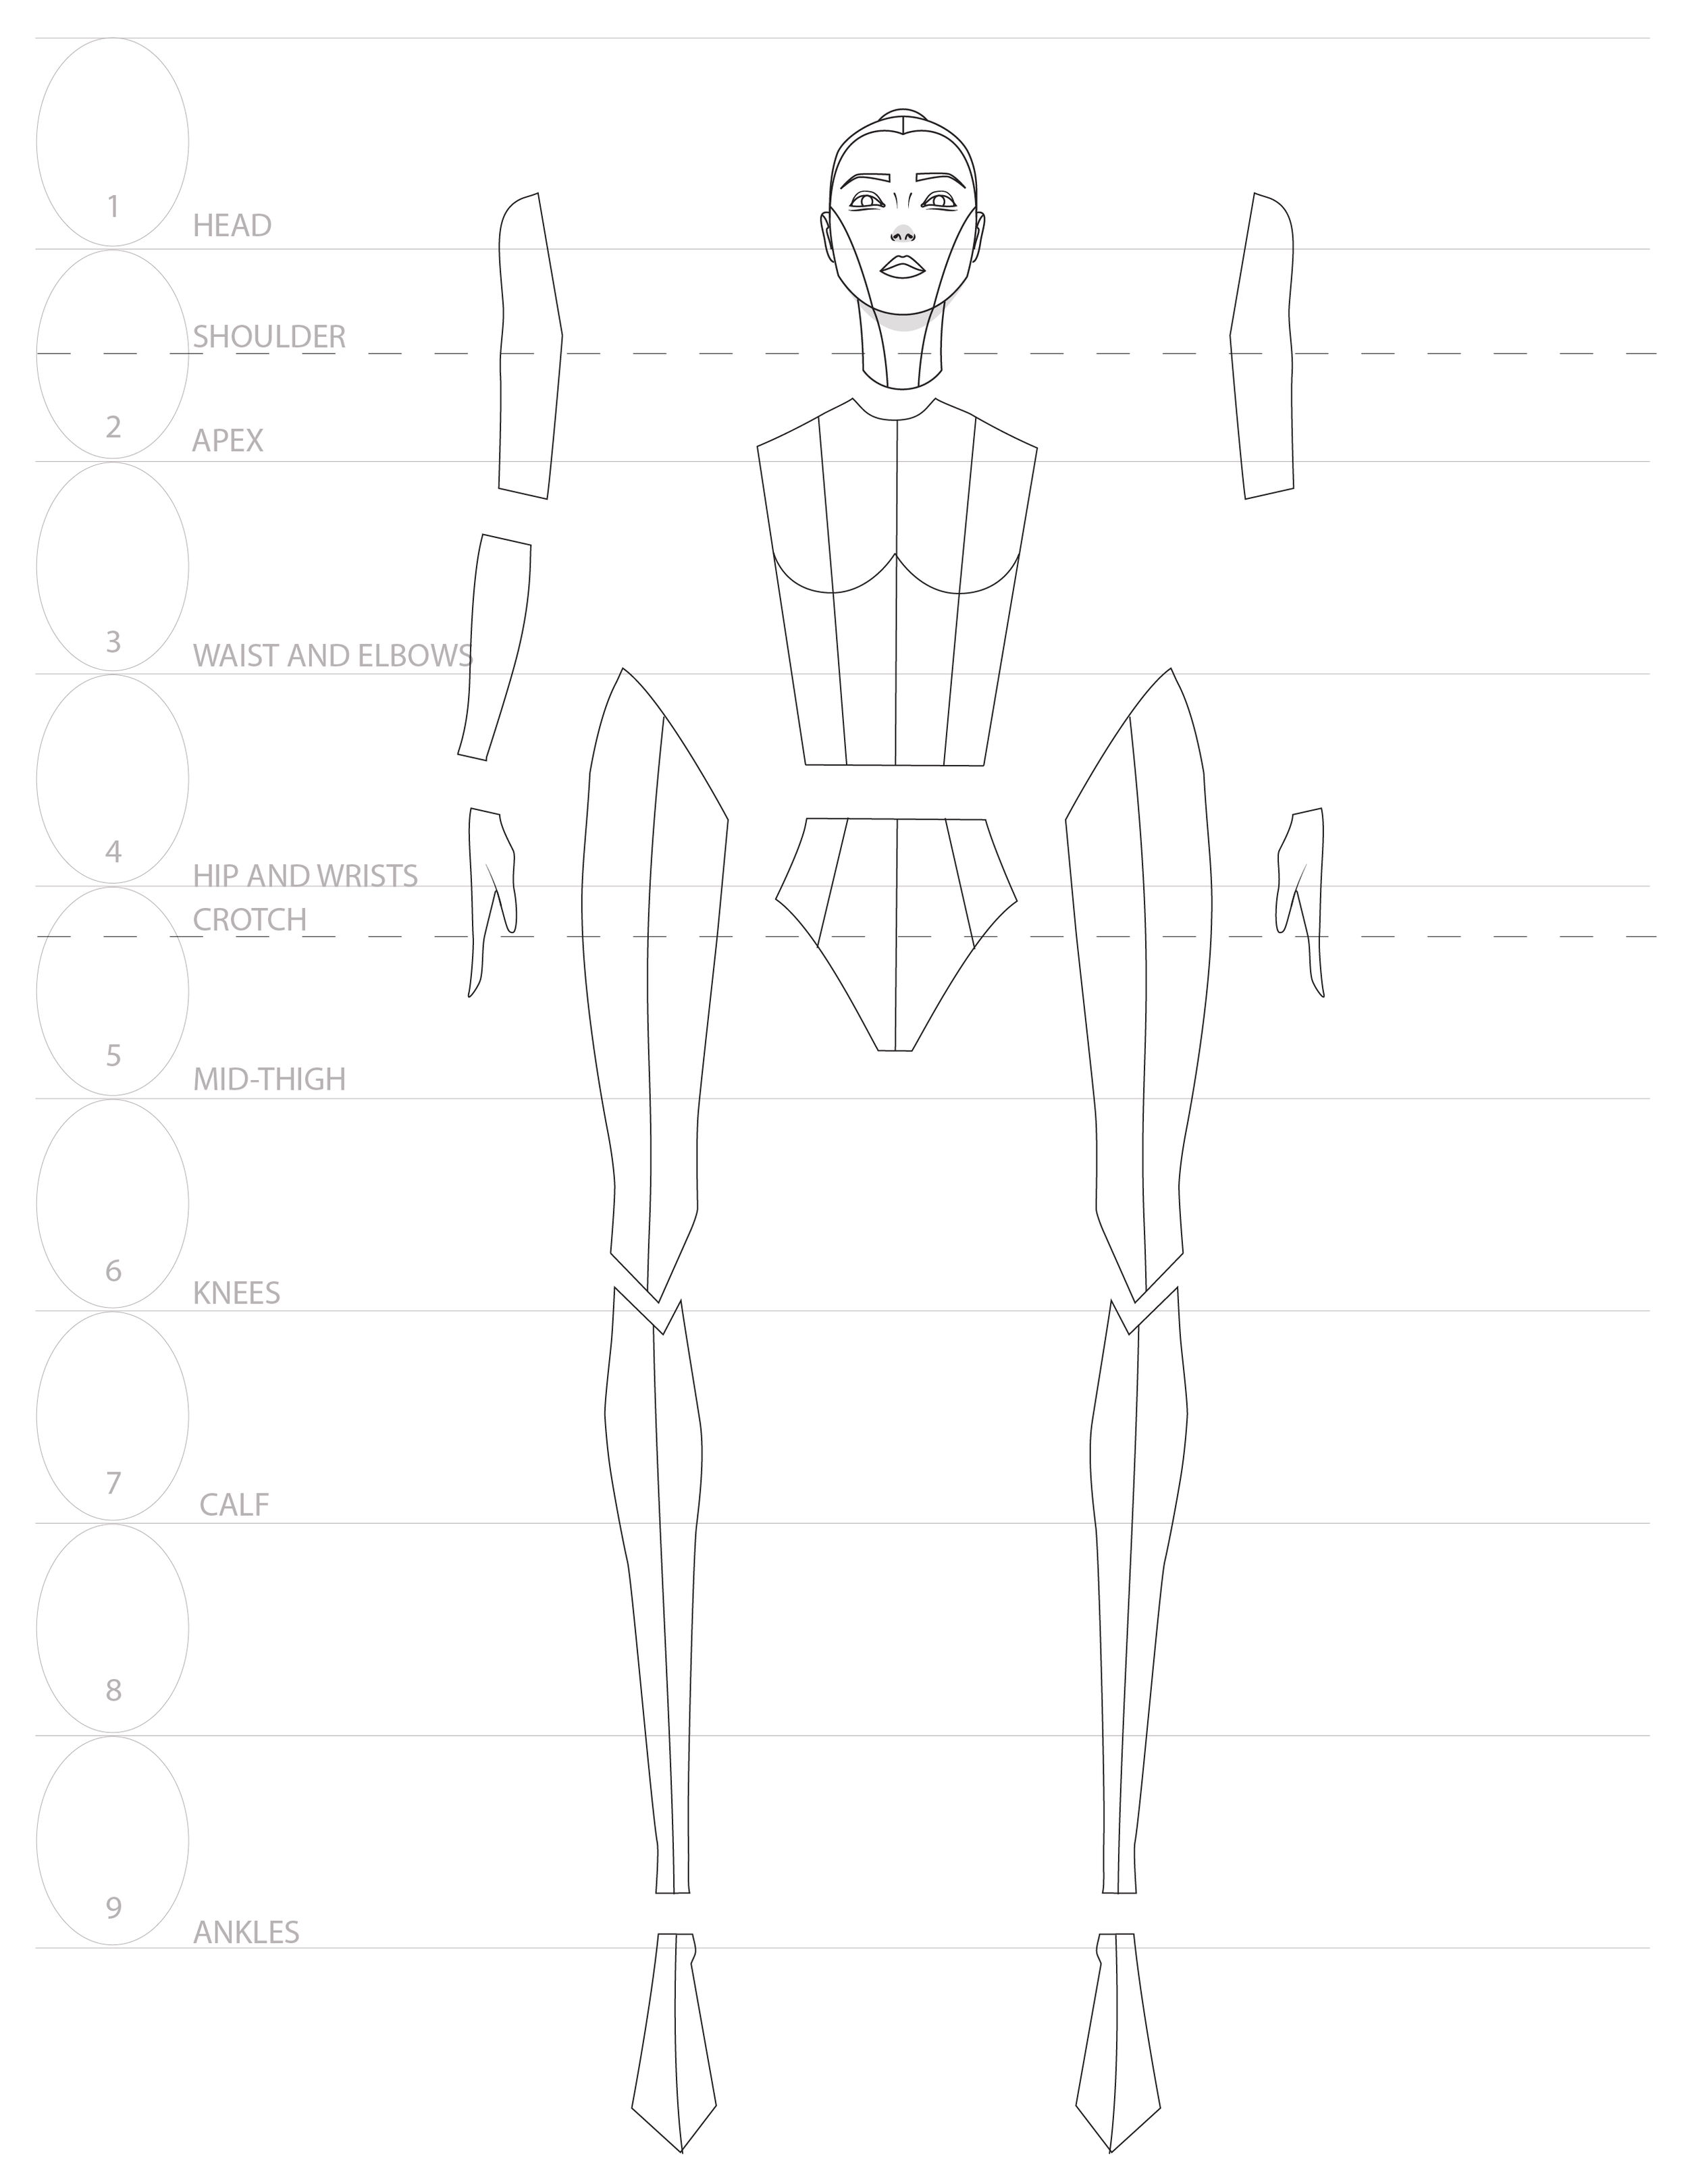
Place the essential structures of the pose.
Assemble the rib cage, pelvis, and dominant leg. Tape into place.

Step 4: Place the non-essential structures
Arrange the arms, hands, neck and head and tape in place.

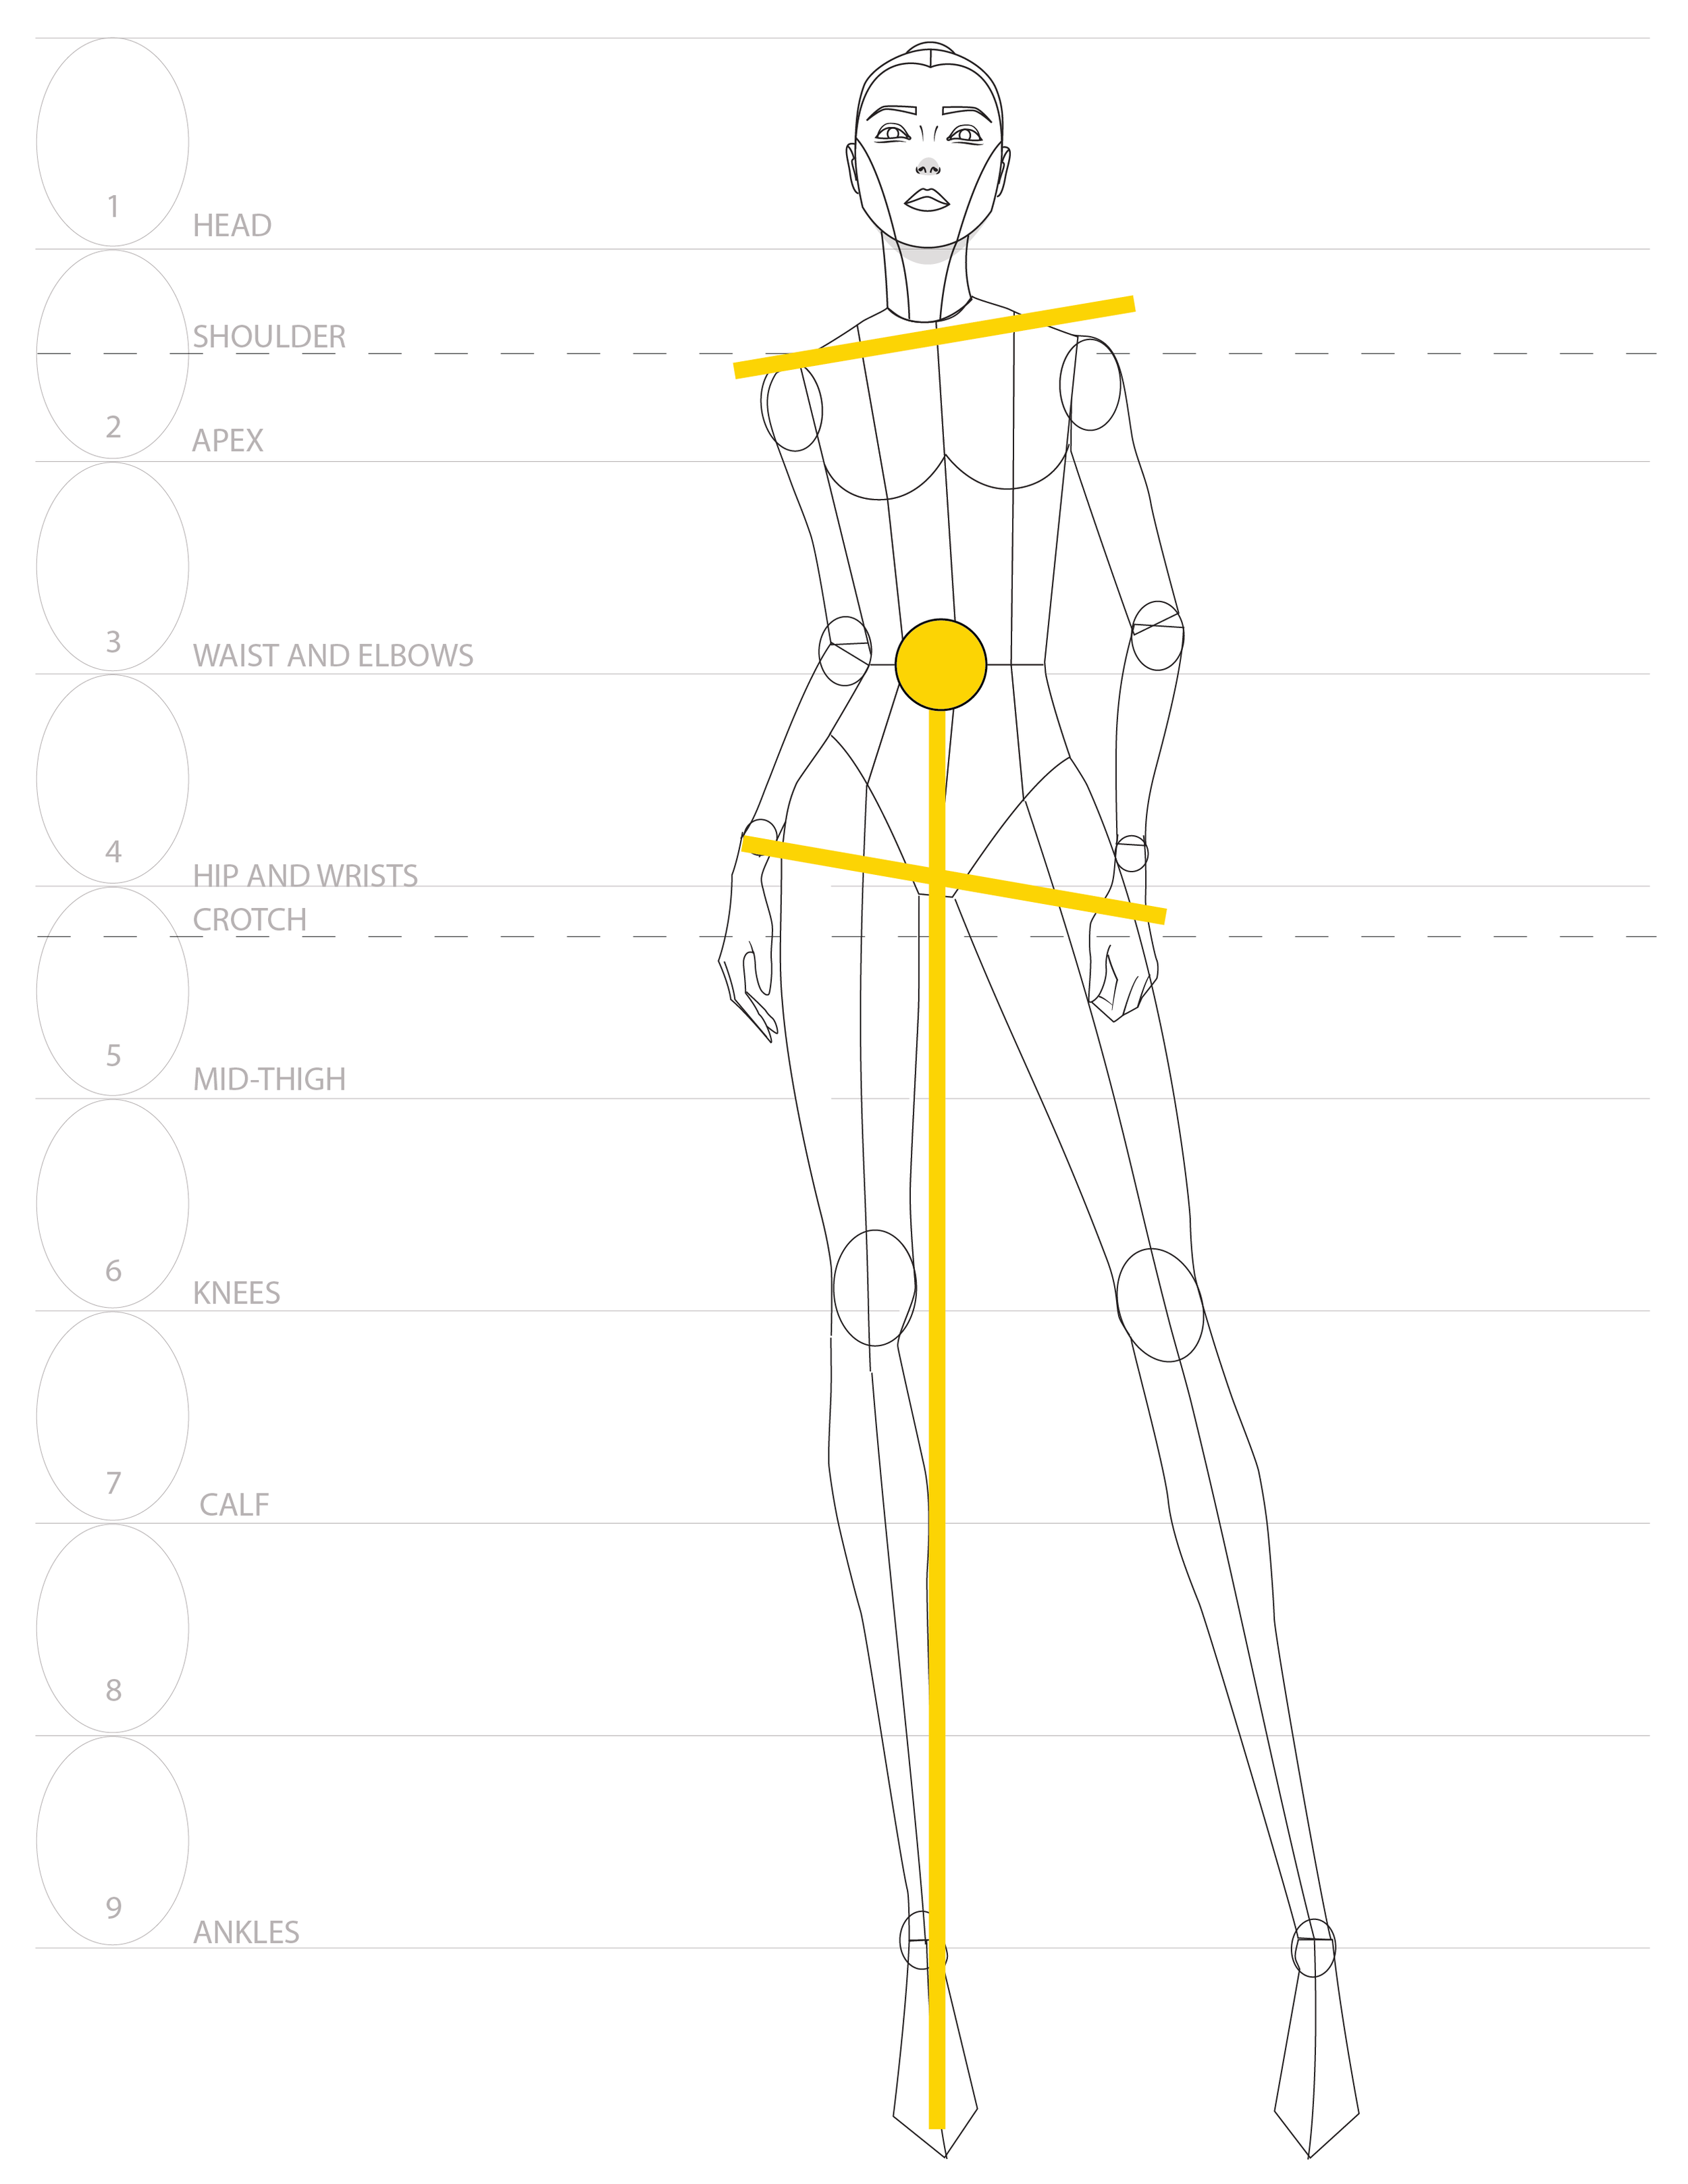
Step 5:
Trace over your work with a fresh piece of paper, smoothing and connecting the lines.
B) Skeleton Method
Repeat steps 1 and 2 from the cut and paste-method method
Step 1: Draw the angles of the shoulders and hips
Step 2: Draw the center line of gravity (also called the "balance line")
Step 3: Draw the essential structures of the pose.
The rib cage, pelvis, and dominant leg are the essential structures.
Draw basic shapes for the rib cage and pelvis, using the guidelines as reference. Draw circles for the knee and ankle placement, then connect a line representing the center of the leg.


Step 4: Draw the non-essential structures
Draw circles for the joint placements, and connect the joints with guidelines for the arms and leg.

Fill in shapes for the arms and legs using the guidelines as reference.

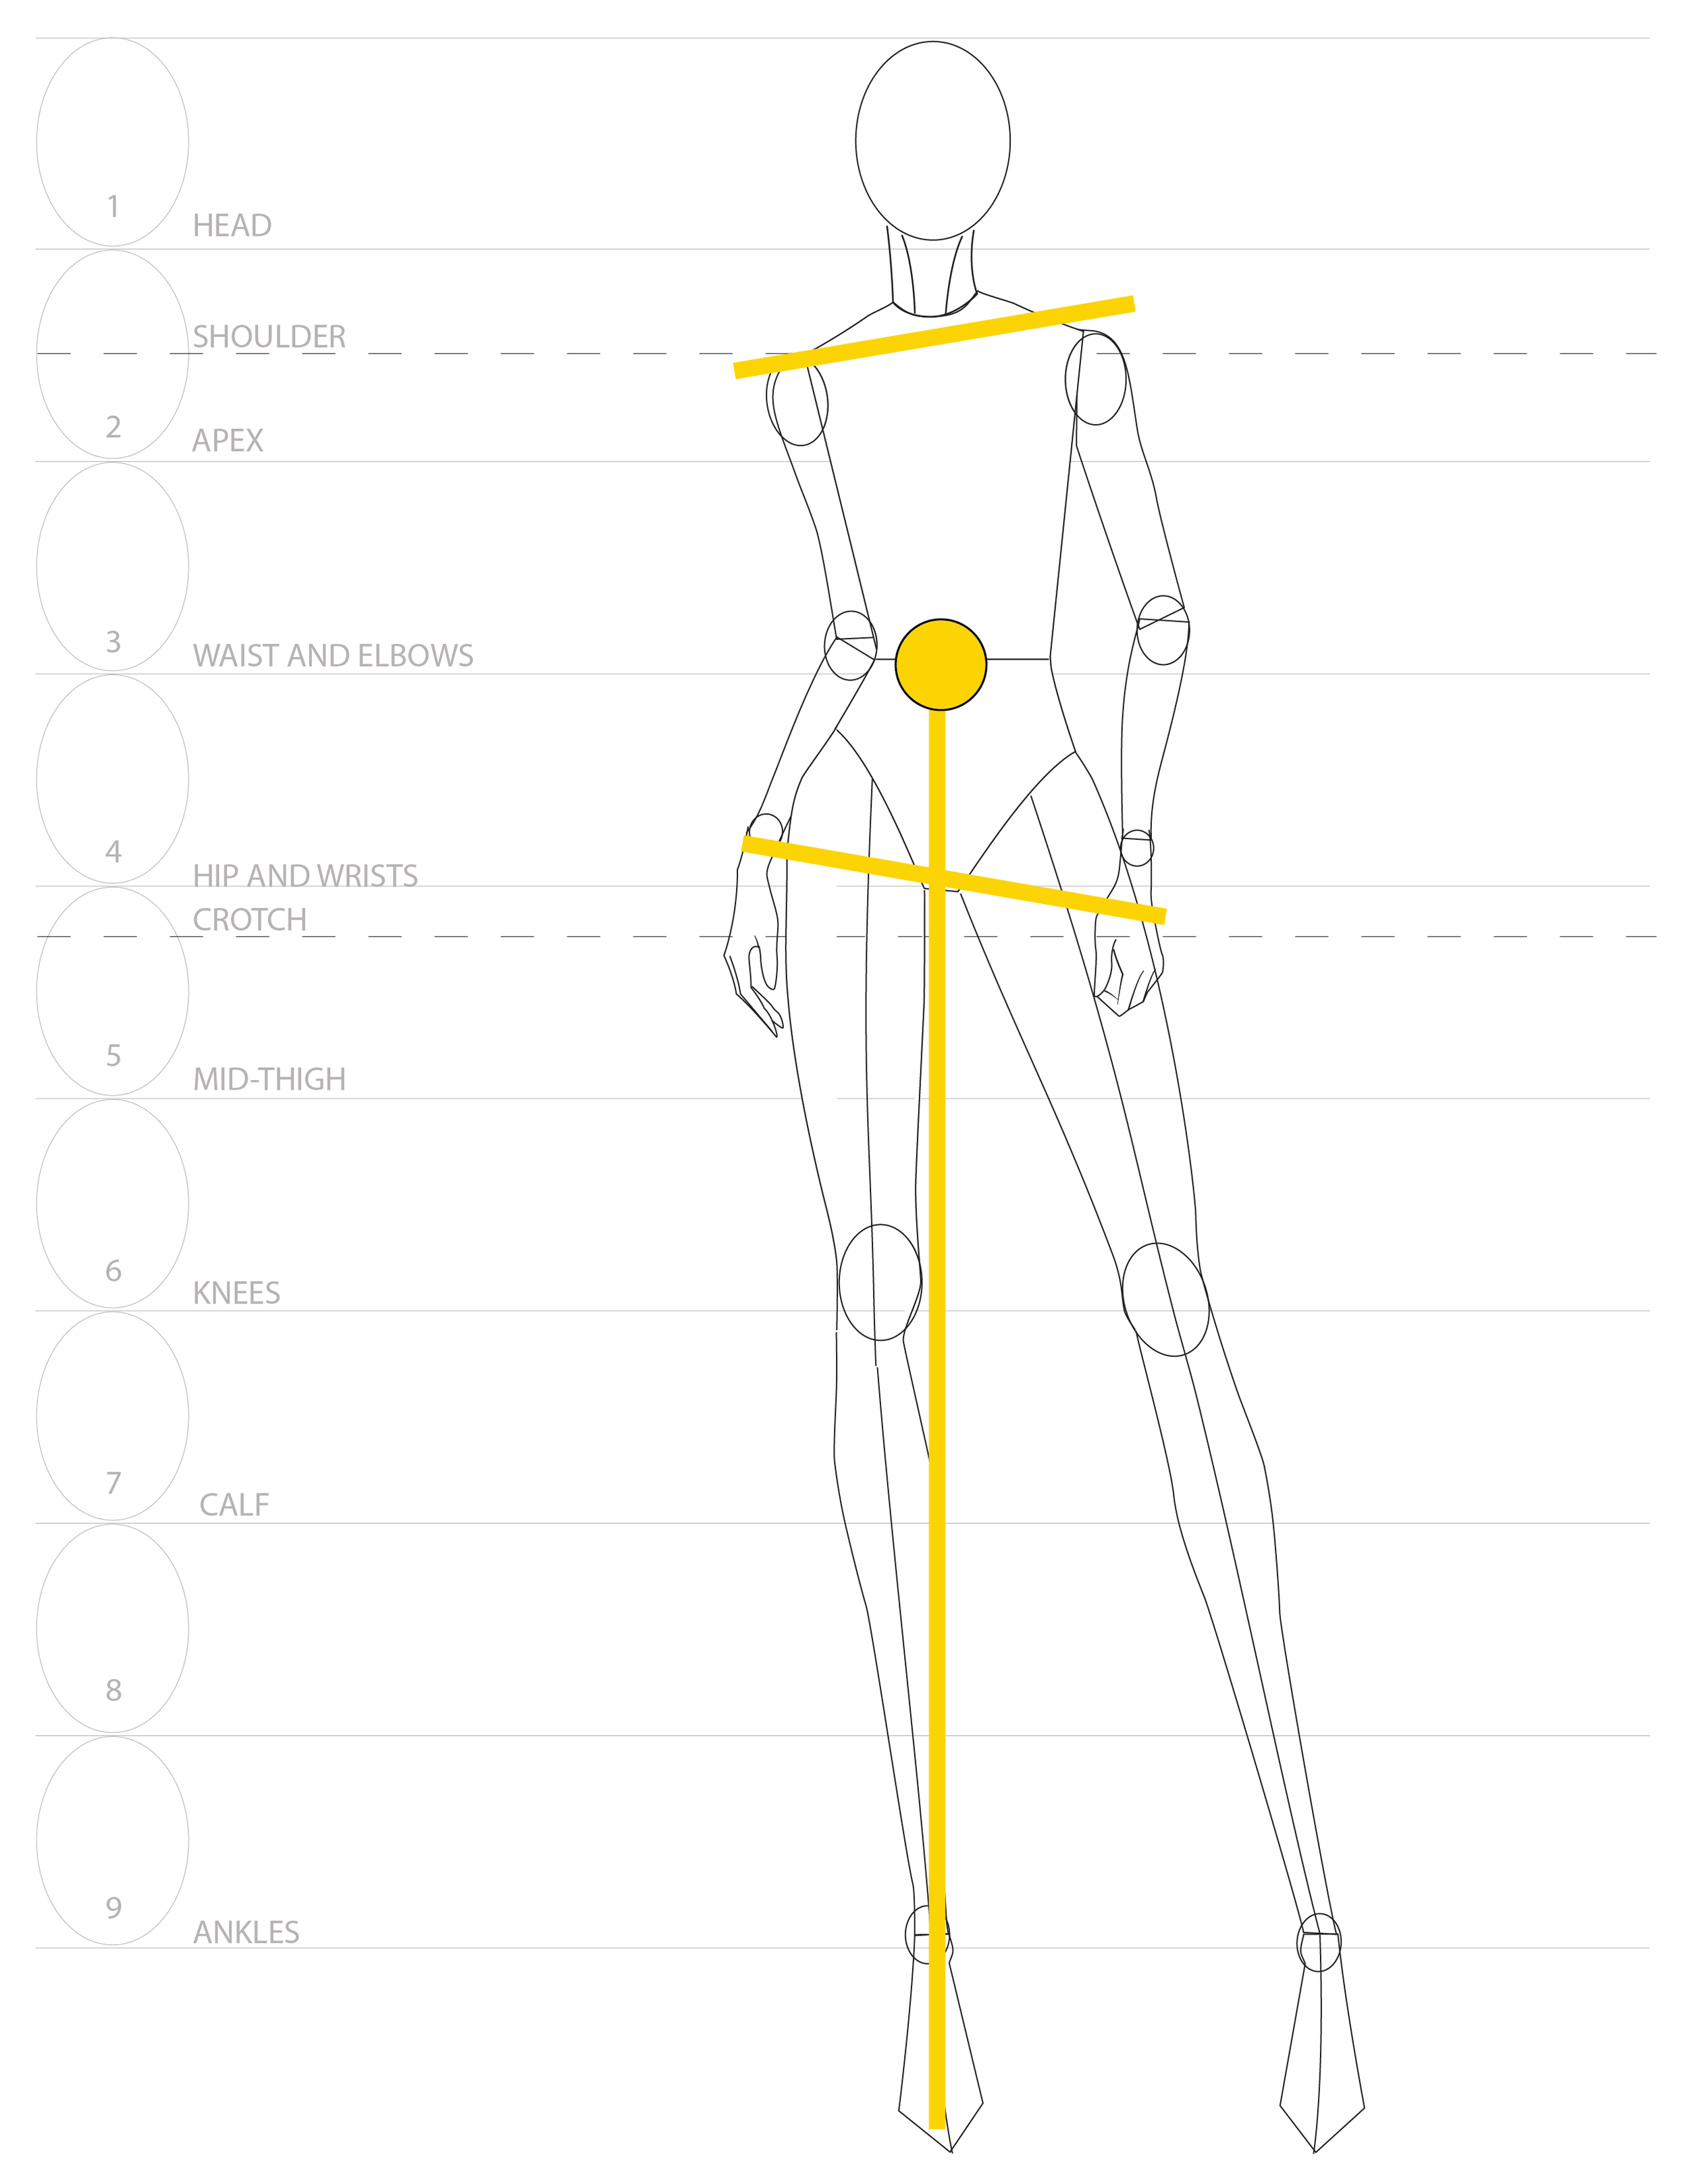
Step 5:
Add hand, feet, face, and seamline details
You can do this free-hand or by tracing over the head, hands, and feet or shoe template in the Croquis Kit.


The Croquis Kit
The end.
You can use either the cut-and-paste or skeleton method to draw new poses for your croquis.
Regardless of the method you chose, the basic steps are pretty much the same:
To begin, find a photo of a pose and examine it's anatomy to use as a reference
Mark the angle of the shoulder and hips
Mark the center of gravity and balance line
Draw the rib-cage, pelvis, and supporting leg(s)
Draw the rest of the pose
Add detail
-Amiko