Fashion Sketching: a Step-by-Step Guide to Drawing the Face
Estimated read time: 2 minutes
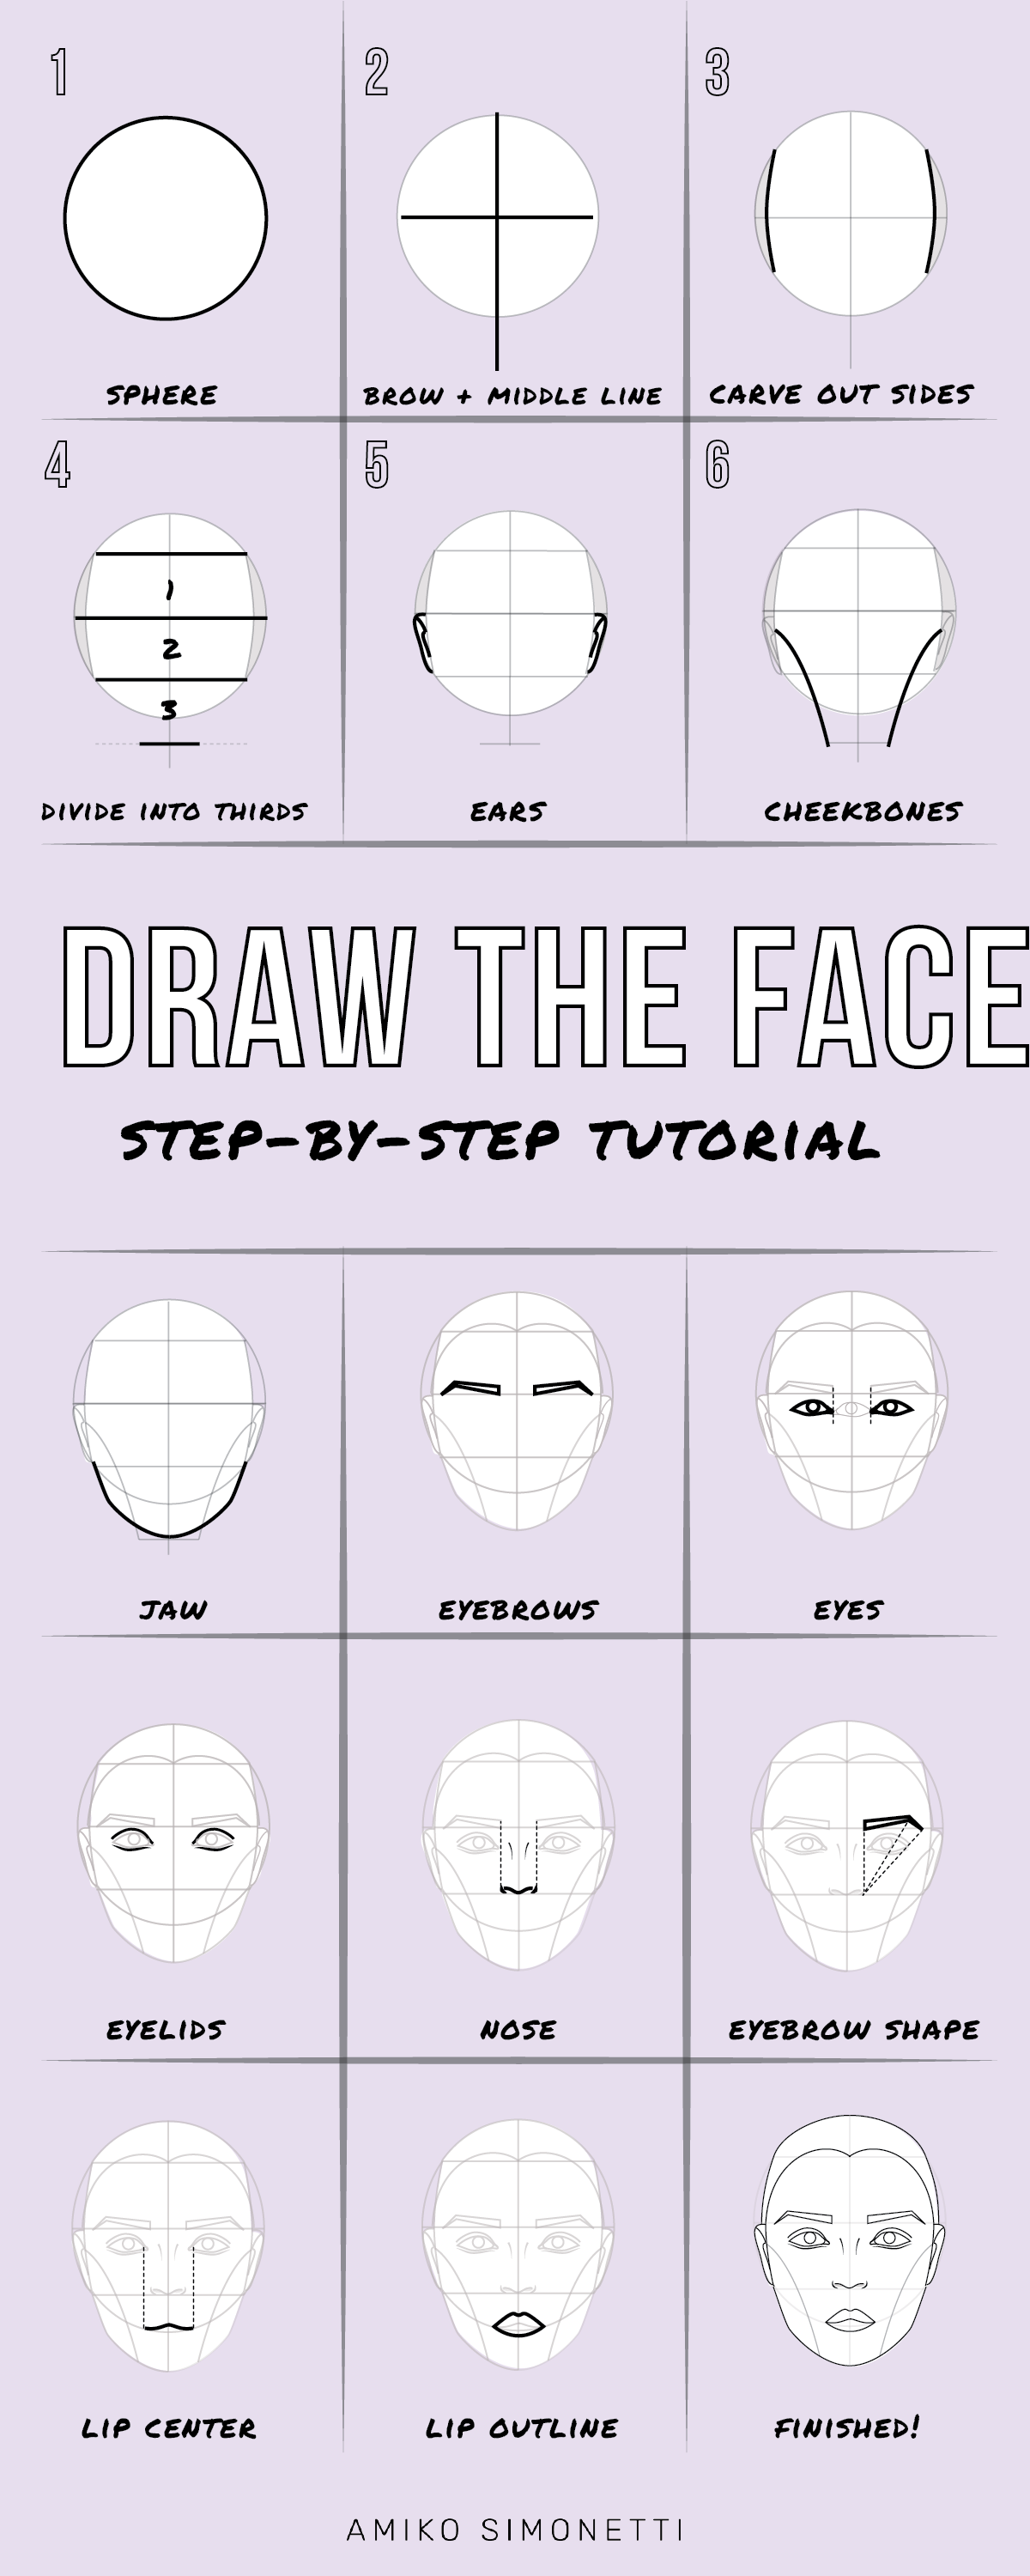
1: Draw a sphere, as symmetrical as possible.

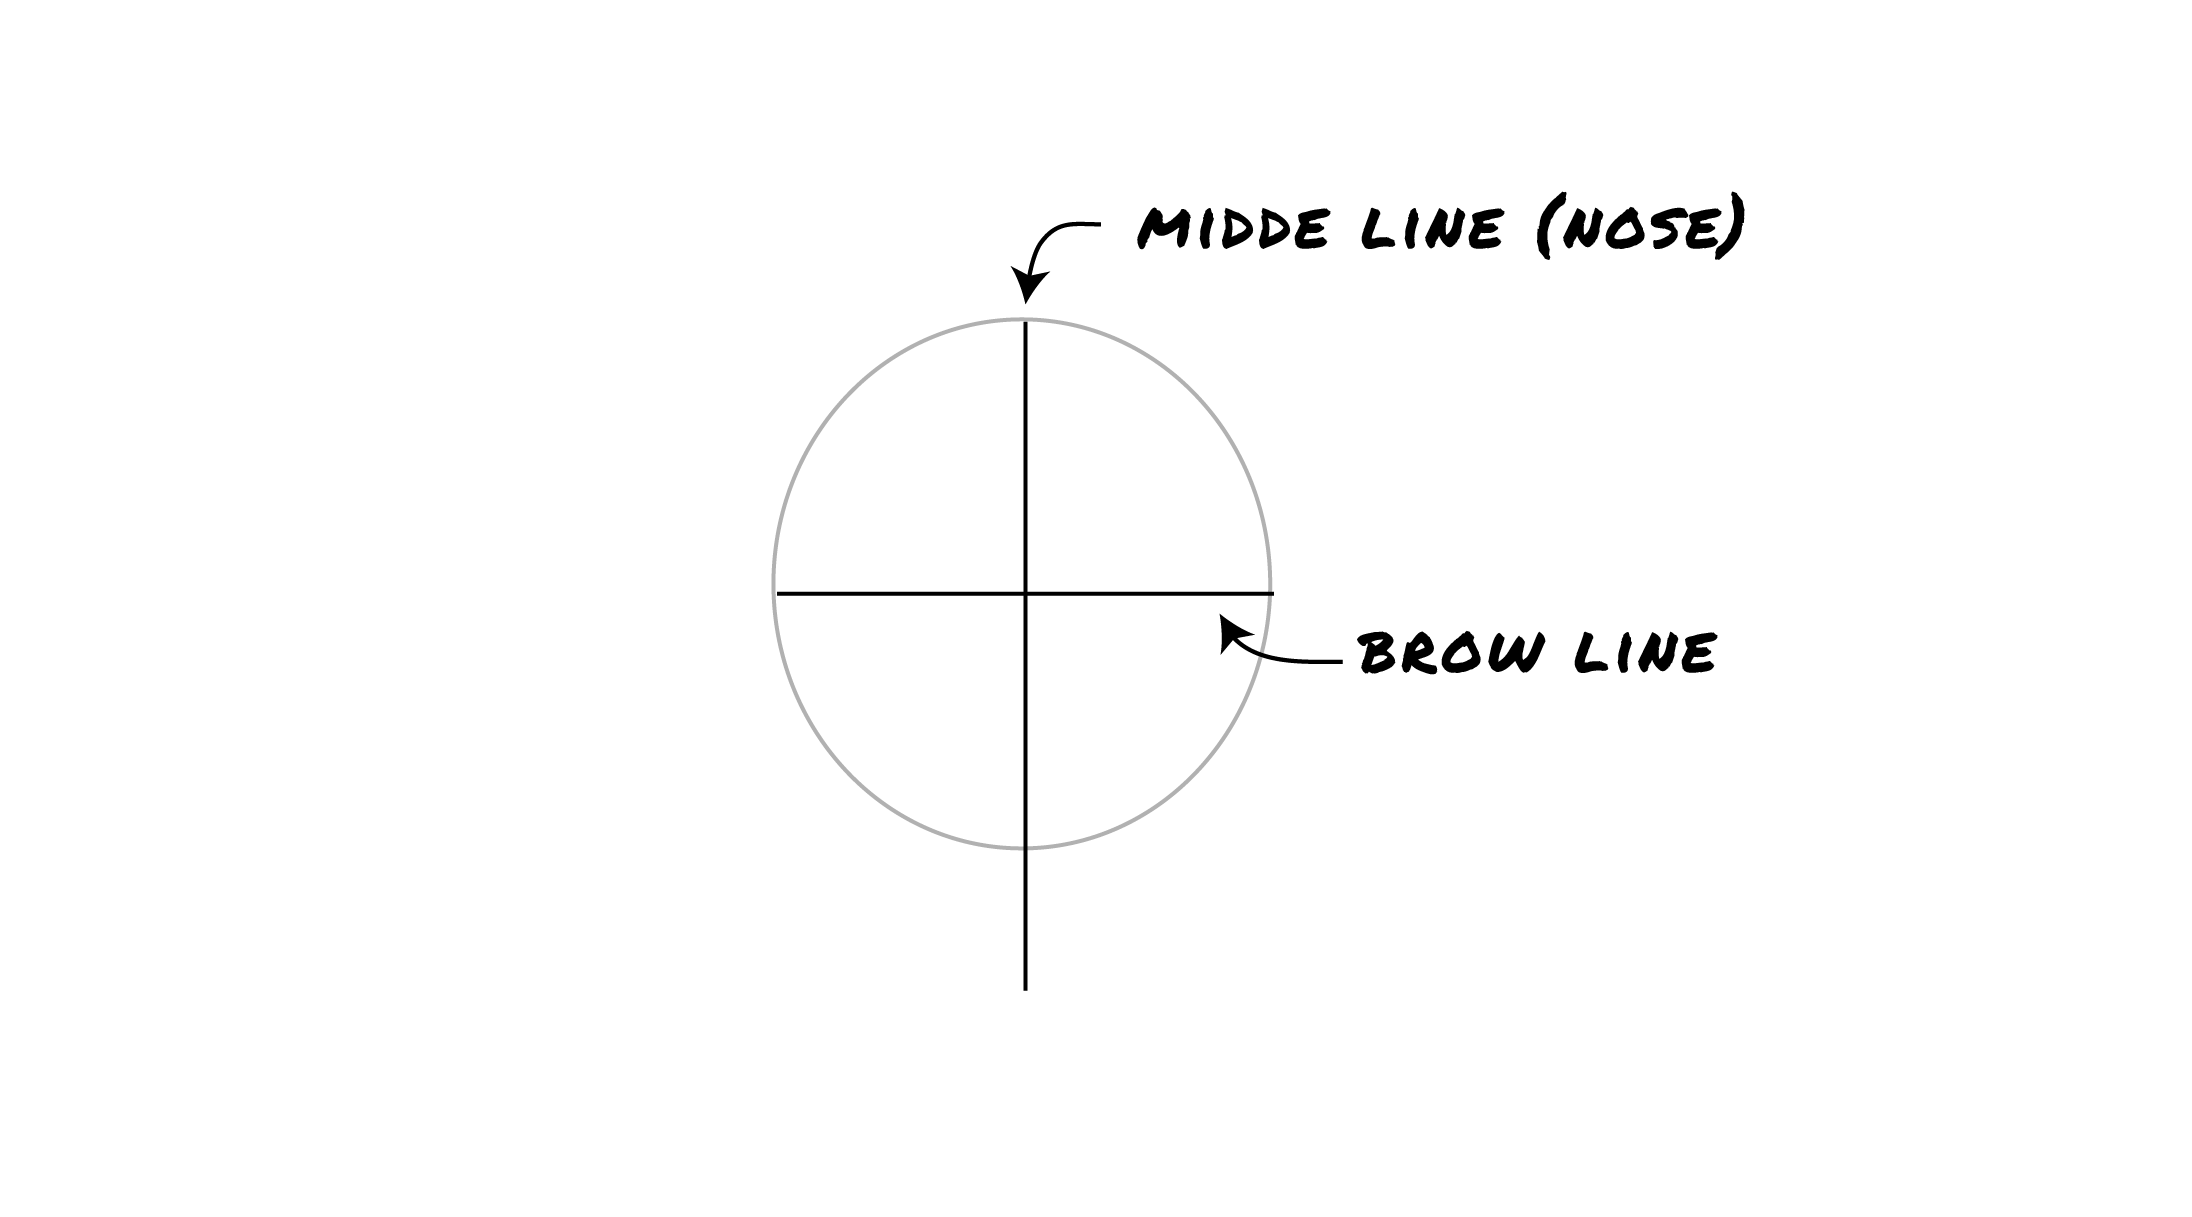
2: Draw crosshairs for the eyebrow and middle line.
The middle line will follow the center of the nose.
3: Flatten the sphere by carving out the sides.

4: Add a line at the top and bottom of the carved sections.
The face is three equal sections starting at the hairline and ending at the chin.

5: Place the ear in the lower quadrant.

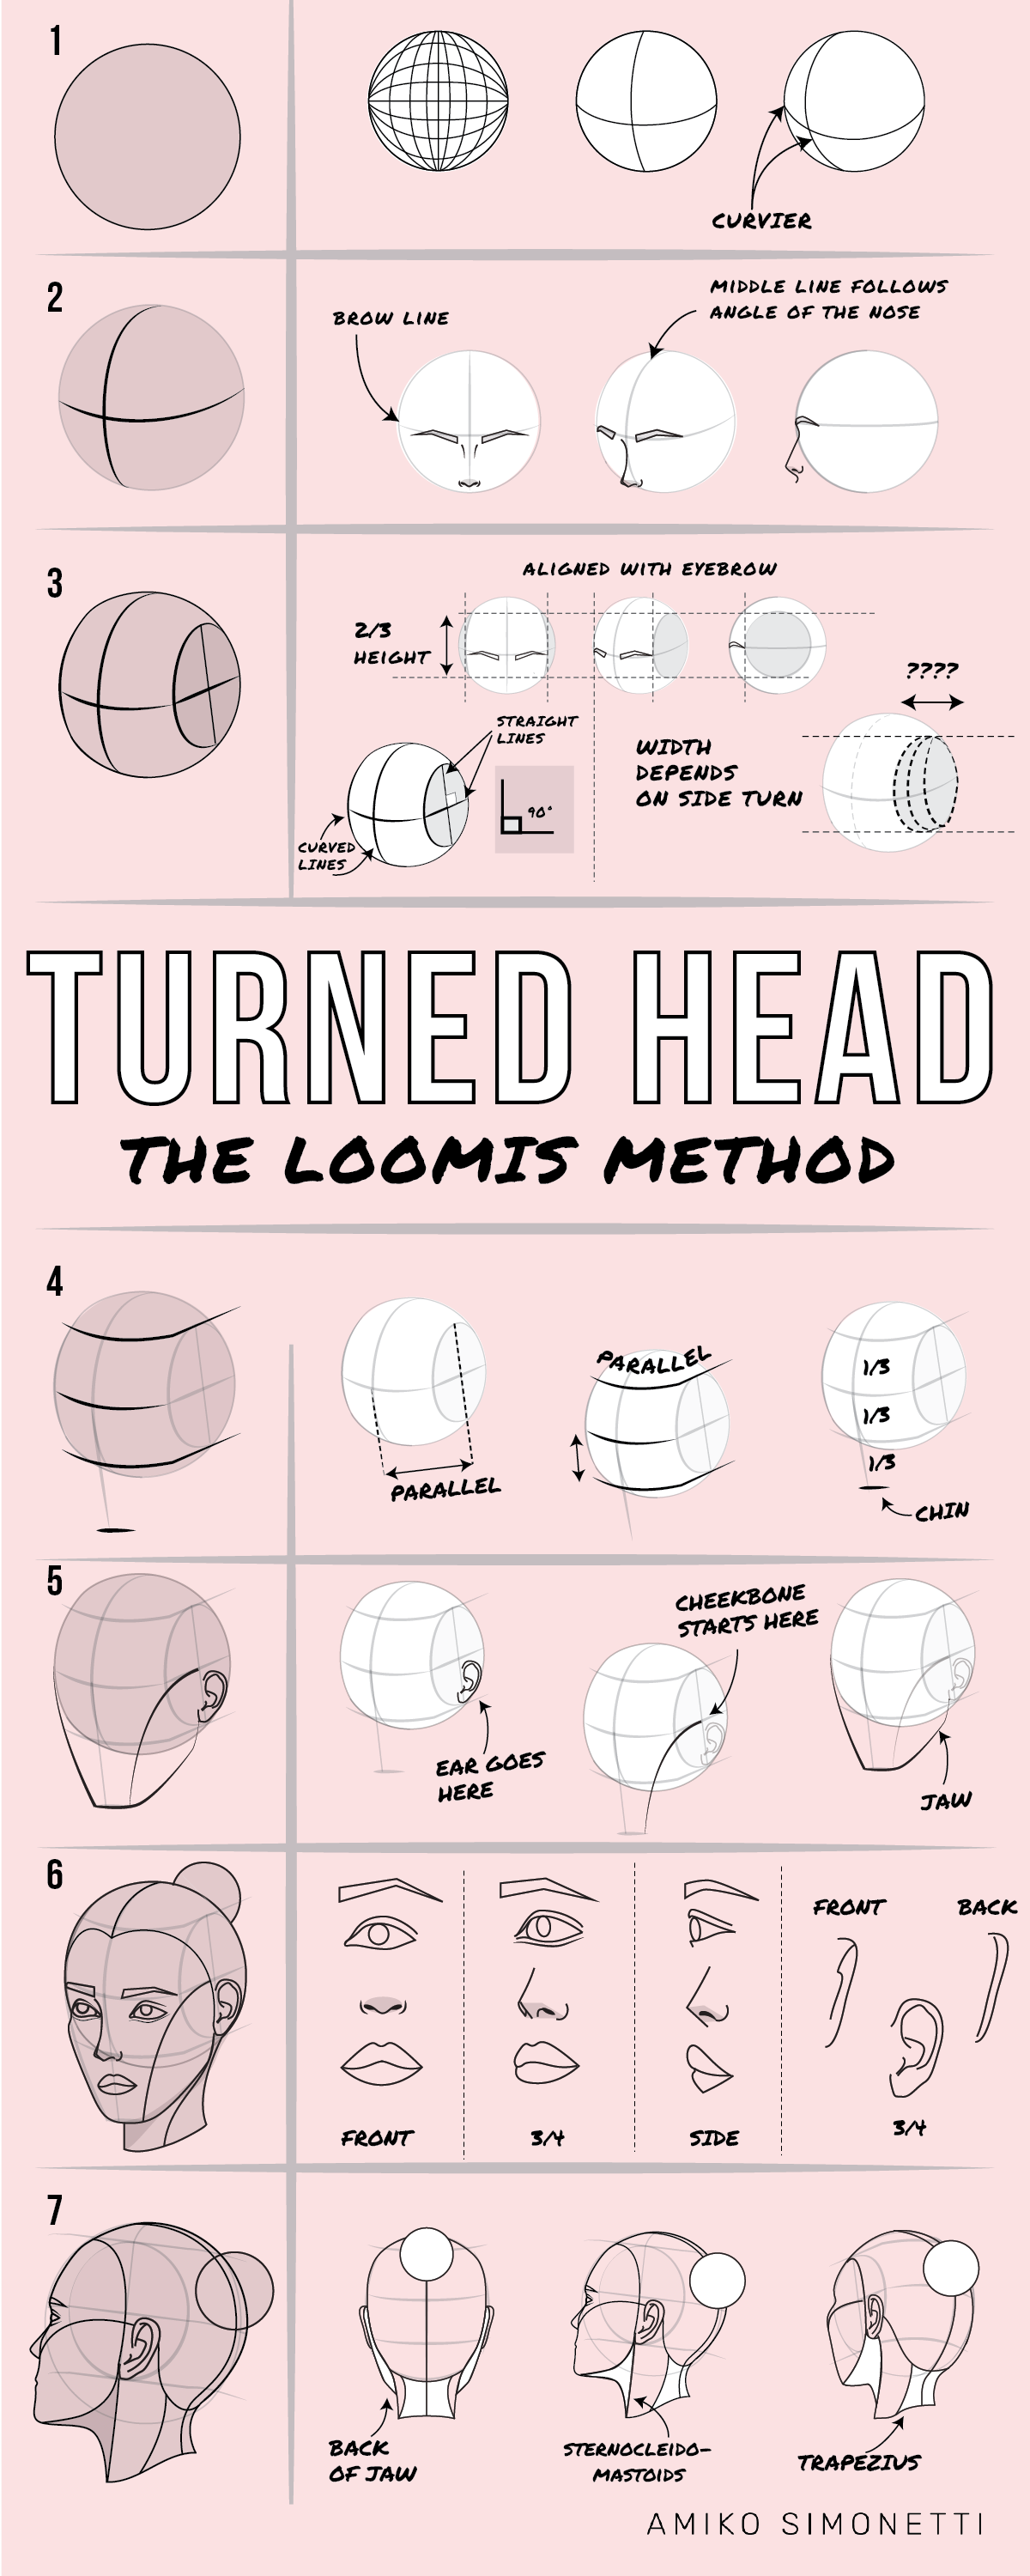
For a traceable template of the turned head in 27 positions, check out this Croquis Kit.

6: Draw guidelines for the cheekbones.

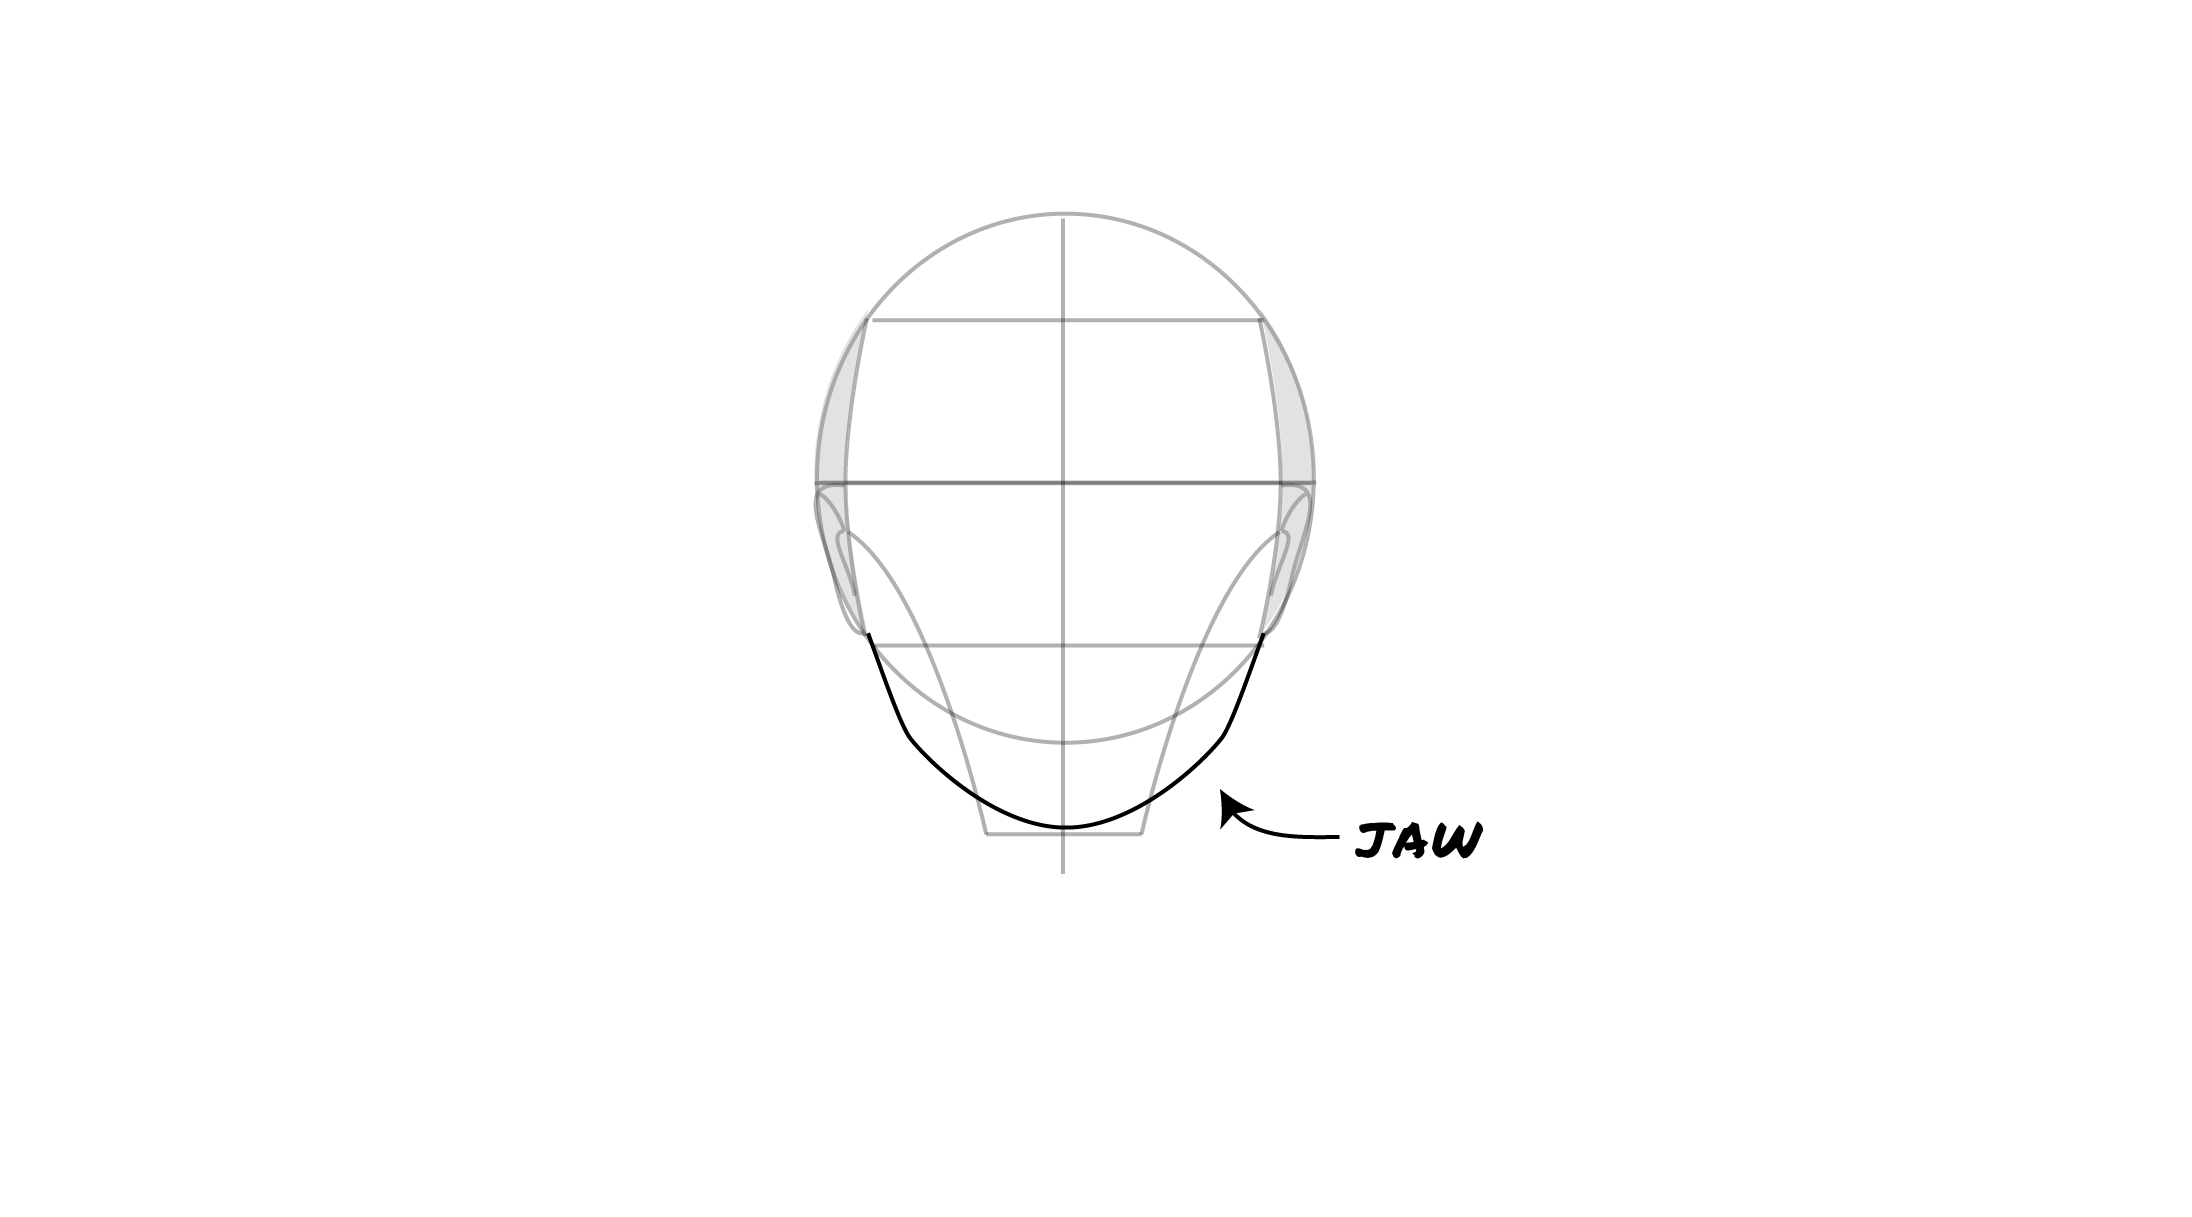
7: Draw the jawline.
8: Draw the eyebrows on the brow line.

9: Draw the eyes under the eyebrow (spaced one-eye-wide.)

10: Optional Draw the upper and lower eyelid.


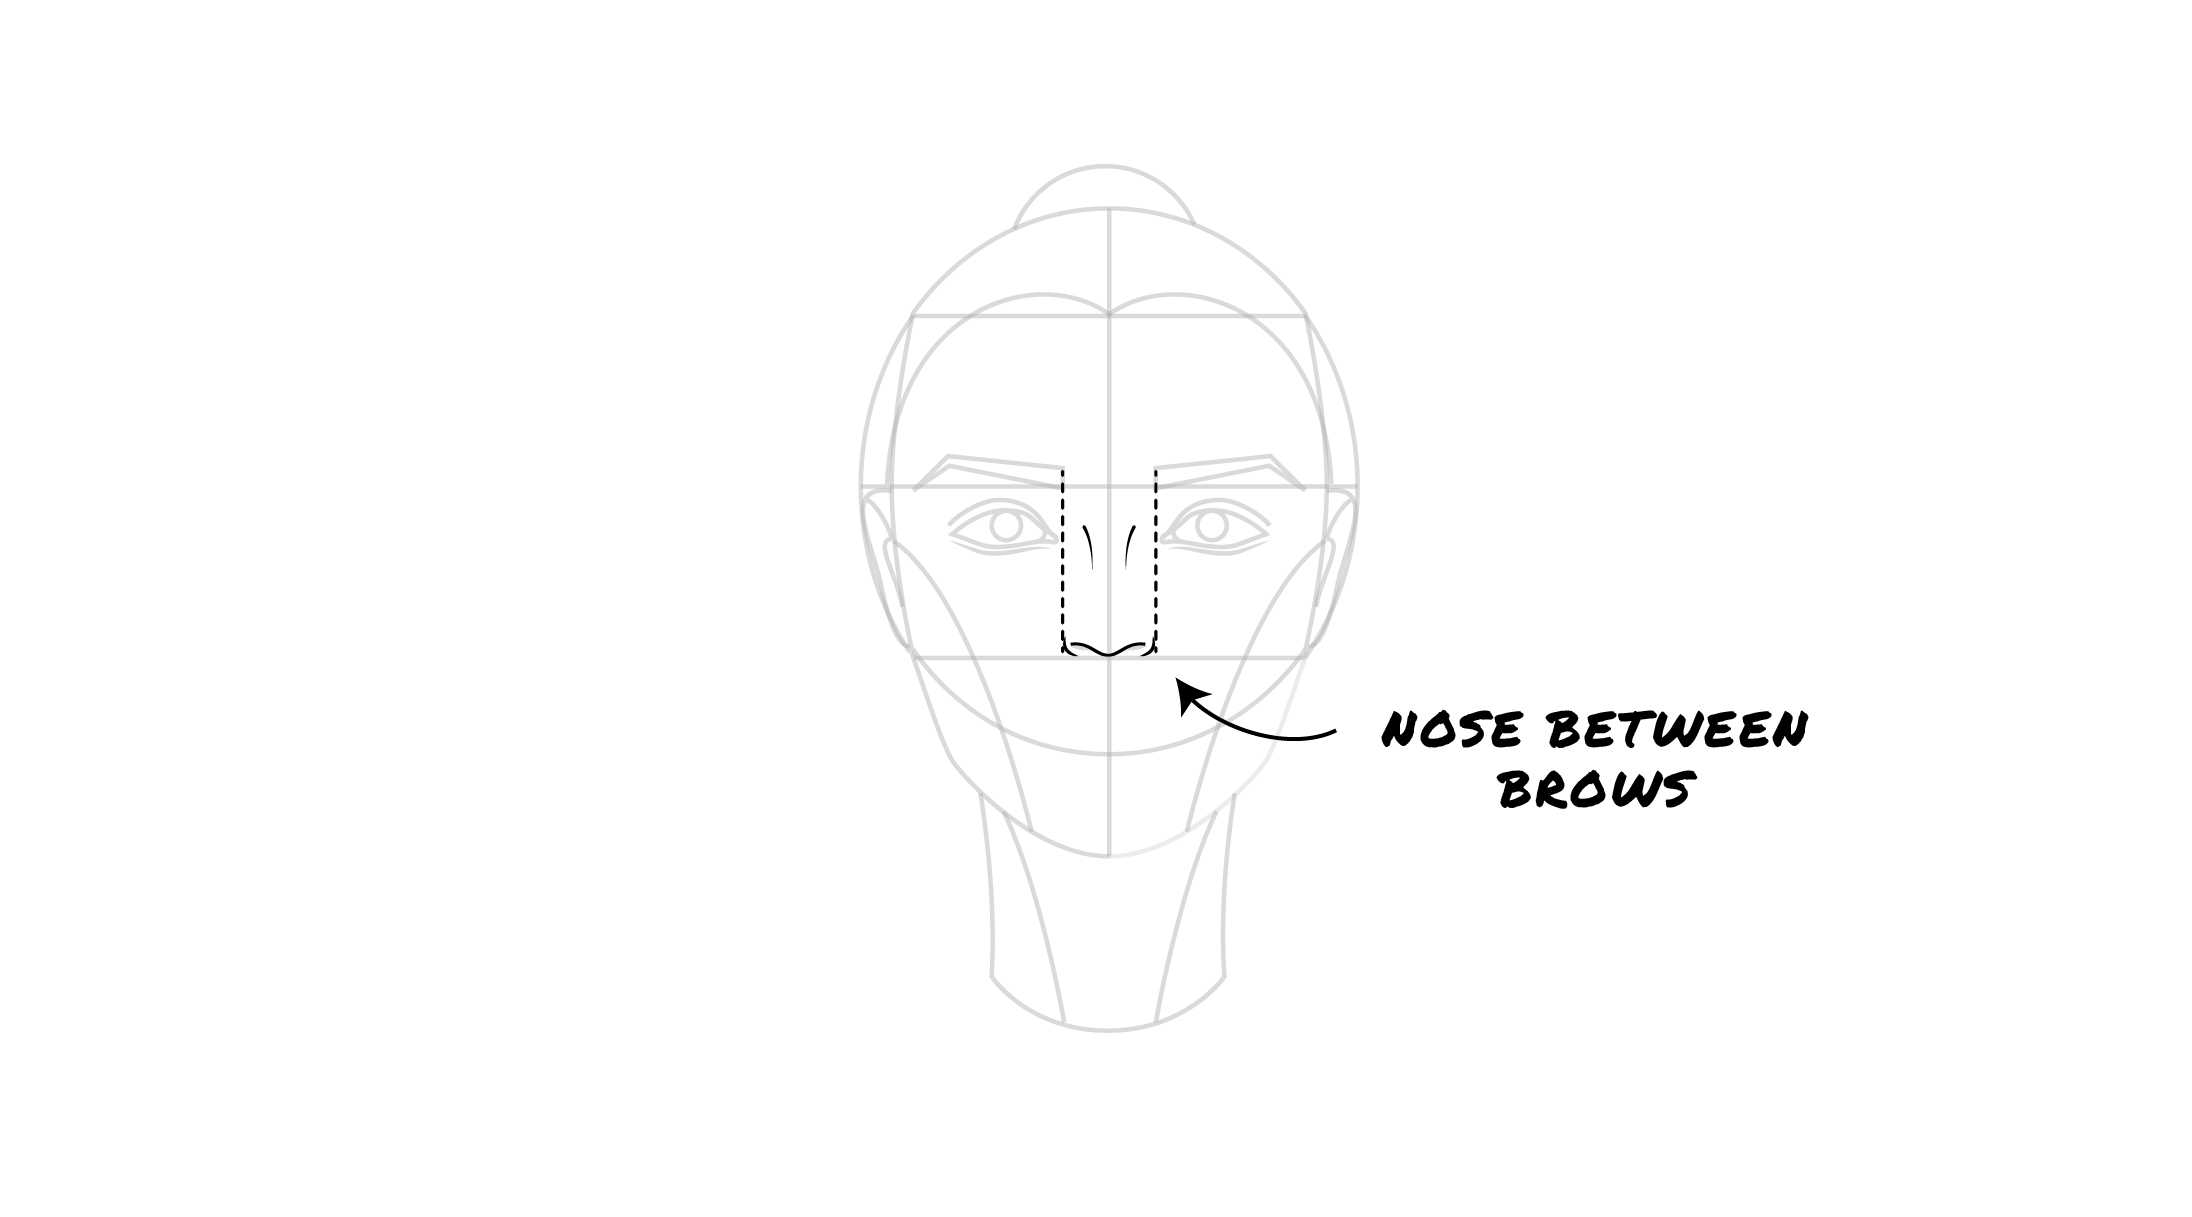
11: Draw the nose between the eyebrows.
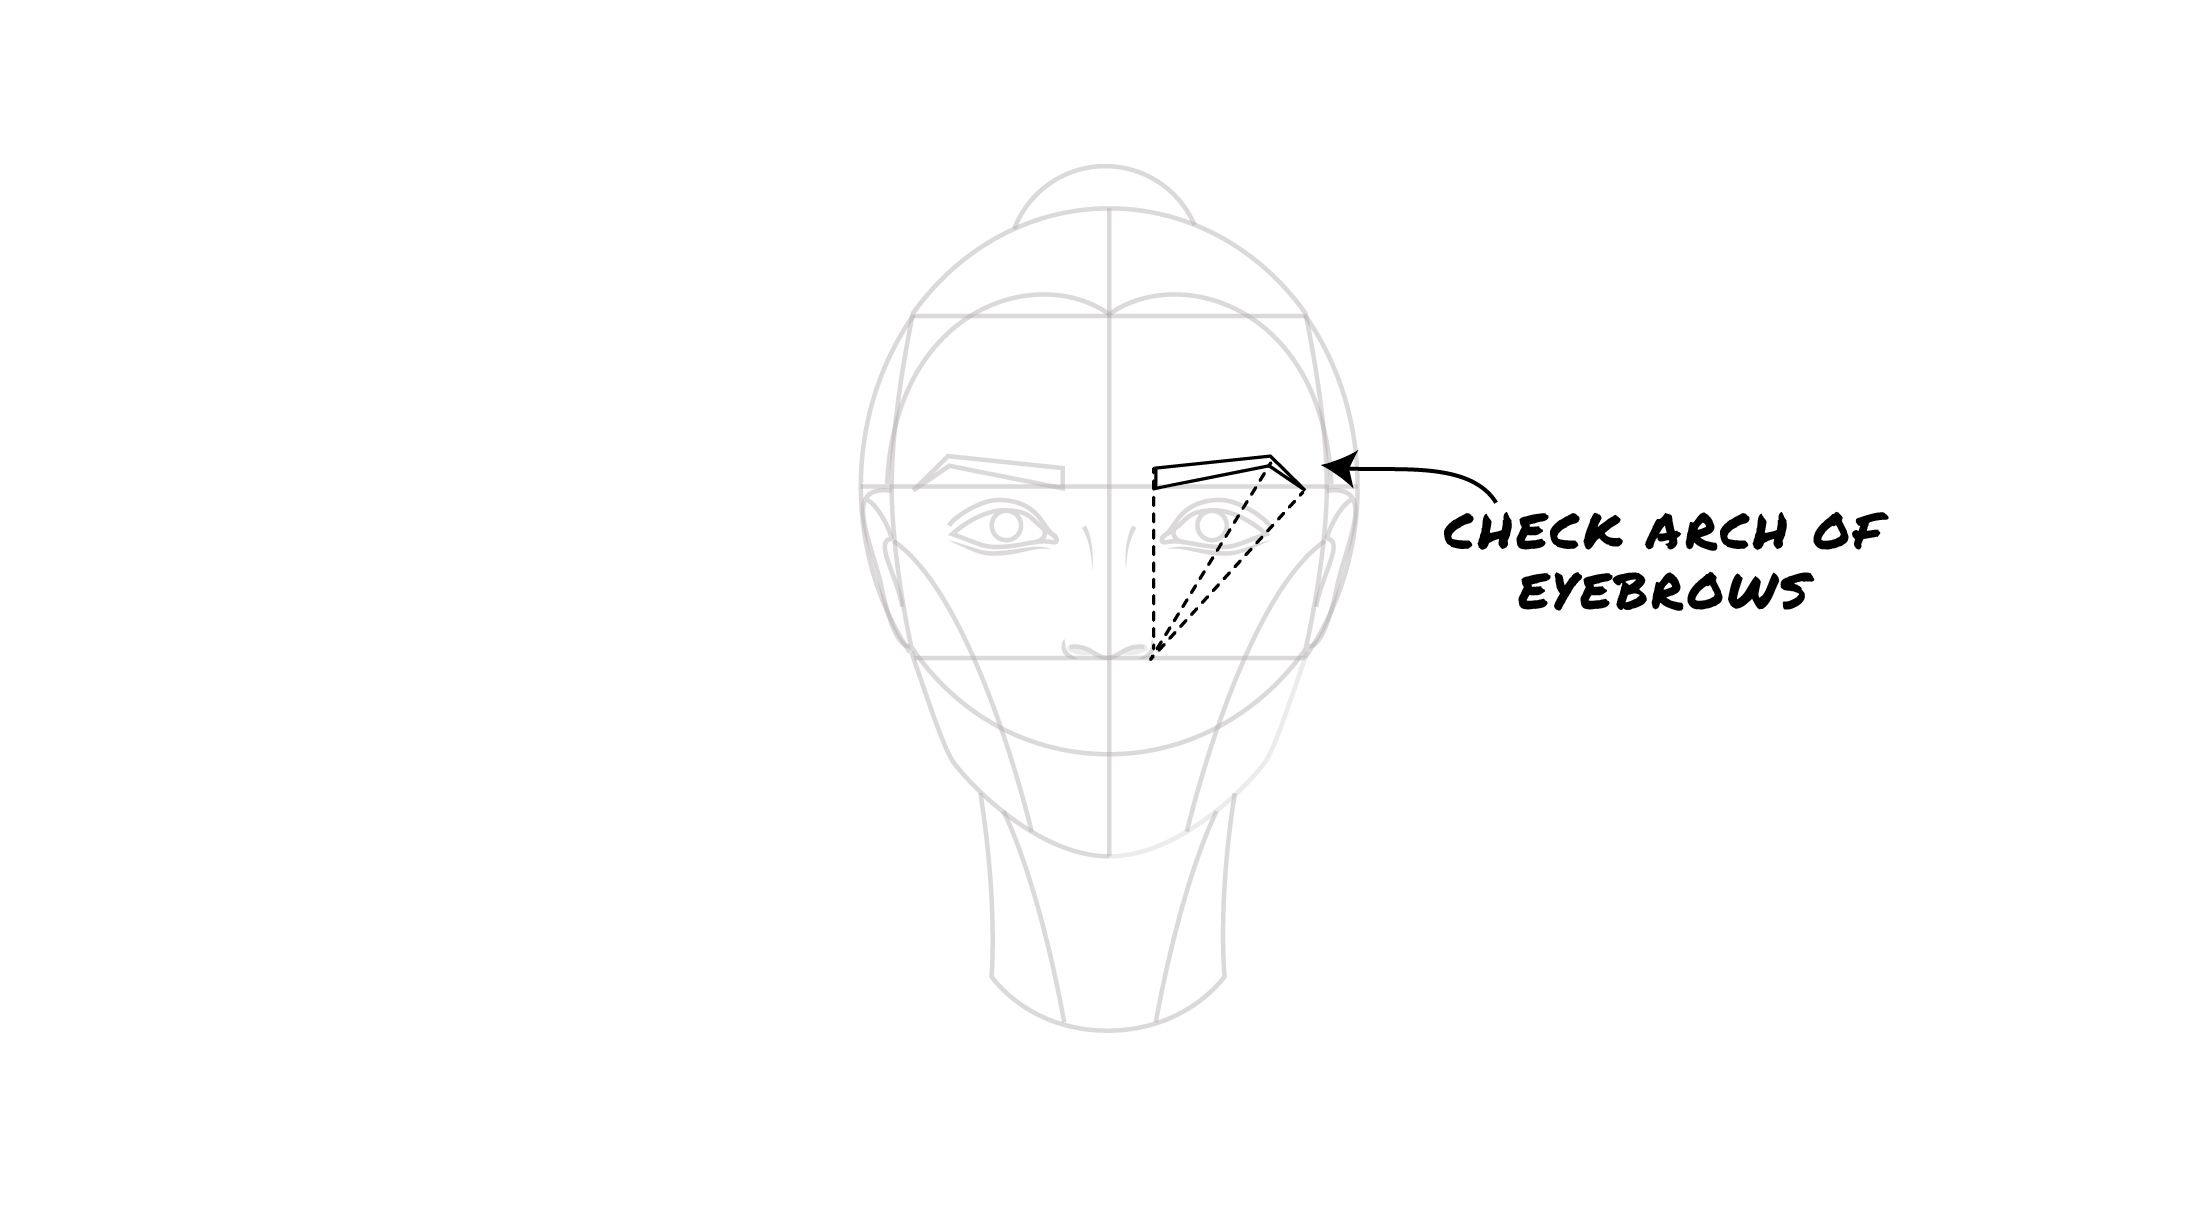
12: Check the arch of the eyebrows.
13: Draw the center line of the mouth.

15: Draw the top and bottom lip.

Adjust as necessary for symmetrical results

Ready for the next steps?
Practice drawing turned head with the Loomis Method in this step-by-step tutorial.

Suggested for you: