
Why Are My Sketches Blurry? How to Fix Pixelated Lines in Procreate
Ever zoomed in on your Procreate sketch only to find fuzzy, pixelated lines where crisp outlines should be?
Many artists have vented that their Procreate drawings “look blurry and pixelated” or “lose that crispness [they] had in the app” upon export.
These blurriness issues boil down to a few common mistakes and misunderstandings about how Procreate works.
This guide will highlight the top reasons your Procreate sketches might appear blurry or fuzzy and how to fix each problem so your line work stays sharp.
Common Reasons Procreate Sketches Look Blurry
1. Small Canvas Size
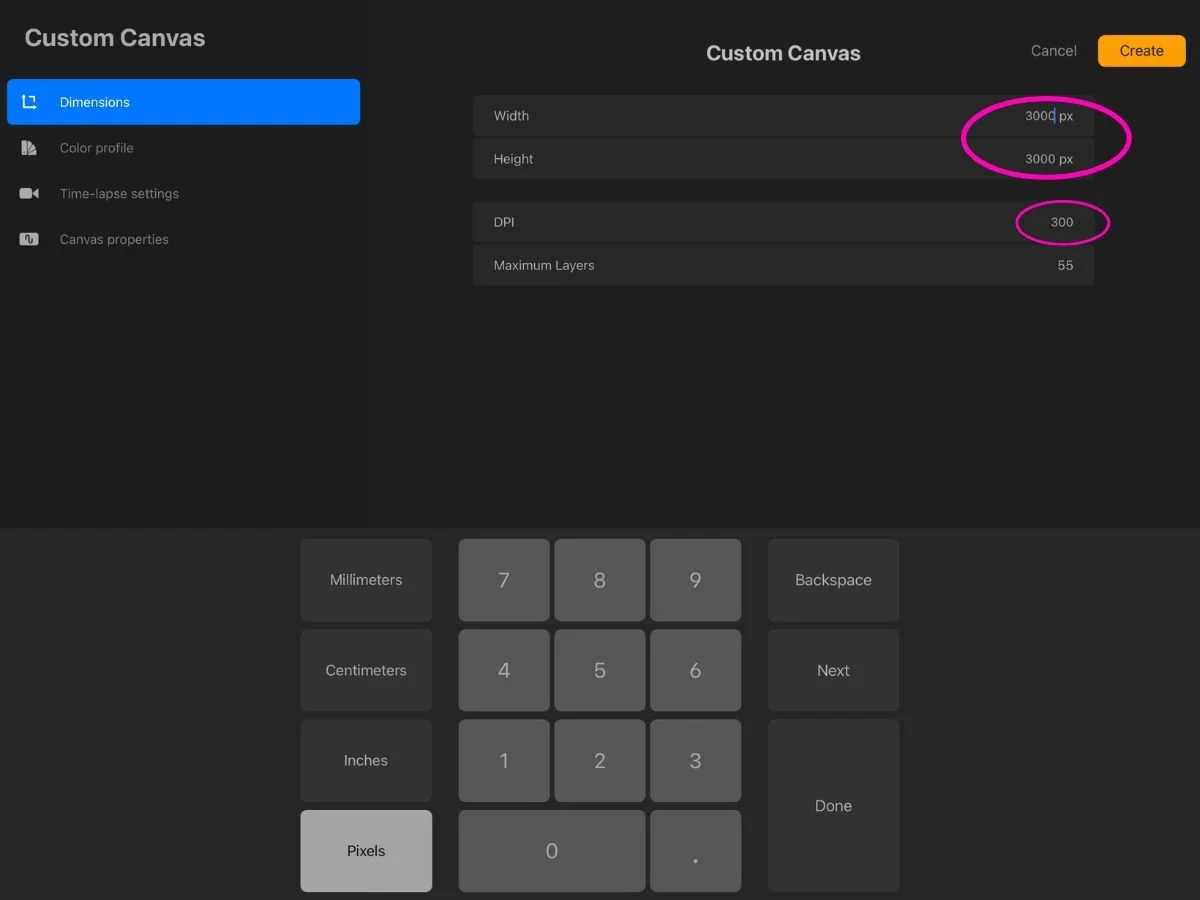
Procreate is a raster app, meaning your drawings are made of pixels. If your canvas is too small, you won’t have enough pixel density for crisp lines. This is where people often get confused about DPI.
How to think about DPI: DPI (dots per inch) is a print setting—it tells the printer how many pixels to squeeze into each inch of paper. On a screen, what matters is the total number of pixels your canvas has. For example:
10 x 10 inches at 300 DPI = 3000 x 3000 pixels (crisp for most uses).
5 x 5 inches at 300 DPI = 1500 x 1500 pixels (fine for Instagram, but blurry on a poster).
One artist clarified: “DPI doesn’t matter. It’s all about pixels. More pixels = less pixelation.” If your canvas is physically small (say 5x5 inches), even at 300 DPI, you don’t have many pixels to work with.
So, instead of focusing on DPI alone, always check your canvas’s pixel dimensions. The minimum canvas size I recommend for crisp fashion sketches is about 3000 x 3000 pixels (≈10 x 10 inches at 300 DPI).
Bigger is better if you know you’ll be presenting or printing. Keep in mind that as you increase the canvas size, Procreate reduces the maximum number of layers available.
2. Overusing the Transform Tool
Every time you resize, rotate, or warp a line, Procreate resamples pixels. Scaling up will always reduce quality, because the app can only stretch existing pixels rather than create new detail. Do it repeatedly and your lines will soften. By default, the Transform tool uses Nearest Neighbor interpolation, which often makes edges look jagged. For smoother results, switch the interpolation setting: tap the arrow (Transform) tool, look at the bottom toolbar, and change Interpolation from Nearest Neighbor to Bilinear or Bicubic. This preserves smoother, sharper edges when resizing.

One artist noted they often have to “just resize and then retrace on another layer if it’s bugging me” — essentially re‑drawing lines to regain crisp edges after scaling up.
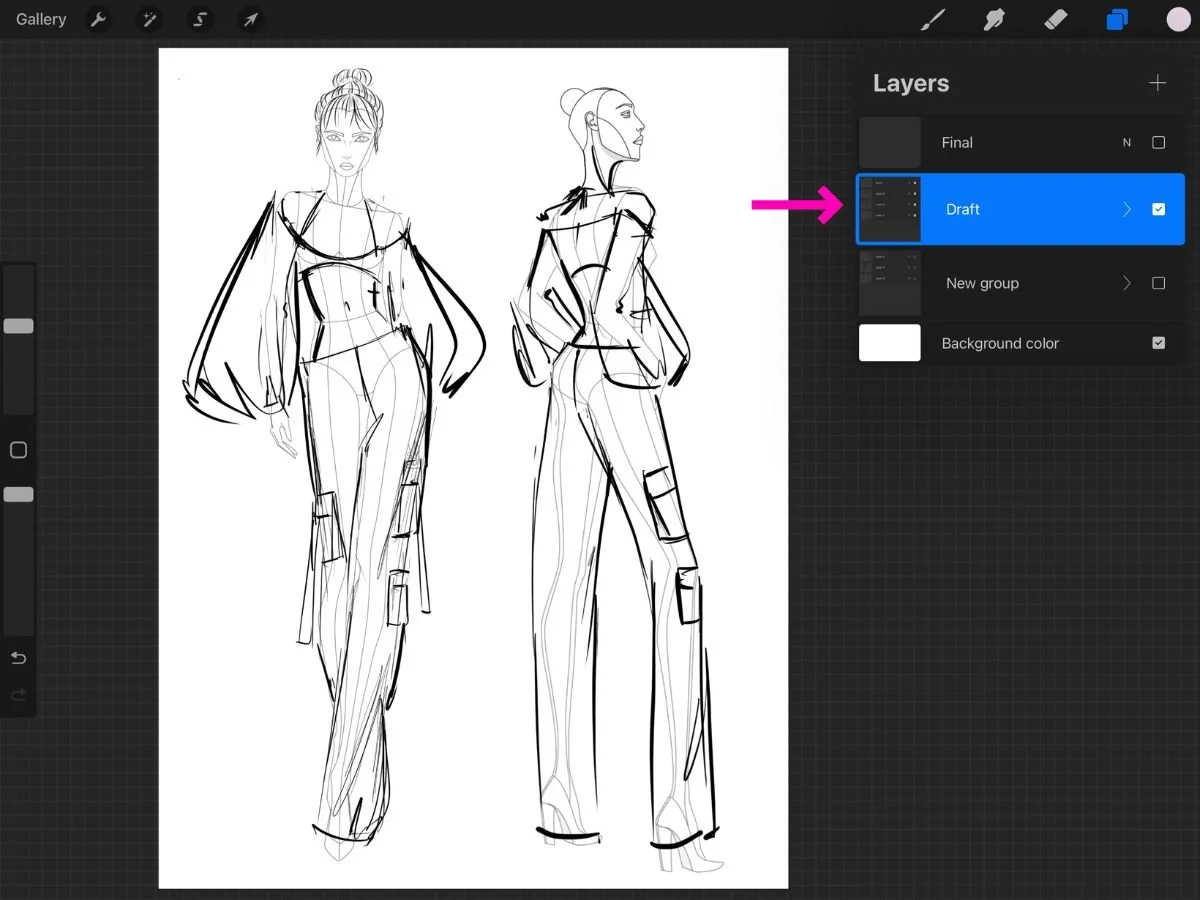
A practical workaround is to keep your rough construction and draft on a separate layer, making as many transforms and edits as needed without worrying about line quality. Once the draft feels right, lower its opacity and trace over it on a new layer with clean, final lines, planning not to make further transforms or edits there.

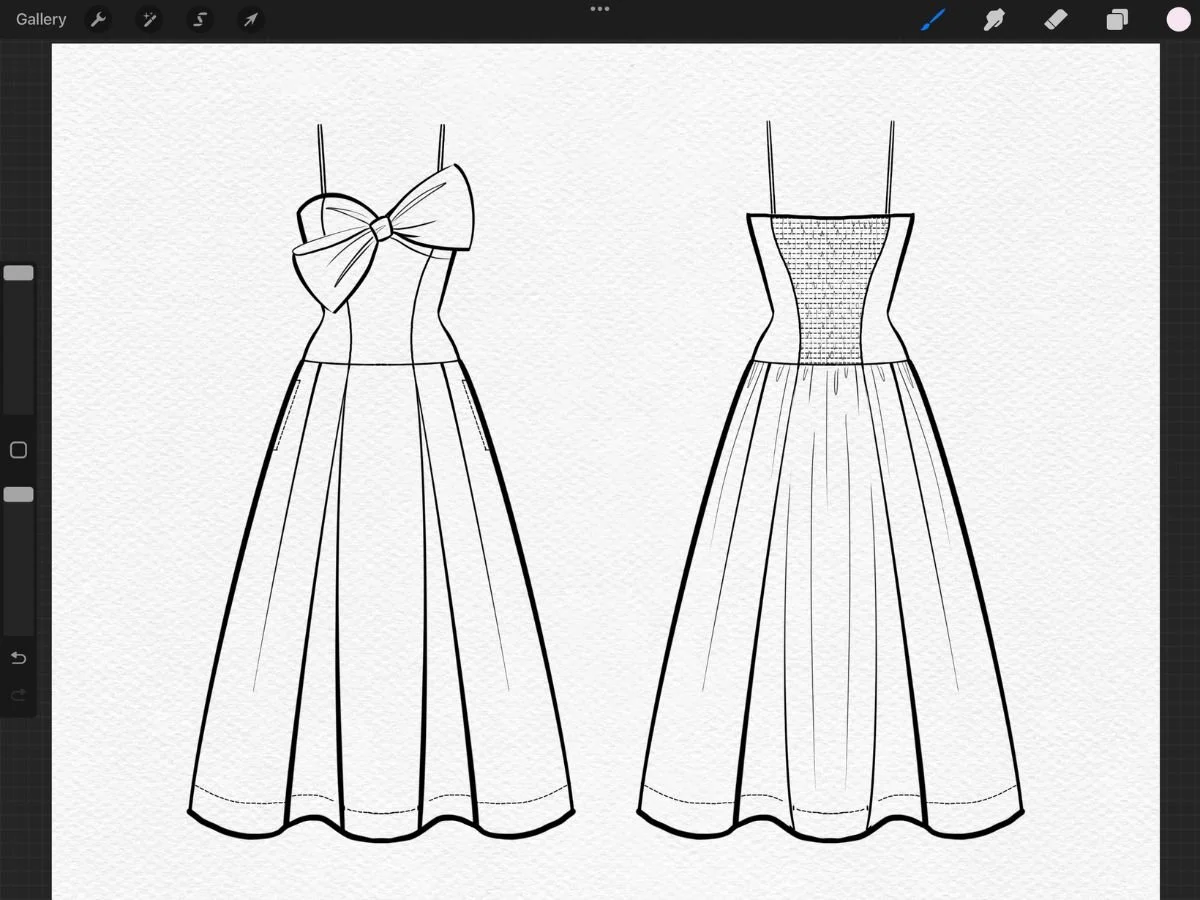
3. Using the Wrong Brushes
Some brushes are meant to look textured. Great for denim shading, but not for a clean fashion flat. For crisp outlines, stick to inking brushes like the Studio Pen or Technical Pen. You can also try my Fashion Procreate Brushes, which have clean brushes for fashion flats.

4. Exporting Incorrectly
JPEGs compress and blur fine details. PNG is a better option for flats. One artist put it bluntly: “export as mostly anything but JPEG.” Also, note that the iPad Photos app sometimes displays images with a smoothing filter—making crisp PNGs look soft. As another frustrated user shared: “I had no idea…image viewing apps compress [or filter]. I was about to pull my hair out thinking Procreate ruined my work.” If this happens, export to Files instead to confirm the quality.

5. Expecting Vector Scaling
Unlike Illustrator, Procreate doesn’t create vectors. That means you can’t scale artwork infinitely without some blur. As one community member explained: “Procreate is pixel based, not vector. Any resizing or rotating will affect the resolution of your lines.” To put it simply: raster graphics (like Procreate) are made of pixels, while vector graphics (like Illustrator) are made of mathematical paths that can scale endlessly without losing sharpness. If you need true vectors, many designers export their PNGs to Illustrator and use Image Trace to regain crisp, scalable lines.
How to Keep Your Lines Sharp
Start with a large canvas. Aim for at least 10x10 inches at 300 DPI (≈3000x3000 pixels). For posters or detailed flats, go bigger if your iPad allows. Keep in mind that larger canvases reduce the maximum number of layers available in Procreate
Check at 100% zoom. Regularly toggle to Actual Size to make sure your lines hold up at true resolution.
Use brushes designed for clean lines. The Studio Pen or Technical Pen are great for crisp flats and outlines.
Resize carefully. If you need to transform, change the interpolation setting in the Transform toolbar to Bicubic. Use these transforms mainly on draft layers, so your final clean lines remain untouched and sharp.
Export smart. Use PNG (lossless) or PSD (for layers). Export to Files instead of Photos for the truest display.
Vectorize when necessary. For projects requiring infinite scalability (like logos or CAD-ready flats), convert to vector in Illustrator using Image Trace. Another workflow option is to do your rough drafts in Procreate—quickly sketching and tweaking proportions or placements—then import those drafts into Illustrator and manually trace over them as CADs, adding stitching and details there. This way you get the advantages of both tools: Procreate for fast, intuitive sketching, and Illustrator for precise, scalable vector flats.
Tip for Fashion Designers: Work with Draft Layers
Here’s a workflow trick that can save both clarity and time: keep your rough sketches on draft layers. Adjust proportions, move sleeves, or resize hemlines there—where a bit of pixel softening doesn’t matter. Once you’re happy with the composition, create a new layer for your clean linework. That way, your final sketch is drawn fresh, without the blur from repeated transformations.
👉 Learn more about organizing layers in my guide: How to Use Layers in Procreate for Fashion Design.
Conclusion
With the right canvas size and workflow, your lines can stay as crisp as you intended.
If you’d like step‑by‑step guidance on setting up canvases, using custom brushes, and building a fashion‑specific workflow, my Procreate for Fashion Design course walks you through the process.
May your lines stay sharp!
-Amiko
