
How to Use Layers in Procreate for Fashion Design
If you're sketching garments in Procreate, learning how to use layers will make your process smoother, faster, and easier to edit.
This post will walk you through what layers are, how they work, and how they support your fashion sketches—whether you're drawing a clean flat or a detailed fashion illustration.
✨ As an added bonus, we’ll explore a trick to creating clean time-lapse videos where construction lines, templates, or reference layers are hidden.
🪟 What Are Layers in Procreate?
Think of layers like transparent sheets of tracing paper stacked on top of your canvas. Each layer can hold a different part of your drawing: your fashion figure, color, shading, prints, or stitching details.
You can also think of layers as building blocks: you can stack, shift, label, lock, and group them to build a detailed, editable sketch.
By separating each part of your sketch, you can:
Edit individual elements without disturbing the rest
Experiment freely (and undo mistakes easily)
Keep your file clean, organized, and non-destructive
✍️ Why Layers Matter for Fashion Sketching
Here’s how layers make your work more flexible:
Editing linework without affecting colors
Trying different colorways or prints on the same sketch
Creating time-lapse videos that show your design process cleanly (with the option to hide croquis templates)
Organizing details like stitching or shadows separately so they can be toggled on/off
Add a background layer—like textured paper—to make your sketches feel more tactile
🧰 Layer Tools and How to Use Them
Procreate gives you several layer options—each with a purpose that makes sense for fashion illustration. Here’s a quick guide:
You’ll find the Layers panel by tapping the double-square icon at the top of your canvas. This is where all the magic happens.

🔒 Lock
Swipe left on a layer and tap "Lock" to prevent accidental edits.
Use it for:
Protecting your sketch once you're happy with it
Locking the fashion figure layer while working on garments
Keeping template elements untouched
📄 Duplicate
Swipe left and tap "Duplicate" to make a copy of a layer.
Use it for:
Creating quick colorway variations
Testing alternate sleeves, hems, or details
Backing up a version before trying something new
✅ Visibility (Turn On/Off)
Tap the checkbox next to a layer to hide or show it.
Use it for:
Testing a print or texture without deleting it
Comparing two versions of a sketch
Hiding your figure layer to view the garment alone

🌫 Opacity
Tap the “N” on a layer to open Opacity. Slide to adjust how transparent the layer is.
Use it for:
Lowering the opacity of template or draft layers
Creating soft shadows or highlights
Softening print or fabric textures
🧩 Blend Modes
Tap the “N” again to explore blend modes—they change how a layer interacts with layers below.
Use it for:
Creating realistic fabric effects
Adding shadows or highlights
Blend mode option include:
Multiply – great for adding shadows, fabric overlays, or soft print integration
Screen – useful for highlights or shine on satin, leather, or metallics
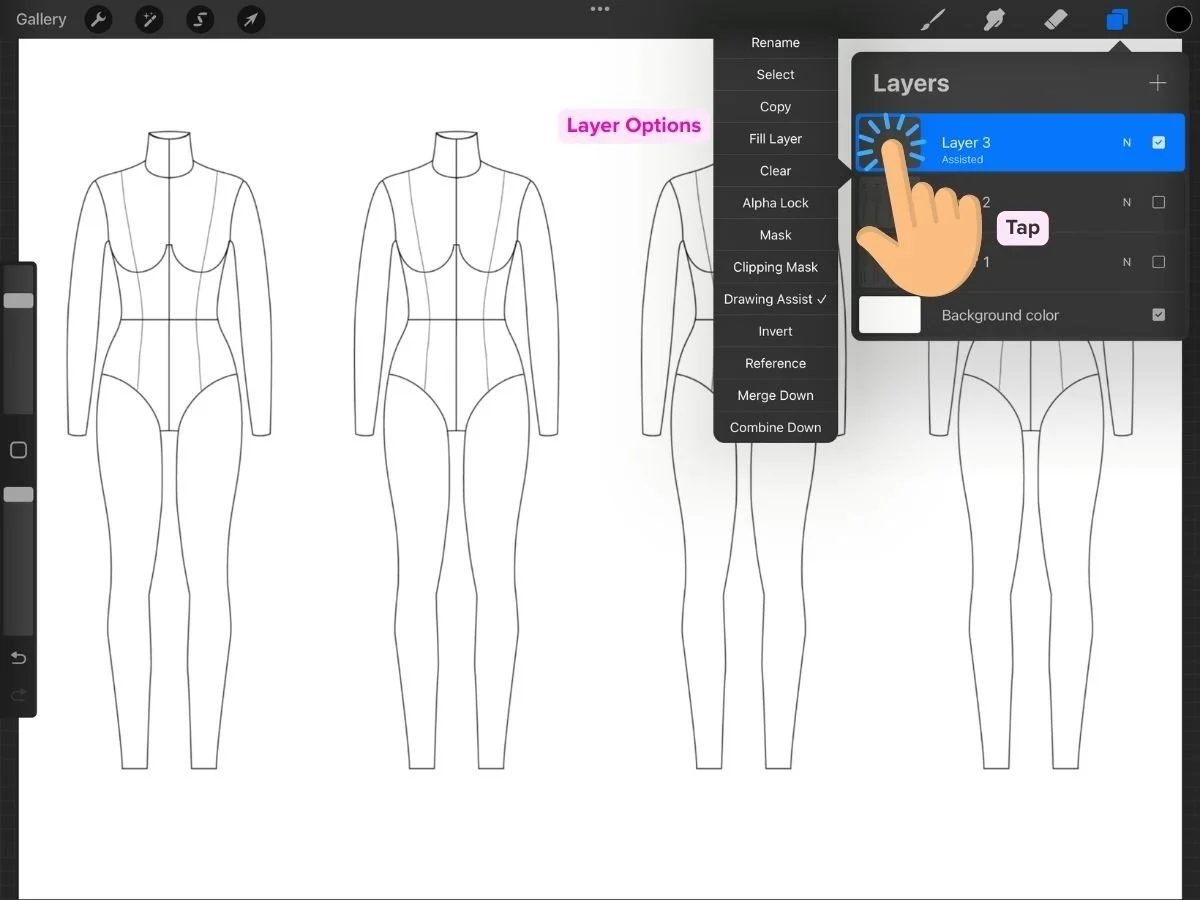
✨ Layer Options
Tap on a layer to open a menu of useful features including:
Rename – keep your layers organized (e.g. “sketch” or “skirt print”)
Select – grab that layer’s contents quickly
Clipping Mask – apply prints or textures only inside a shape (covered in this how to add prints tutorial)
Clear- Clear the contents of the entire layer in an instant, without having to erase. This will preserve the layer name, blend mode, and opacity
🌓 Primary vs. Secondary Layers
Primary Layer
In the Layers panel, tap any layer to make it active. It will highlight in bright blue—this is now your Primary layer. You can only have one Primary layer at a time, and all drawing and painting actions will apply to this layer only.Secondary Layers
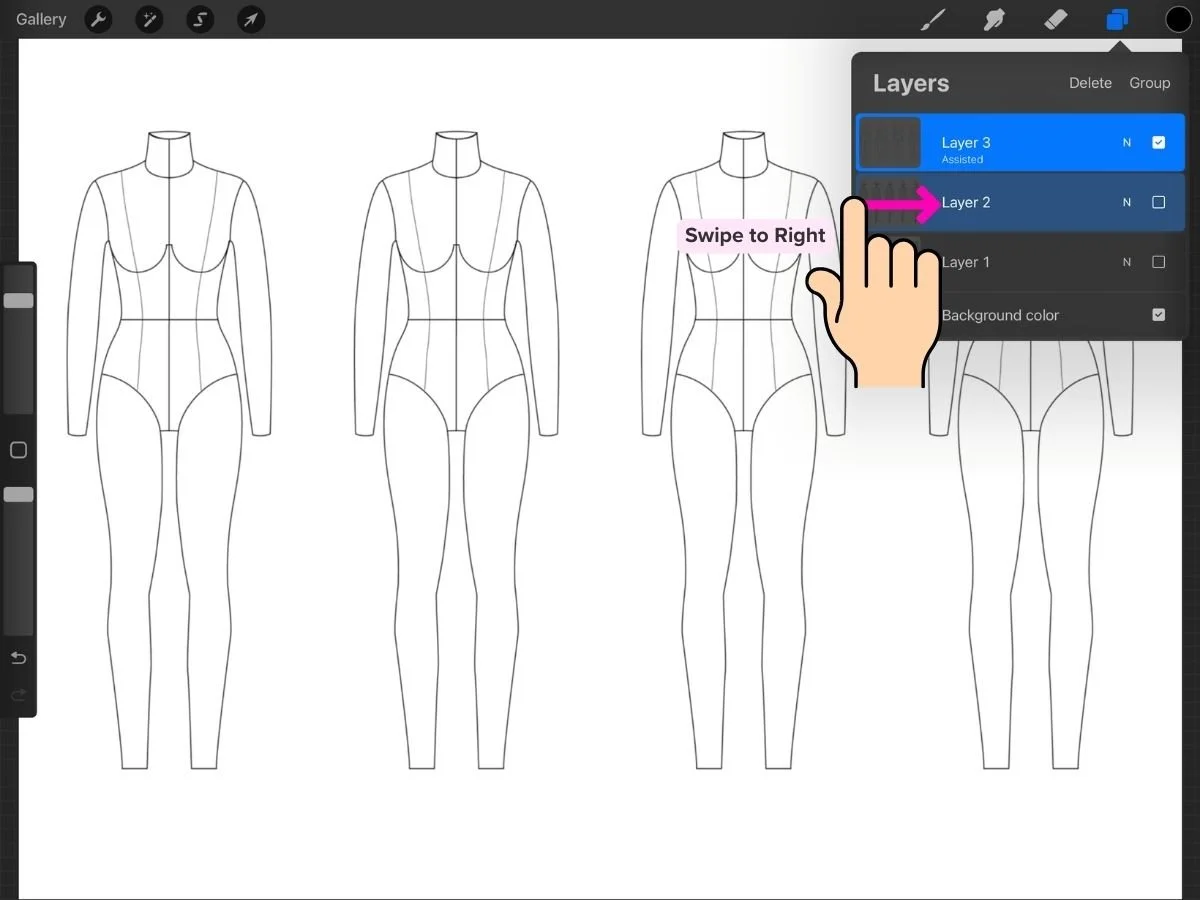
Swipe right on any other layer to select it as a Secondary layer. These show up in dark blue, and you can select as many as you like. While drawing only affects the Primary layer, any Selection or Transform actions will apply to all selected layers.
✨ Think of the Primary layer as the one you’re actively working on, while Secondary layers help you organize, group, move, or delete multiple layers at once without affecting what's on the Primary.
📦 Grouping and Merging Layers
Layers are your best friends because they help you draw complex images that are easy to iterate and edit. However, they can quickly get out of hand and multiply like bobby pins in a bathroom drawer.
Grouping layers helps keep your files organized. Organized files are more satisfying to work with, so it’s worth the effort—trust me! Here’s how to group layers:
🔧 How to Group Layers
In the Layers panel, tap to select one layer
Swipe right on additional layers to select them
Tap “Group” at the top
Group types that make sense for fashion sketching:
Template Group: Drafts, background paper, figure base (often locked + low opacity)
Sketch Group: Outlines, stitching, pockets + details
Rendering Group: Fill layers, clipping masks (for prints or shadows), highlights
Merging Layers
Merging means combining two or more layers into a single layer. Once merged, the individual elements can no longer be edited separately.
It can be a helpful way to simplify your workspace—especially if you're done editing certain layers and want to reduce clutter. It’s also useful if you ever hit Procreate’s maximum layer limit (which depends on your canvas size and resolution). If that happens, look through your file for layers you can safely merge to free up space.
But here’s the key: Don’t merge too early.
Once merged, there’s no going back unless you immediately undo.
It's best to merge only once you're happy with what you've drawn and you're sure you won’t need to adjust each layer again.
🔧 How to Merge Layers in Procreate
Option 1: Merge Down or Pinch
Tap the layer you want to merge and select “Merge Down” (it will combine with the layer directly beneath it)
Or, pinch multiple layers together in the Layers panel to combine them
Option 2: Select + Group + Flatten
In the Layers panel, swipe right on multiple layers to select them
Tap Group. Collapse the group by tapping the arrow
Tap the group name, then choose Flatten to merge all the layers in the group into one

🛑 Merged Something by Accident?
Quickly Undo by tapping with two fingers
Or tap the Undo arrow at the bottom left of your screen
Once you’ve closed the file, you won’t be able to undo—so double-check before you flatten anything.
🧵 Tips for Layering Like a Pro
Name your layers as you go. It saves time later.
Use groups to keep variations organized—like different colorways or design details.
Duplicate before major edits so you always have a fallback.
Lock layers you’re not actively working on to avoid accidents.
✨ Bonus: Keeping Layers Private in Time-Lapse Replays
By default, Procreate records every visible layer in your time-lapse replay—including figure templates, construction lines, reference photos, and rough sketches. But sometimes, you want to exclude certain layer in your final video.
That’s where Private Layers come in.
To make a layer invisible in the time-lapse recording:
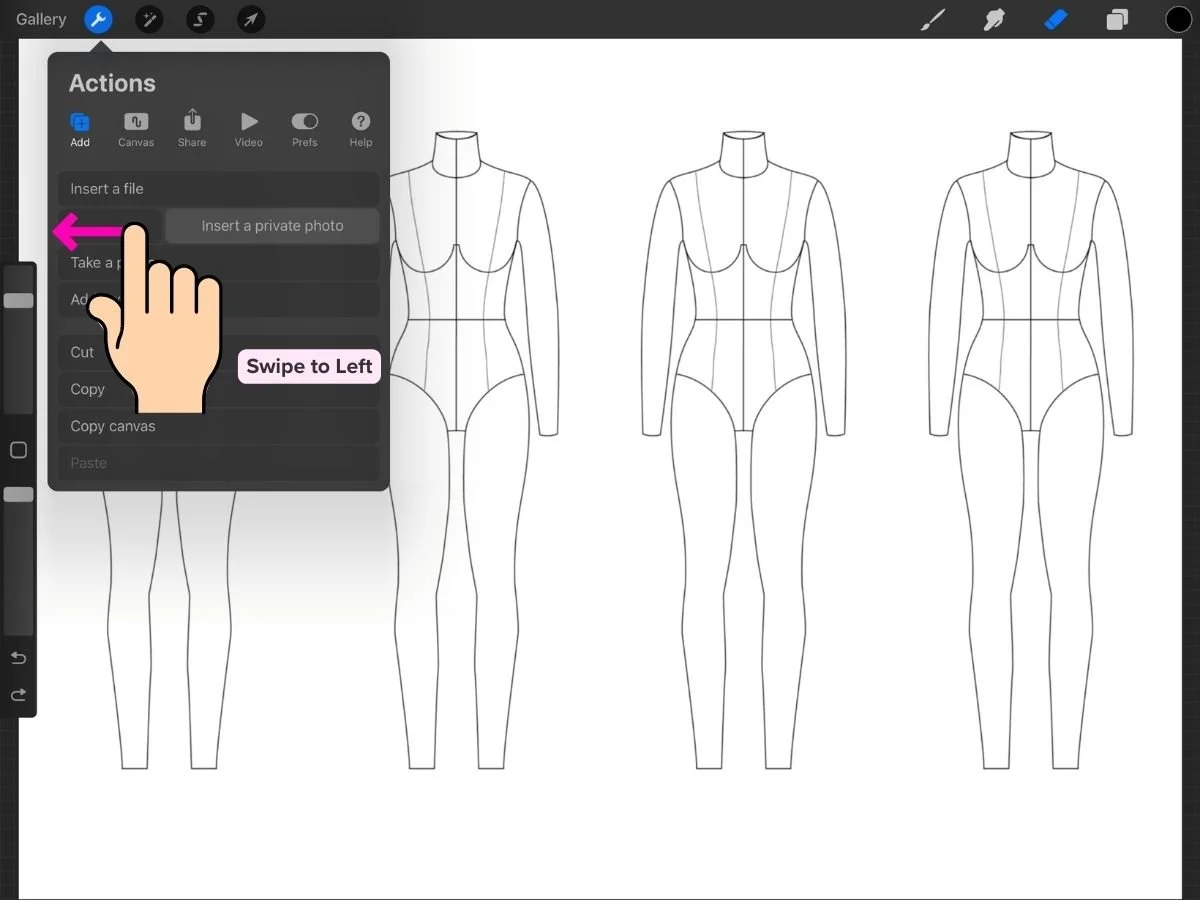
Tap Actions (the wrench icon)
Go to Add
Swipe left on any of the following options:
Insert a File
Insert a Photo
Take a Photo
You will see a new option to “Insert a Private File/ Photo”
Choose your file or photo—Procreate inserts it directly into your canvas as a Private Layer, labeled “Private” under its title in the Layers panel.
These private layers look and behave like standard layers—they can be moved, hidden, or modified—but they remain invisible in your time-lapse playback.
Ready to Explore Working with Layers?
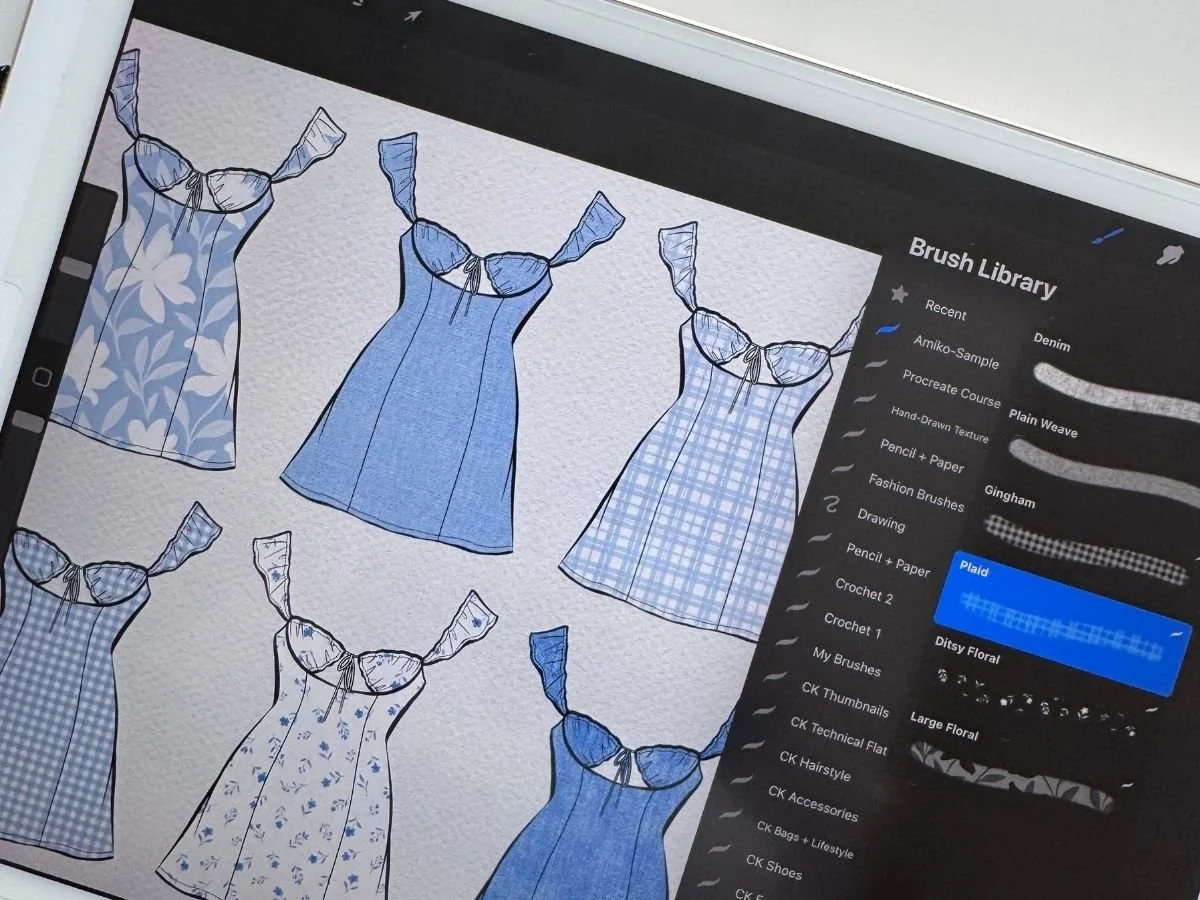
You can start layering today using my free Procreate fabric and print brushes—they’re and perfect for experimenting with textures and color.
If you're new to Procreate and want a clear, fashion-focused workflow, my Procreate for Fashion Design course walks you through everything from brushes to final sketches.
