How to Add Fabric + Prints to Fashion Sketches in Procreate
If you’re sketching in Procreate and want to add fabric texture or prints without erasing around the edges, this post will walk you through how to use clipping masks.
You’ll be able to test different prints, make changes easily, and give your designs more depth—without touching your original sketch.
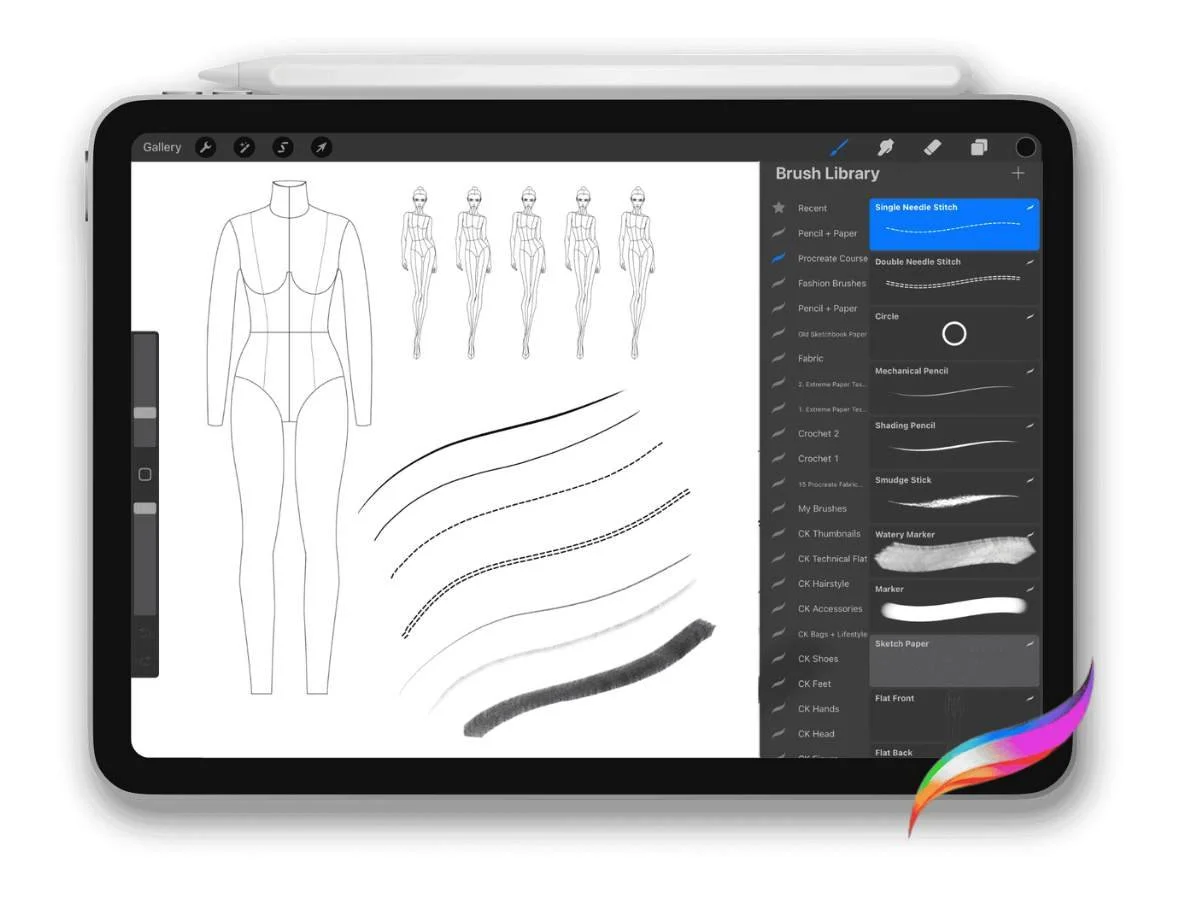
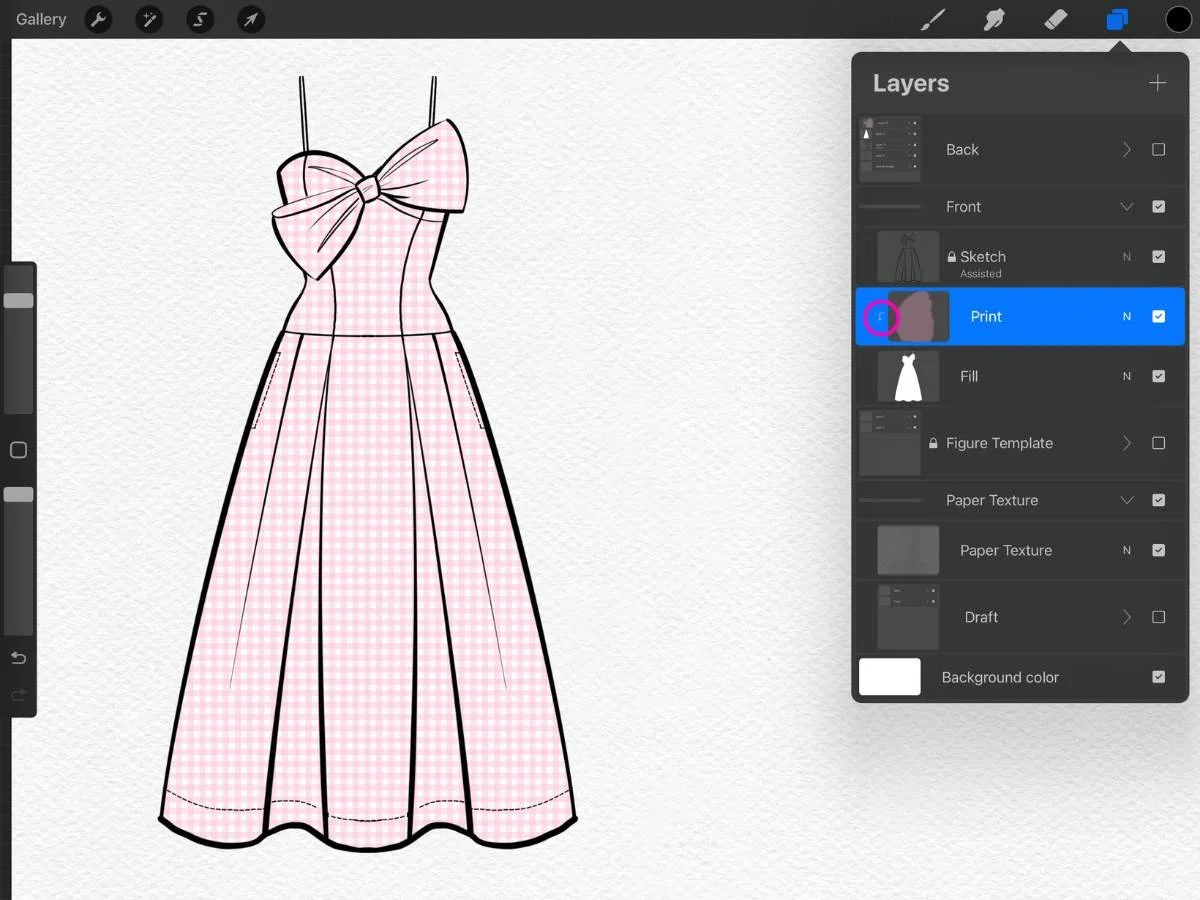
🪟 Understanding Layers in Procreate
Layers in Procreate are like transparent sheets stacked on top of each other. You can draw or paint on each one separately—so your sketch, shading, and print can all live on different layers without interfering with each other.
To open the Layers panel, tap the double square icon at the top right. From there, you can:
Add a new layer: Tap the ➕
Delete a layer: Swipe left on it
Toggle visibility: Tap the checkbox
This keeps your workflow flexible and non-destructive—perfect for experimenting.
🚀 To learn how to make your design process smoother and easier to edit, check out How to Use Layers in Procreate for Fashion Design.
✂️ What Is a Clipping Mask?
A clipping mask lets you apply a print, color, or texture inside the shape of the layer below it—like a stencil.
Why it’s helpful:
✅ You can test prints without erasing or merging
✅ Everything stays editable
✅ Your sketch stays clean and organized
🧵 Step-by-Step: How to Add a Print to Your Sketch
Step 1: Draw Your Sketch (on its own layer)
Open the Layers panel and tap ➕ to create a new layer.
Draw your garment or flat sketch here.
Rename this layer “Sketch” for clarity.
Swipe left on the layer, then tap Lock to avoid accidental edits. A padlock icon will appear.
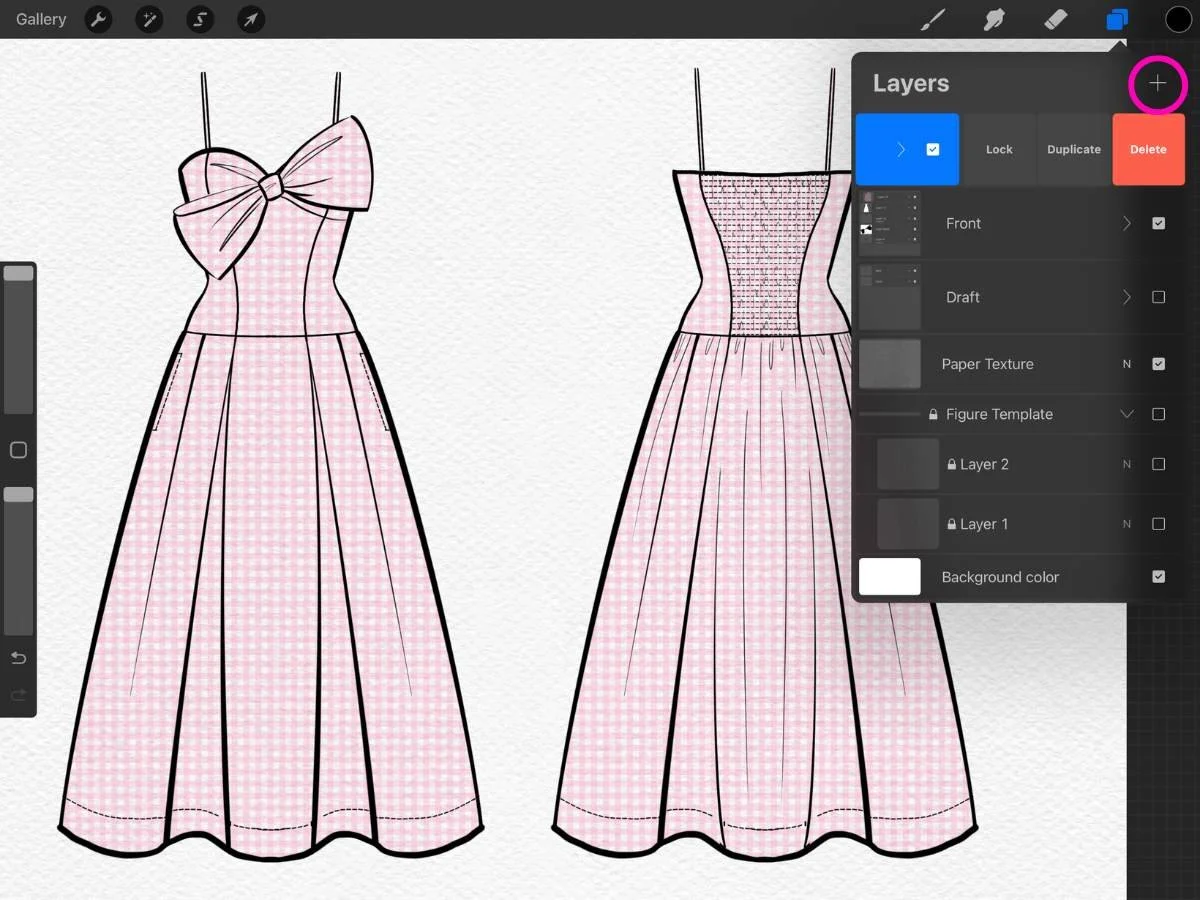
Step 2: Create the Fill Layer (Your “Stencil”)
Tap ➕ to add a new layer.
Drag this layer below the Sketch layer in the Layers panel.
Pick a color using the Color Picker (top-right circle).
Outline your garment with a brush. Make sure the shape is closed—meaning no gaps in the outline—so you can fill it cleanly. Think of a closed shape like a cup: if there’s a hole in the bottom, your color (or print) leaks out.
Drag the color circle in the top right it into your shape to fill it. This is called ColorDrop.
⚠️ If the whole screen fills with color, tap two fingers to undo, then check for gaps in the outline and try again.
Change the color to white so it doesn’t interfere with the print color.
Rename this layer “Fill.” This acts like an invisible stencil—the shape that holds your print.
If your sketch is blocked by white, your Fill layer is likely above it. Just drag the Fill layer under the Sketch.
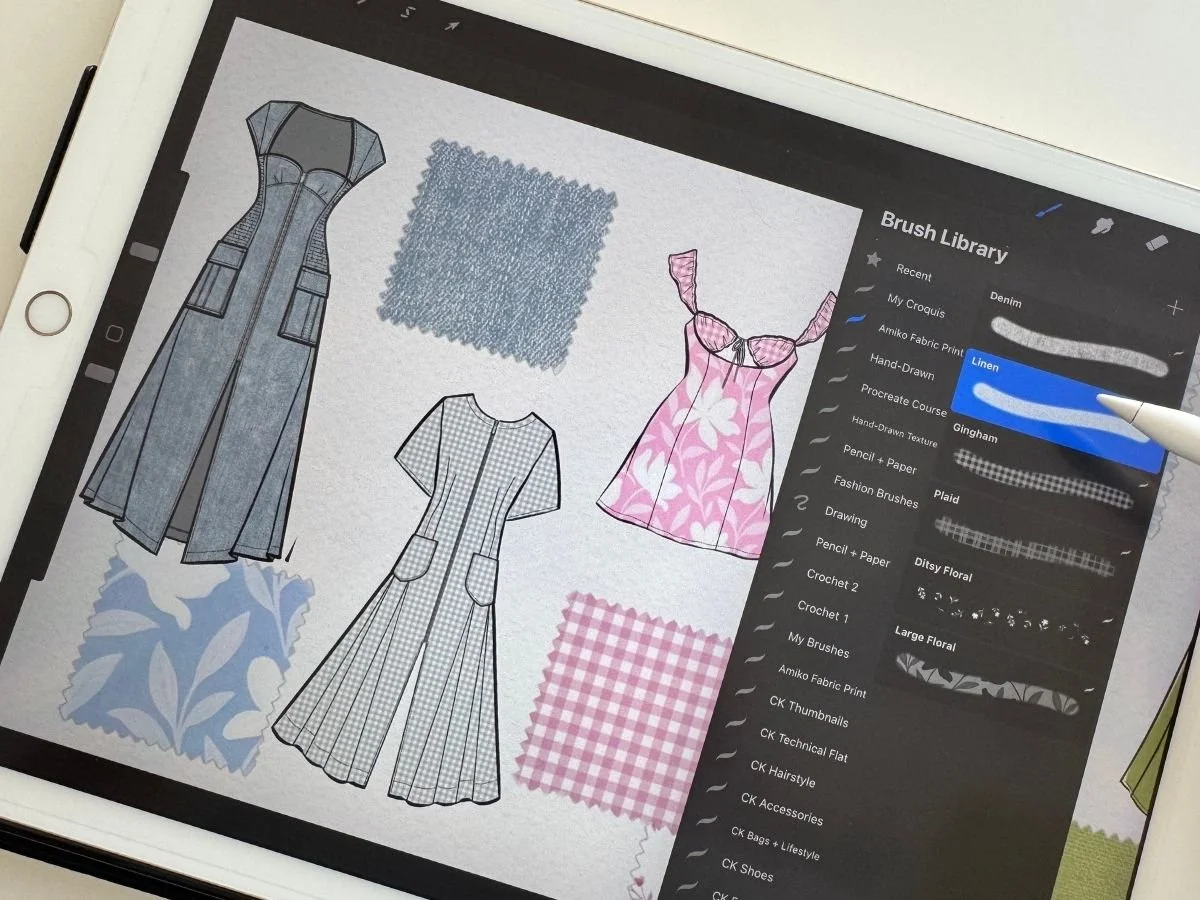
🎨 Step 3: Add Your Print or Texture
Tap ➕ again to create a new layer above the Fill layer (but still under the Sketch).
You can:
Insert a print: Go to Actions (🔧) > Add > Insert a photo or Insert a file
Paint a print: Use any print or fabric texture brush on this new layer
Want to test it out? Try my free fabric + print brushes that includes textures like florals, denim, and linen.
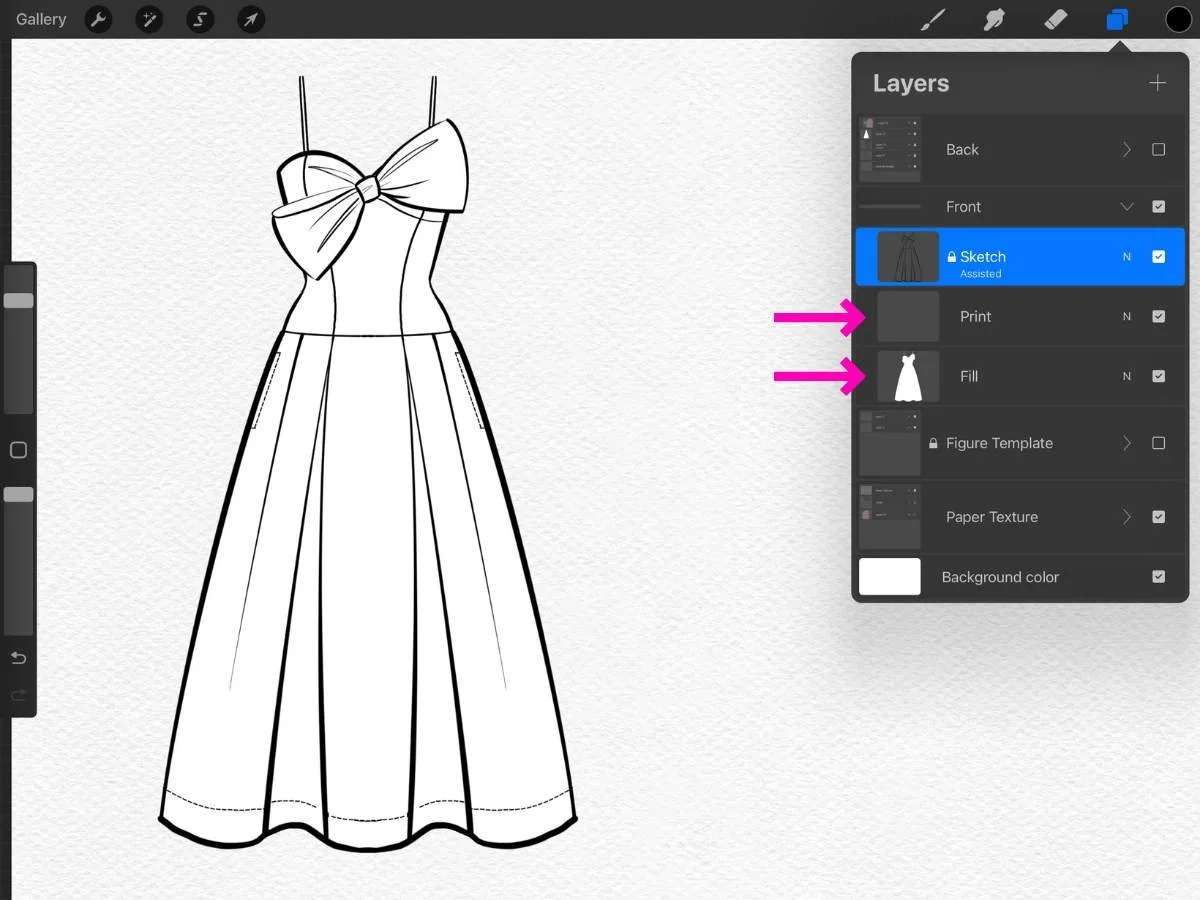
✨ Step 4: Apply the Clipping Mask
Tap on your print layer once > choose Clipping Mask from the layer menu. An arrow will appear in the clipping mask layer preview.
Now your print is neatly masked inside the Fill shape. It won’t spill outside.

🎛️ Customize Your Print
Once your clipping mask is in place, you can refine the look:
Opacity: Tap the “N” on the layer and lower the opacity slider for a softer effect
Fill Color: Change from white to a new background color
Blending Modes: Tap the “N” next to the layer and experiment with blending modes. For example, “multiply” will deepen the print while “color dodge” will brighten it
Transform Tool: With the print layer selected, tap the arrow icon (top-left) to reposition, scale, or rotate your print
→ For a full walkthrough on positioning prints, check out: Tricks for Realistic Prints in Procreate
🌀 Want to Test Different Prints?
Here’s a simple way to try out multiple print options:
Add new Clipping Mask layers above the Fill layer
Insert or draw a different print on each one
Toggle visibility (eye icon) to compare instantly
It’s like fabric shopping—but faster.
⚠️ Common Mistakes to Avoid
Print spilling outside the shape? Your Fill shape may not be fully closed. Zoom in and fix any gaps before using ColorDrop.
Flattening or merging too early? Keep your layers separate while experimenting. Merging makes the print permanent and harder to edit later. Stick with clipping masks for flexibility.
🎨 Bonus Tip: Let Your Background Show Through
If you’re using a textured background (like watercolor paper or graph grid), try this:
Set both your Fill layer to Multiply
Your background texture will subtly show through—great for more dimension.
Want textured paper? Try one from my Pencil + Paper Brushes.

Highlights/ Product Specs:
Digital Download (.brushet + .swatches)
Compatible with: Procreate only
File size: 38.6 MB
Created: March 8th, 2024
Description:
14 PROCREATE BRUSHES | REALISTIC PENCIL + PAPER SKETCHES ON THE IPAD | FASHION SKETCHES AND MORE | Pencils: Mechanical pencil, shading pencil, textured pencil | Blending stick | Hard and soft eraser similar to kneaded eraser for highlights | Seamless paper textures: sketch, pulpy, recycled | Seamless sketchbook textures including graph, grids, lines, and dots | BONUS color palette for cohesive sketches across artboards
Please read Usage Terms and Download Instructions below
🌟 Final Thoughts
Clipping masks let you add prints to your fashion sketches cleanly and flexibly—without redrawing or erasing. Once you set up your sketch, fill layer, and print layer correctly, you’ll be able to test many ideas and keep your file neat.
Want to keep everything tidy? You can group your layers by selecting one, then swiping right on the others to highlight them. Tap Group to place them in a collapsible folder.
⚠️ Accidentally add the wrong layer? Just drag it out of the group—easy fix.
If you want more tips for organizing your Procreate files, this guide on layer management walks you through naming, grouping, and staying streamlined.
—
If you're new to Procreate and want a beginner-friendly, fashion-specific workflow, my Procreate for Fashion Sketching course walks you through brushes, templates, flats, prints, and more—with everything organized step by step.