
Tips for Realistic Print Placement in Procreate
Have you ever added a print to a sketch and something felt… off? It’s likely because the print didn’t follow the drape or construction of the garment.
This post walks you through three simple tools that make prints look more realistic, dynamic, and tailored to the sketch.
We’ll cover how to:
Use Warp to curve your print to match fabric tension or shape
Use Liquify to gently ripple the print for a more organic flow
Use separate Clipping Masks for elements like collars and pockets where the print should start, stop, or change direction or scale
👉 If you're new to adding prints in Procreate, check out this beginner guide to adding prints before continuing.
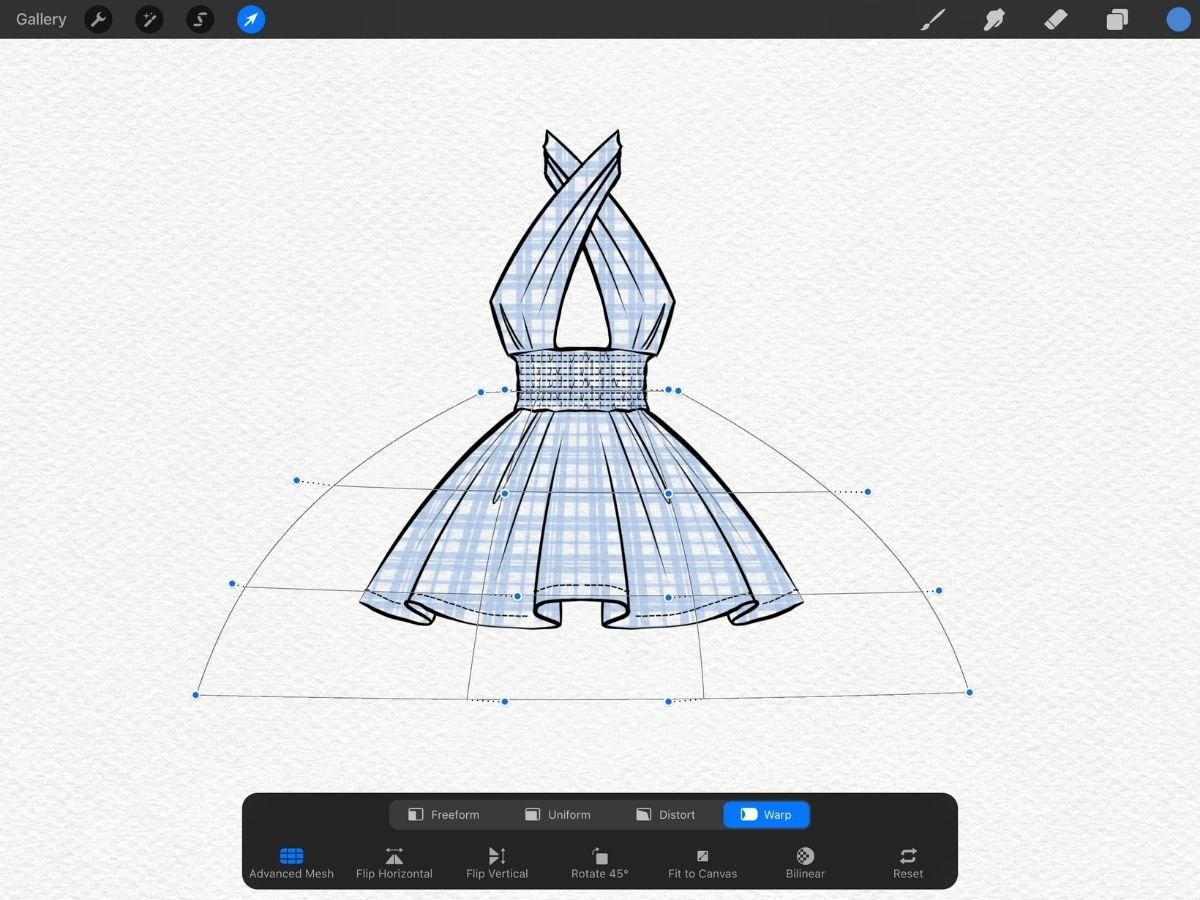
🌀 Warp: Bend the Print to Fit the Fabric
Warp lets you manually curve or stretch an image so it looks like it's wrapping around a 3D form. Think of it like molding a decal onto a curved surface.
Example: Imagine a tight floral print dress—on flat fabric, the print is even. But once it’s stretched across the bust or hips, the print naturally pulls and expands. With Warp, you can simulate that visual stretch in your sketch.
How to Use Warp in Procreate:
Make sure your print is on its own layer as a clipping mask above your fill color.
Tap the Transform Tool (arrow icon).
At the bottom menu, select Warp.
Drag mesh points to curve, pinch, or stretch the print. You can tap “Adjust Mesh” to add more control points for finer tweaks.
Tap Reset if you want to undo the warp and start fresh, or Commit by tapping the arrow again to lock in changes.
👉 You can also use the Uniform setting (under Transform) to scale the print proportionally
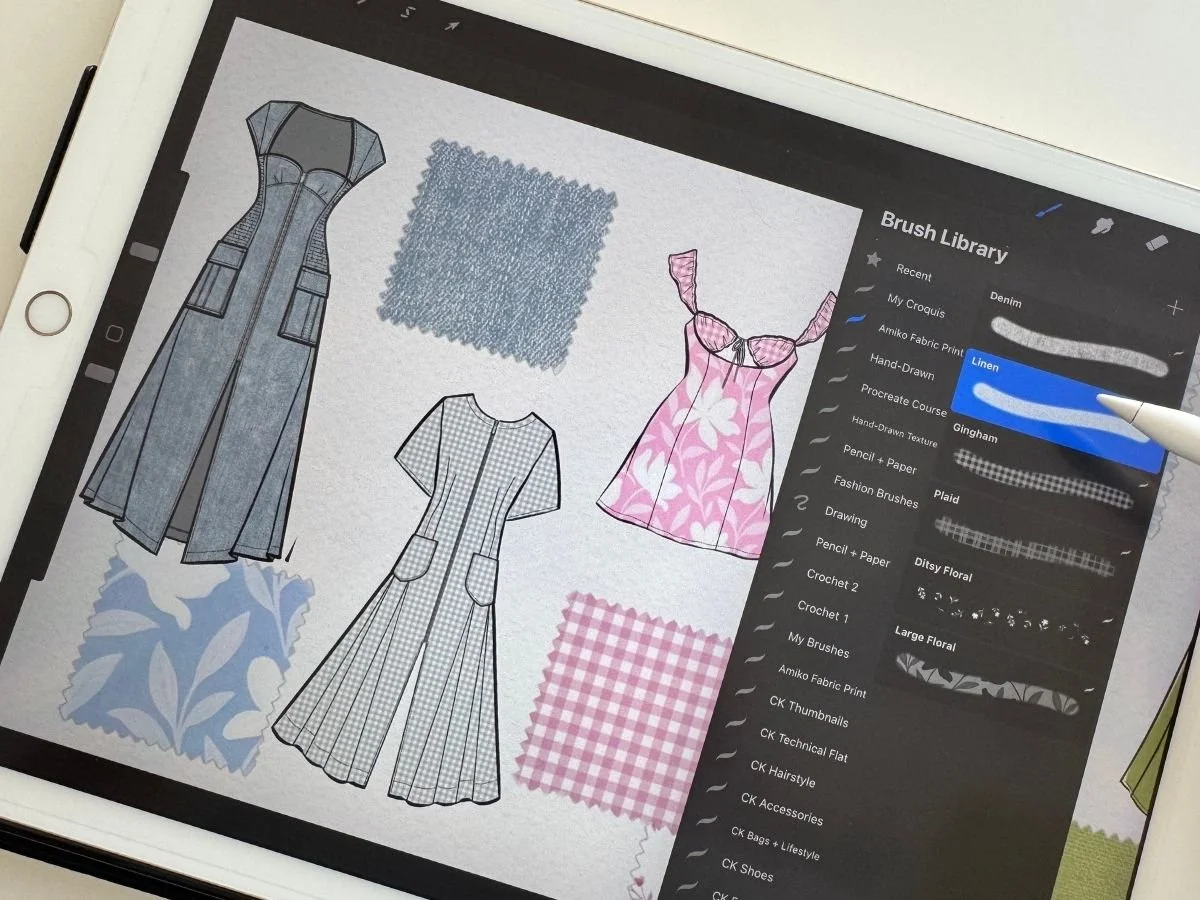
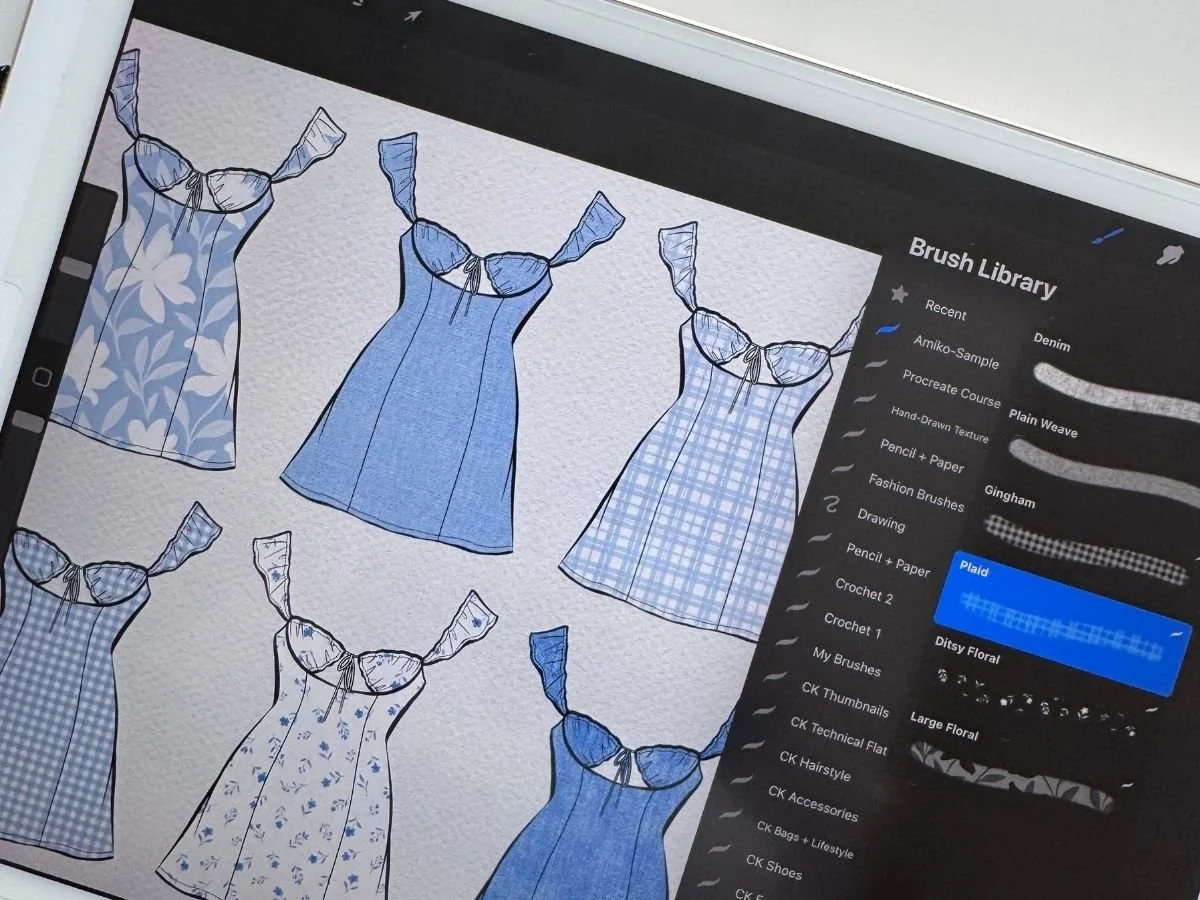
👉 You can practice warping a gingham and plaid print included in my Free Fabric + Print Brushes.
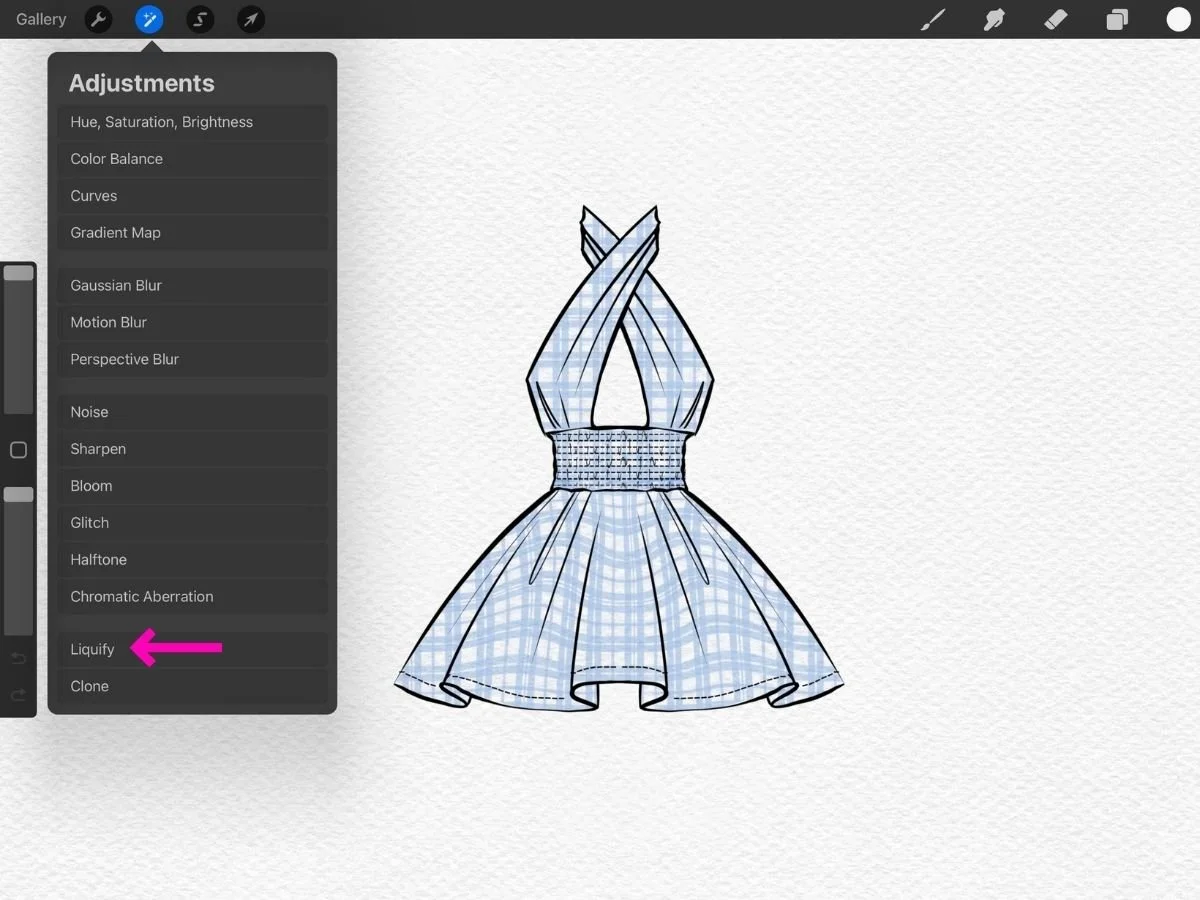
🌊 Liquify: Gently Flow and Distort
While Warp gives you control points, Liquify lets you nudge and push the print.
Example: You’ve added a geometric print to a flowing skirt, but the pattern looks too stiff. With Liquify, you can mimic the natural folds and drape of the fabric.
How to Use Liquify in Procreate:
Select your clipping mask print layer.
Tap the Adjustments icon (magic wand).
Choose Liquify.
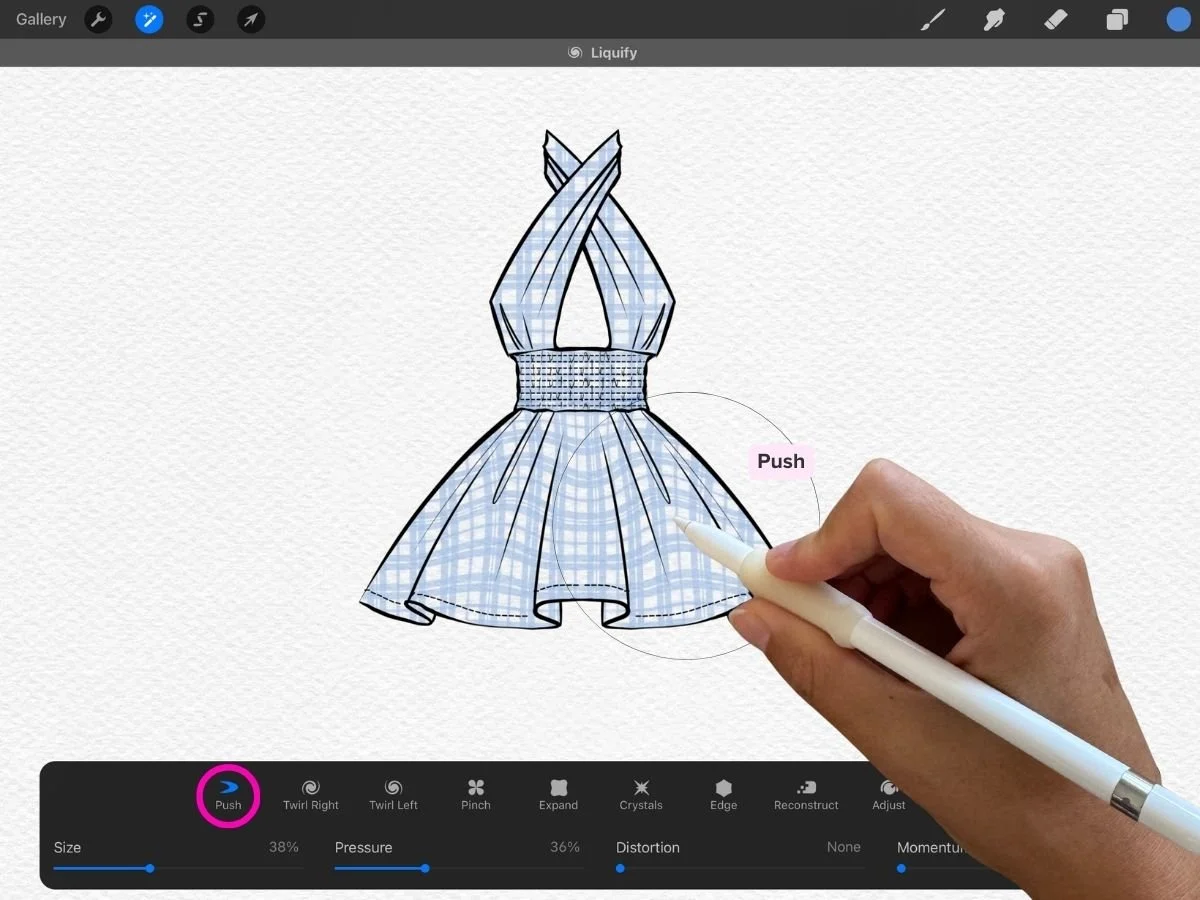
Select the Push tool to move parts of the print.
Adjust these settings:
Size: How large the brush area is.
Pressure: How strongly the effect is applied.
Distortion: How chaotic, twirly or jagged the effect is. I recommend setting this to none.
Momentum: How long the effect will continue after you lift off the canvas. I recommend setting this to none.
Tap Reset to remove changes, or tap the magic wand again to commit your changes and exit Liquify mode.
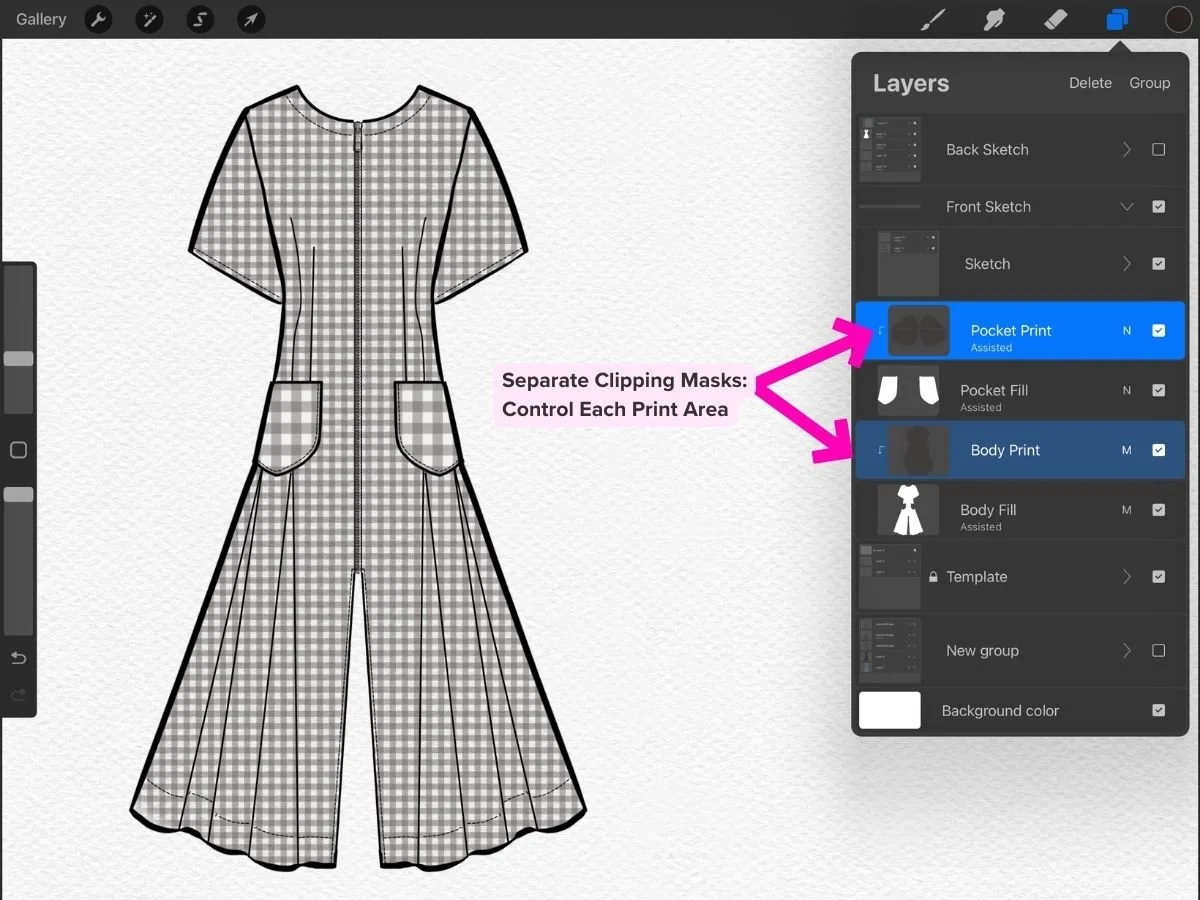
✂️ Separate Clipping Masks: Control Each Print Area
In fashion sketching, print direction can shift depending on design or construction. Pockets, collars, cuffs, and waistbands can have intentionally different fabric grains or print scales. Procreate makes it easy to manage these using separate clipping masks.
Example: You’re drawing a striped shirt. The body has vertical stripes, but the collar is cut on the bias.
How to Do It:
Make sure each garment section (like the body, collar, or pocket) has its own fill layer.
Create a new layer above that fill and tap it → Clipping Mask.
Add or insert your print to that layer.
Use the Transform Tool to rotate or scale the print:
Tap Uniform to resize proportionally
Tap Rotate to adjust the angle of the print
Use Warp or Liquify (as explained above) if needed
This method keeps your prints editable and directional—without needing to redraw anything.
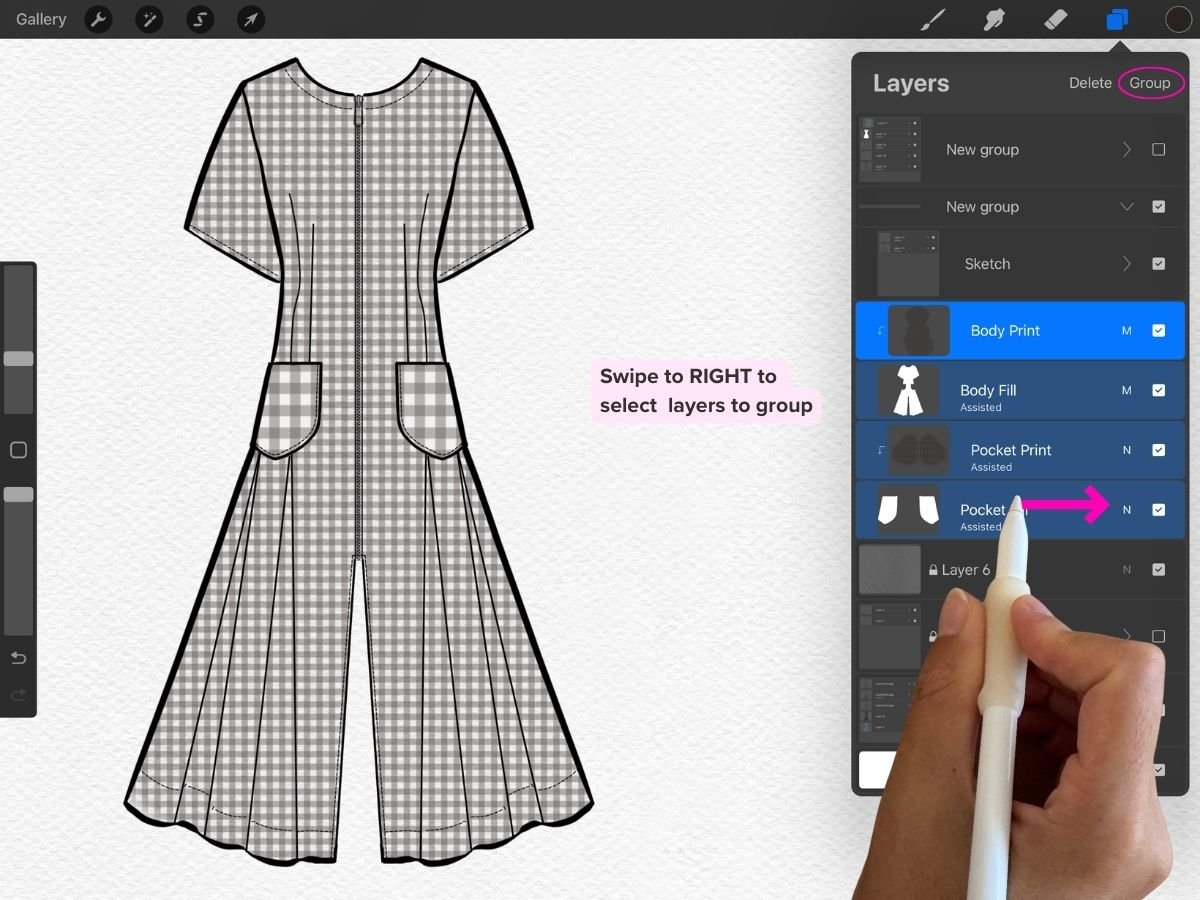
If you’re working with many print sections, group them for easier navigation:
Swipe right on the layers you want to group → tap Group
Collapse or expand the folder for a cleaner workspace
💃🏻 Why This Matters for Fashion Sketching
Whether you’re designing for print-on-demand or previewing a collection, realistic print placement can elevate your sketches from flat to dimensional. It communicates how prints behave on different surfaces—tight stretches, draped folds, or rotated pattern pieces—and gives a better sense of your design vision.
Common Mistakes to Avoid
Using one flat print layer for the whole garment → Break it up with separate clipping masks for better control and direction.
Over-warping → Small tweaks are more believable than extreme distortions.
Skipping duplication → Always duplicate your print layer before editing with Warp or Liquify so you have a clean backup.
Want to Experiment with Prints?
You can try these techniques using my free Procreate Fabric + Print Brush Set
If you’re new to Procreate and want a clear, fashion-focused workflow, my Procreate for Fashion Design Course walks you through everything from brushes and figure templates to clean sketches, flats, and adding texture.
