How to Color Your Sketches in Procreate (Without Messing Up Your Line Art)
Many Procreate beginners struggle with adding color without destroying their linework.
One designer wrote that they had “no clue about layers” at first and kept ruining their sketches.
Fortunately, Procreate offers several straightforward, flexible methods for coloring—whether your goal is a loose illustration or a precise flat.
In this post, we’ll explore the main approaches, with pros, cons, and tips to make each one work smoothly. We’ll wrap up this post with how to recolor sketches and add shadows and highlights to your rendering.
🎨 1. Painting Directly on a New Layer
This approach feels most natural for expressive fashion illustrations.
Steps:
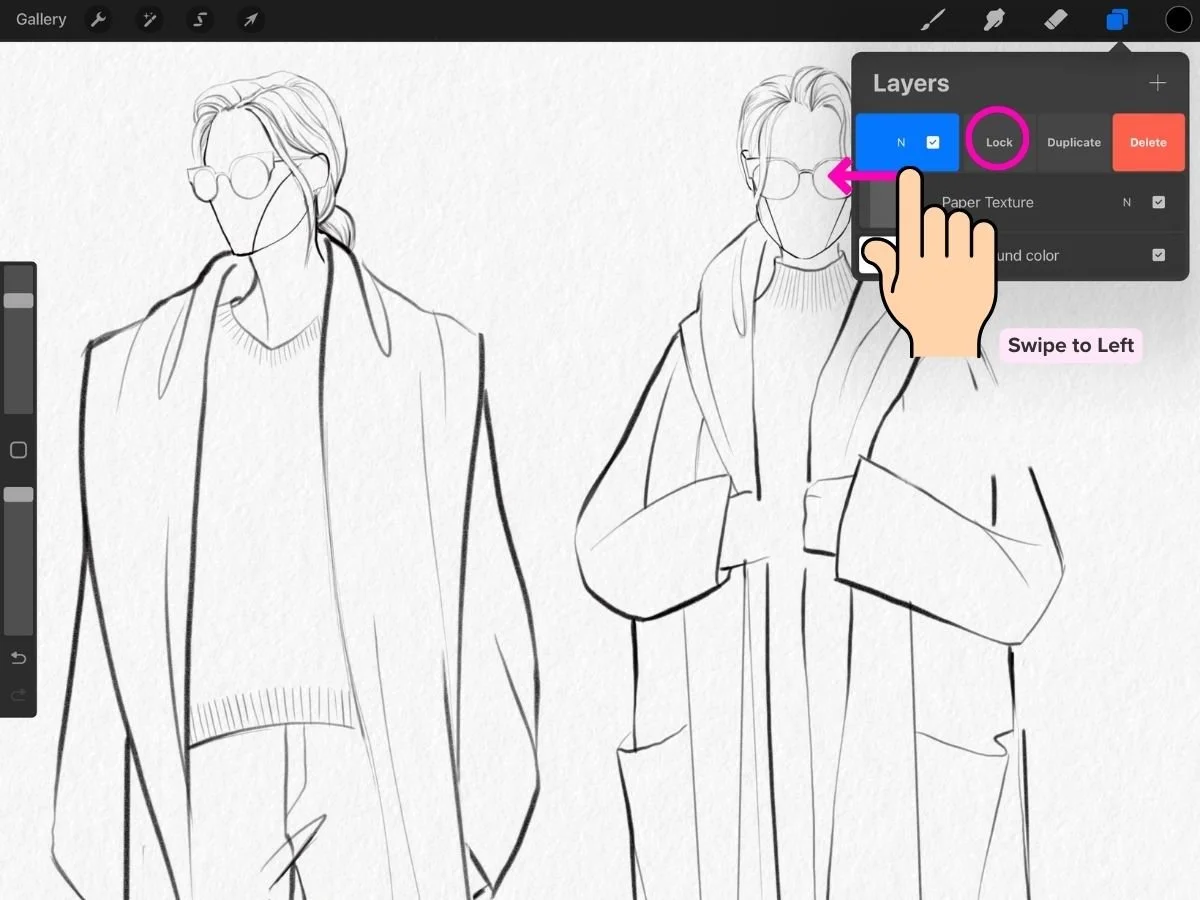
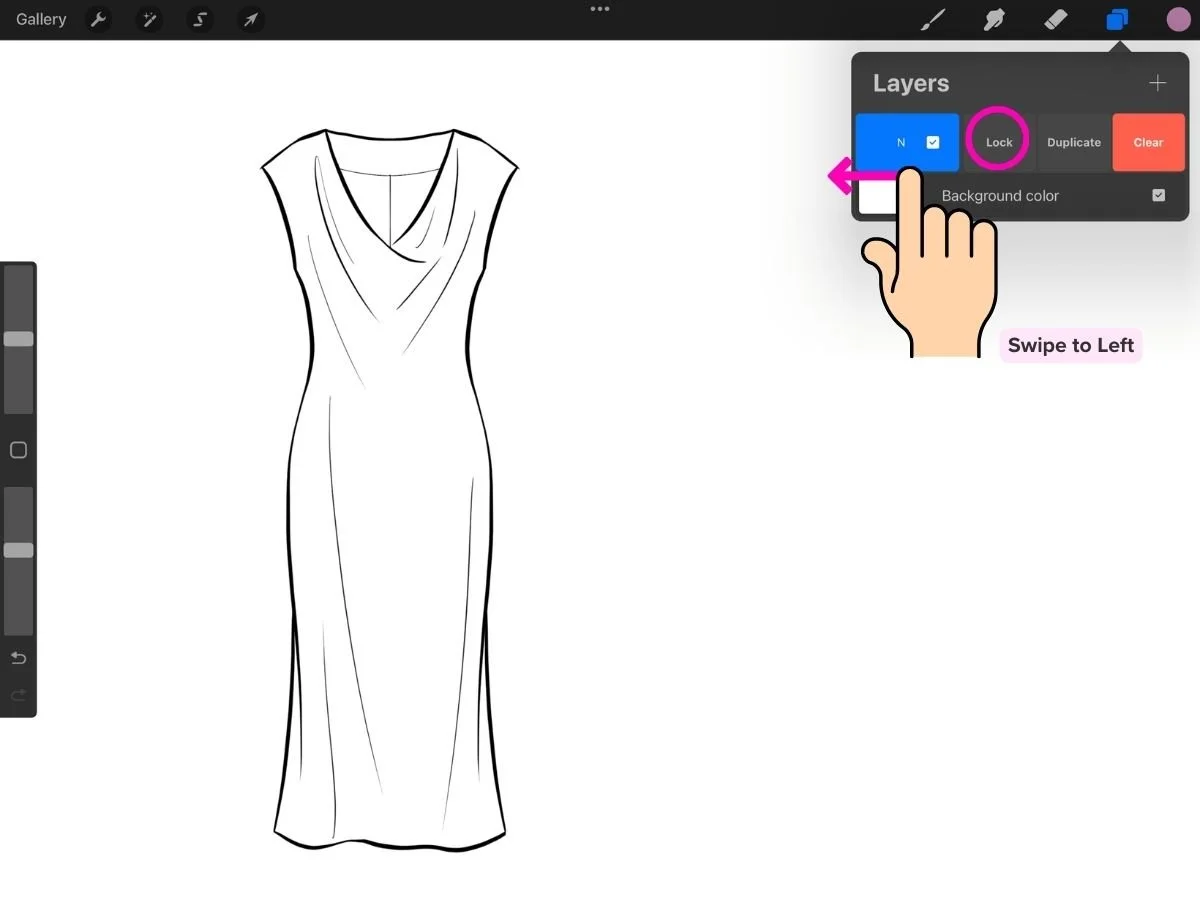
1. Lock your Line Art: Tap the double-square Layers icon at the top right of your screen to open the Layers panel > tap your line art layer > swipe the layer to the left and select Lock. This prevents accidental edits while you paint.
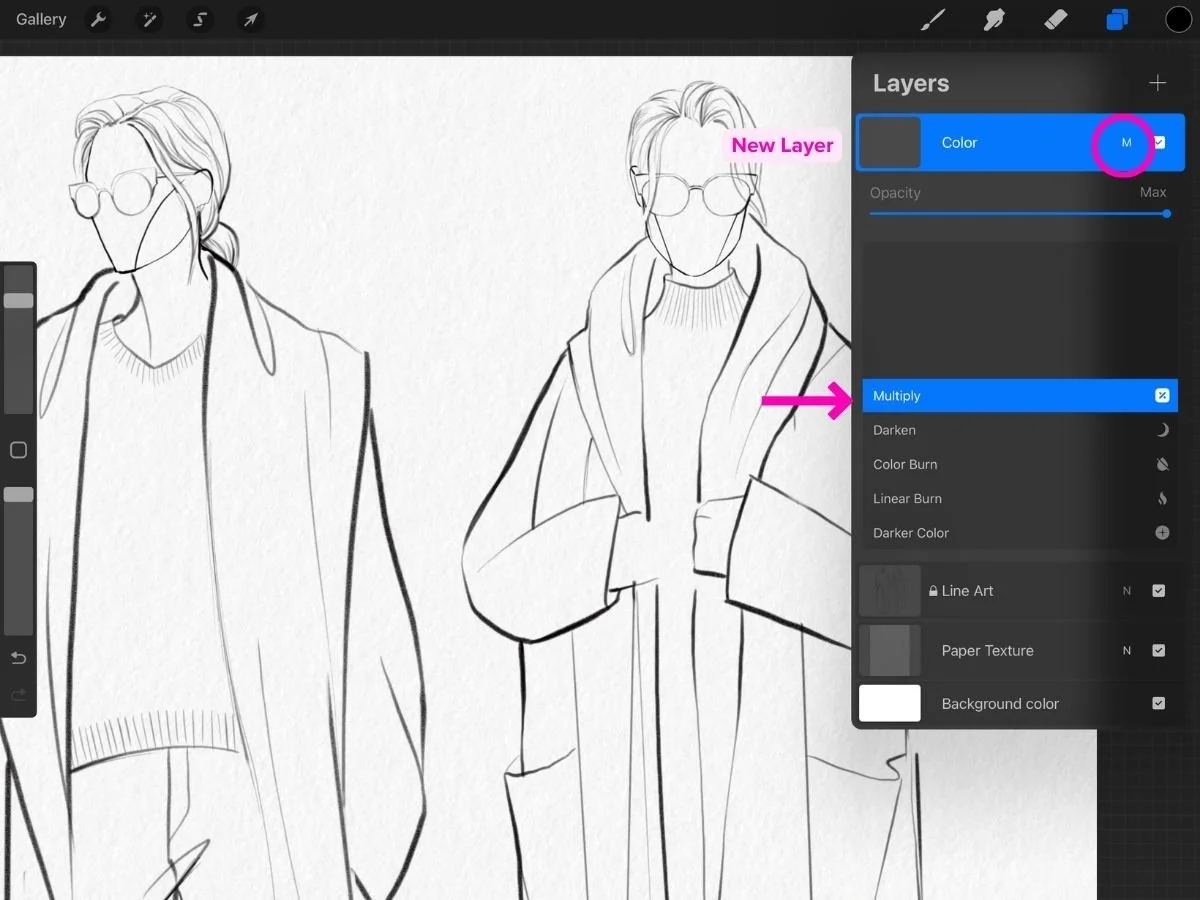
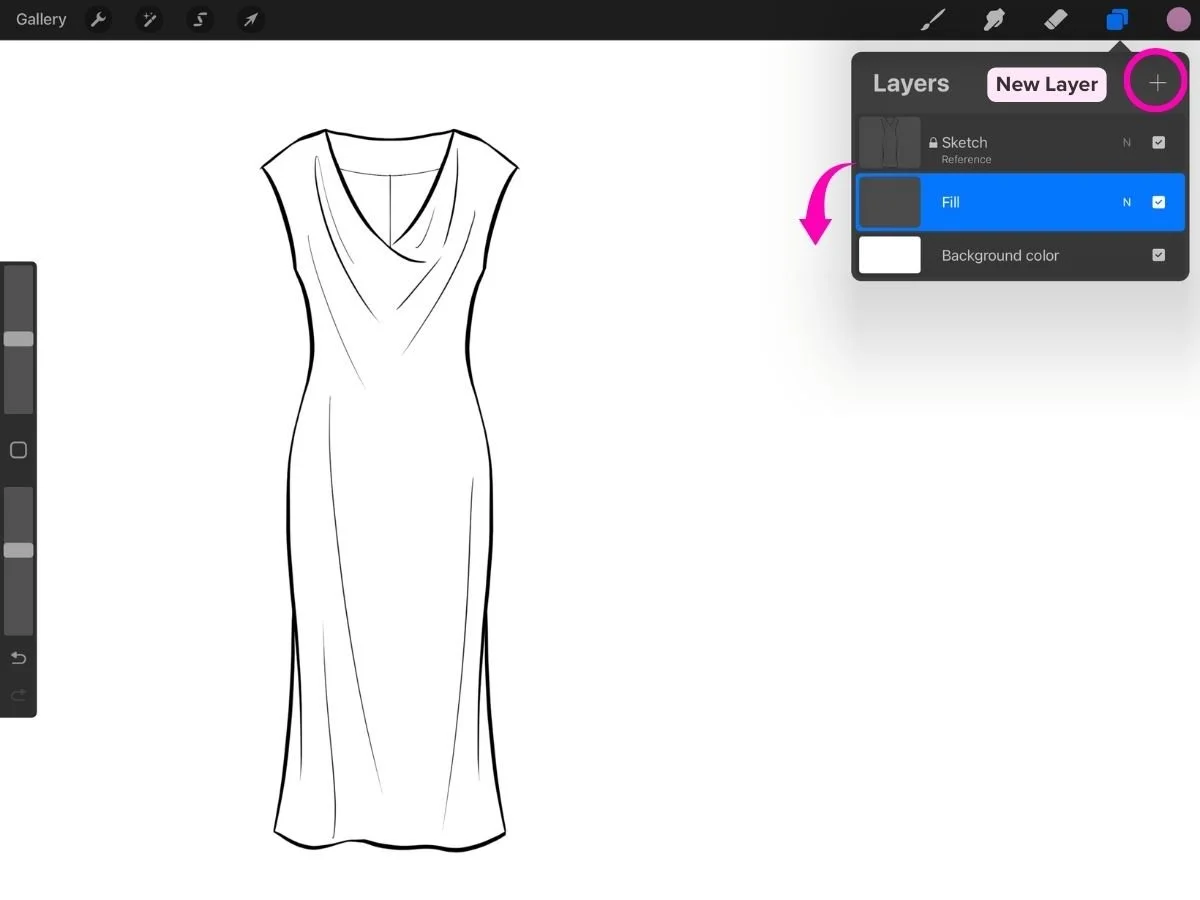
2. New Multiply Layer: Tap the + button at the top of the Layers panel. A new layer will appear above your line art. Tap the little letter N on the new layer to open Blend Modes. Select Multiply to keep your black lines visible as you paint.
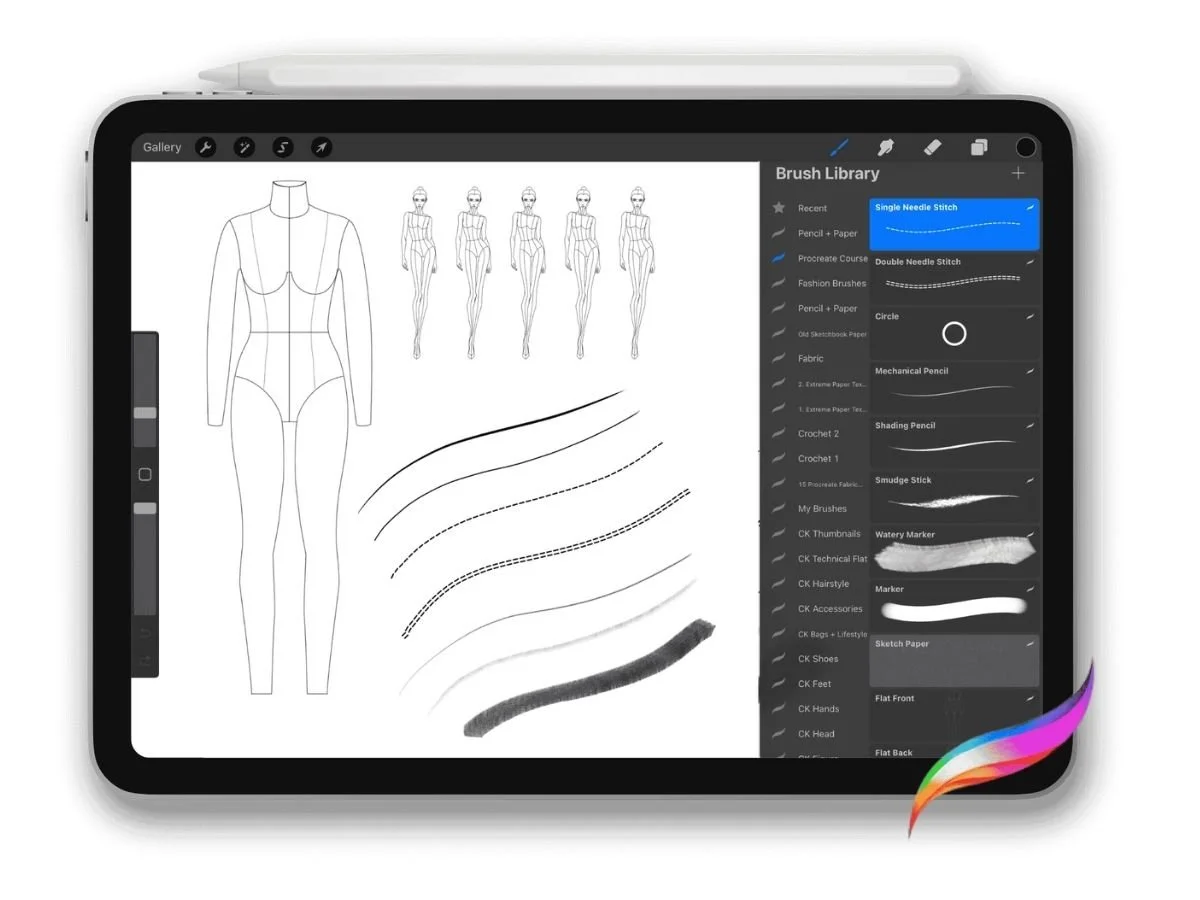
3. Choose a Brush: Tap the paintbrush icon at the top right to open the Brush Library. You’ll see categories like Inking, Painting, and Airbrushing. Test strokes on the canvas until you find the brush that feels right for your style. For illustrations, I like to use the custom Watery Marker for a loose, transparent feel with layering ability that resemble professional markers. This marker is included in the Procreate for Fashion Design Course, along with other sketching and fabric texture brushes.

4. Choose a Color: Tap the color circle in the top-right corner to open the Color menu. You can:
Pick a color by dragging around the color wheel.
Use the sliders (Disc, Classic, Value, or Harmony tabs) for more control.
To save a color, go to Palettes > Tap on the + icon at the top right menu > Create New Palette (scroll to the top of the window to see the new “untitled” palette) > then tap empty squares to add swatches. This way you build a custom palette for your project.
Import a Custom Palette: In the Color menu, go to Palettes > tap the + icon > New from File/Photos/Camera. You can import a .swatches file, or pull colors directly from an image on your iPad. The palette will appear in your library for easy access.
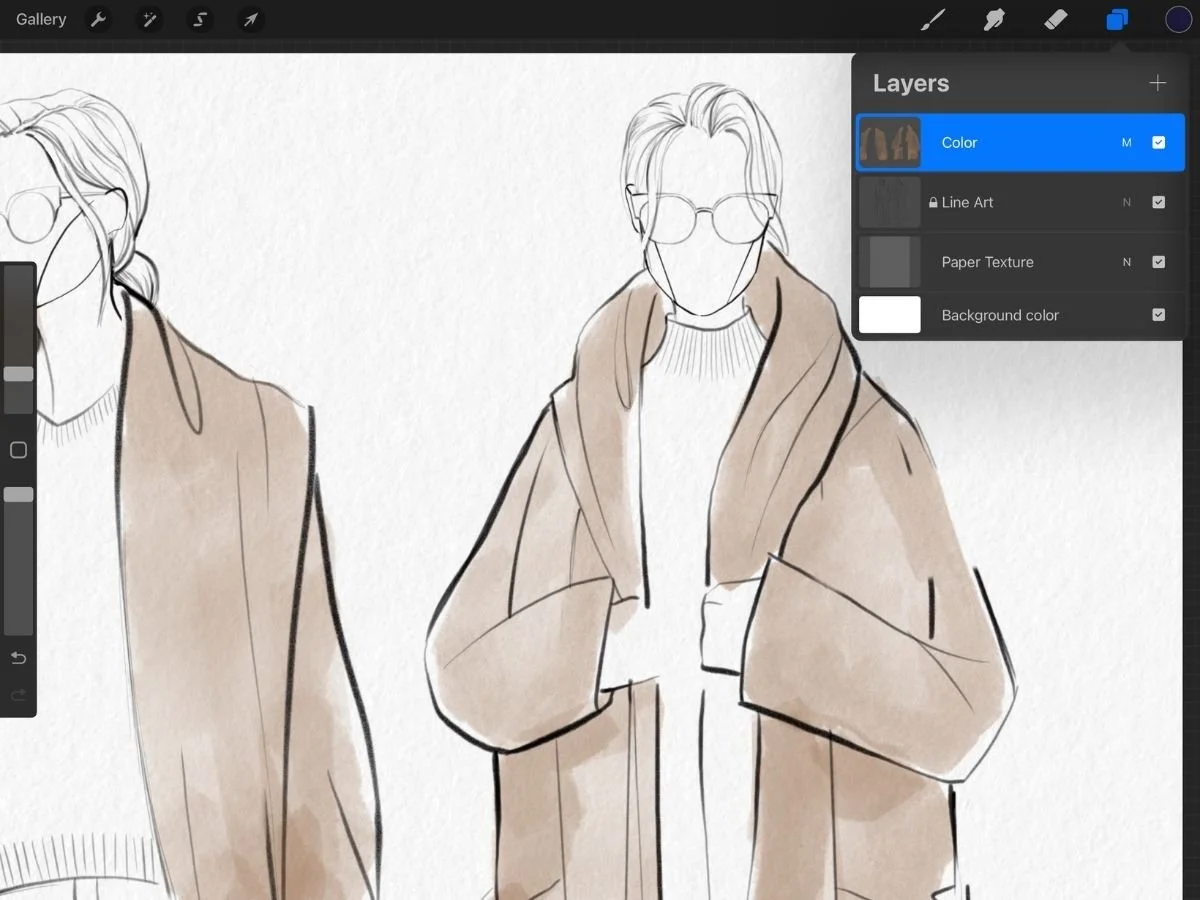
5. Paint: Paint directly onto your Multiply layer to render your design. If your colors look like they’re covering your line art instead of blending underneath, make sure the layer is set to Multiply.
Pros:
Painterly, natural, expressive look.
Great for shading, blending, and fabric textures.
Feels close to traditional illustration with markers or watercolor.
Cons:
Takes more time.
Requires a steadier hand (though you can use stabilization).
Harder to make quick colorway changes later.
To add prints to your sketches, take a look at this step-by-step guide on adding prints in Procreate.
🔴 2. Color Drop (Fill Tool)
Color Drop is Procreate’s drag-and-drop fill tool. It’s great for clean, flat coloring—especially useful for fashion flats where precision matters.
Option A – Closed Shapes with Reference Layer:
1.Closed Shape: Make sure your line art is fully closed (no gaps in the outlines). Zoom in closely to check for even the tiniest breaks—one small gap can cause the color to flood across your canvas.
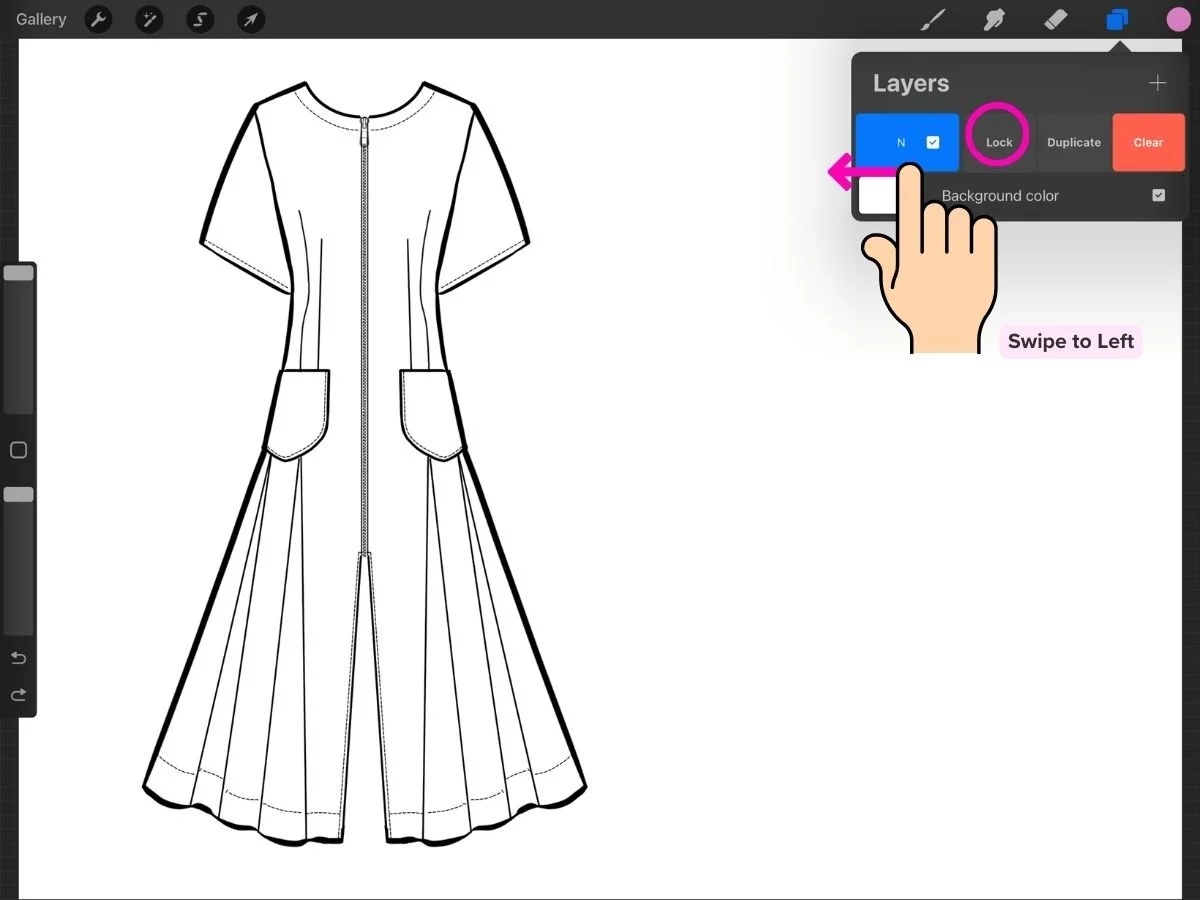
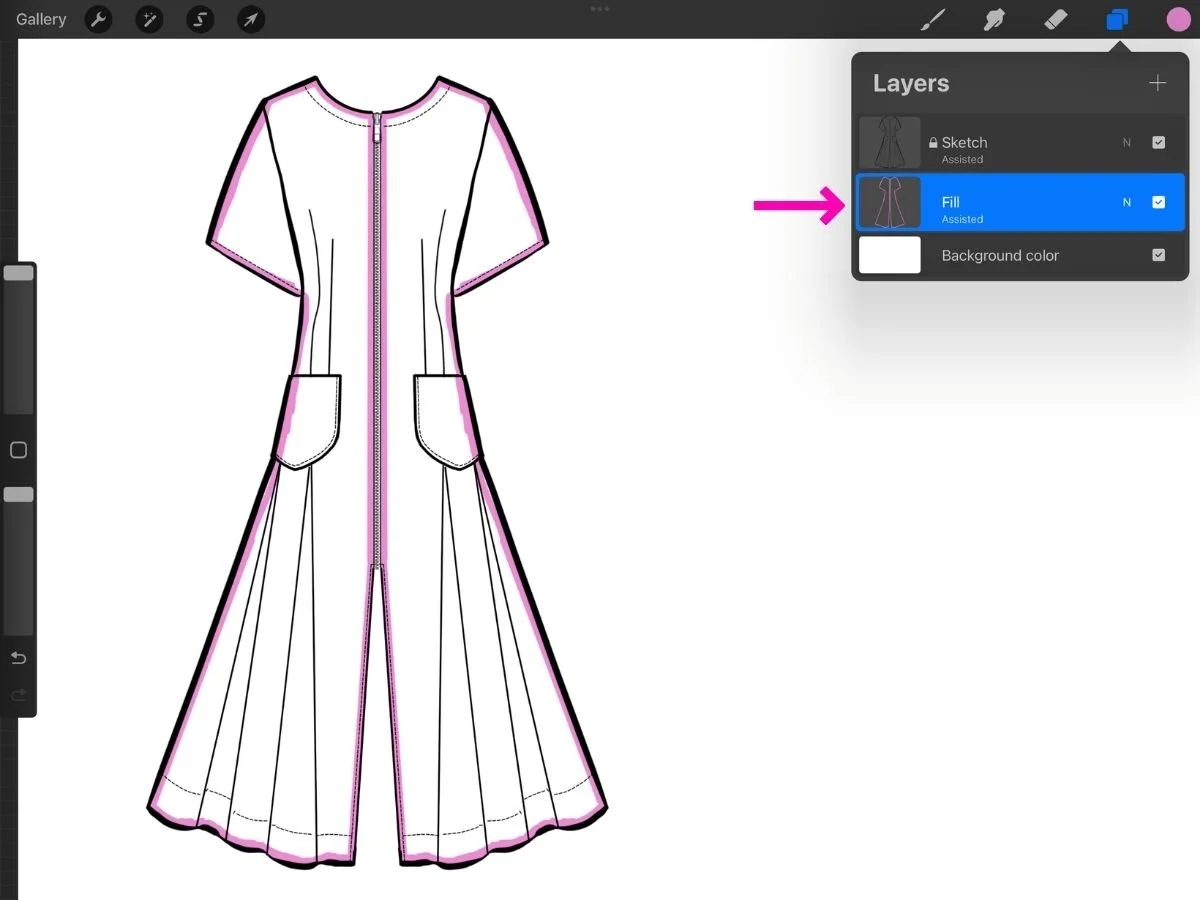
2.Reference Layer: Tap the double-square Layers icon (top right) to open the Layers panel, then tap the line art layer > tap Reference.

3.Lock: Swipe the layer to the left and select Lock. This prevents accidental edits.
4.New Fill Layer: Tap the + button at the top of the Layers panel. A new blank layer will appear above your reference layer. Drag this layer below your line art.
5.Color Drop: Drag the active color from the top-right circle and drop it into the area you want to fill. You can also drag swatches directly from the Palettes menu: open the Color panel, go to Palettes, then tap-and-drag a swatch straight into your canvas to fill the selected area.

Keep in mind you’ll need to drop color into each separate closed area on your reference layer. For example, on a t-shirt sketch you’d fill the body and the sleeves individually.
Option B – Open shape with Filled Outline Layer:
Option A works well, but only if your sketch lines are completely closed. In fashion sketches, that isn’t always the case—tiny gaps, expressive strokes, or textured line quality are often intentional and can make the sketch look better. Because of that, many designers (myself included) often prefer the next method.
1.Lock your sketch layer: Tap the double-square Layers icon at the top right of your screen to open the Layers panel > tap your line art layer > swipe the layer to the left and select Lock. This prevents accidental edits while you paint.
2.New Layer: Tap the + button at the top of the Layers panel. Drag this layer below your locked sketch.
3.Draw an Outline Shape: Tap the color circle in the top-right corner to open the Color menu and pick a shade. On your new layer, trace around the area of your sketch you want to fill, and make sure the outline connects all the way around so the shape is closed.
4.Color Drop: Drag the active color from the top-right circle and drop it into the outline. You can also drag swatches directly from the Palettes menu: open the Color panel, go to Palettes, then tap-and-drag a swatch straight into your canvas to fill the selected area.
Both methods keep your line art safe while letting you work quickly with fills.

Pros:
Very fast and precise.
Keeps linework separate and editable.
Great for filling multiple colorways of flats.
Cons:
Needs perfectly closed outlines
Residual color can appear along edges if you drop on the same layer (using a Reference Layer solves this).
Less natural than painting for fabric rendering.
Common Mistakes to Avoid:
Spilling across the canvas: this happens if your outlines aren’t closed. Always zoom in and patch gaps with a brush before trying Color Drop.
Residual color halos: if you fill on the same layer as your line art, the previous color may linger. Always use a separate layer for fills.
⚖️ Bonus: Turn on Vertical Symmetry Guide
Tip: To ColorDrop, paint, or outline both sides of a garment at the same time, you can use the Vertical Symmetry Guide.
Steps:
Go to Actions (wrench icon) > Canvas.
Toggle on Drawing Guide, then tap Edit Drawing Guide.
Choose Symmetry, then under Options select Vertical.
The layer name should now display Assisted. If it doesn’t, tap the layer thumbnail again and choose Drawing Assist from the menu.
From now on, any stroke or fill you make on one side will automatically mirror on the other side.


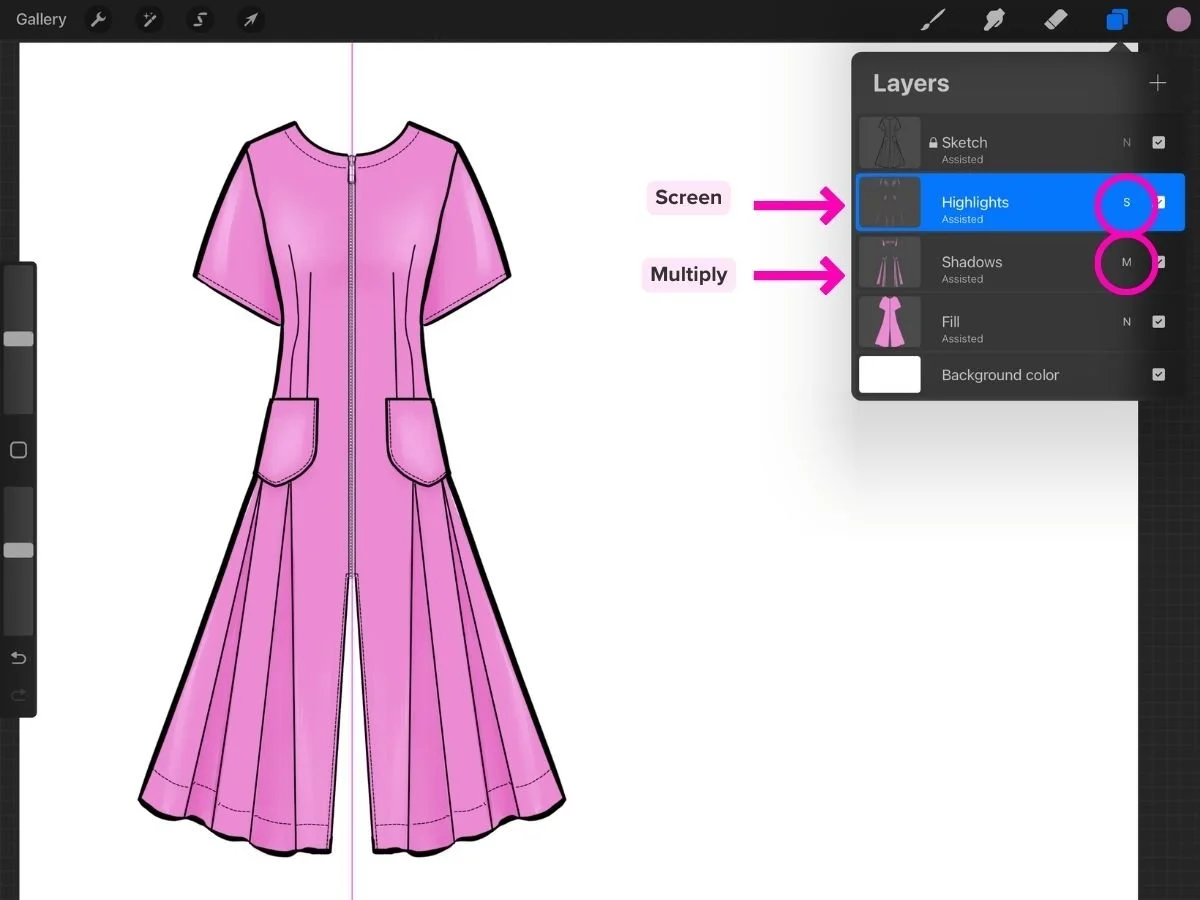
🌗 Bonus: Add Shadows + Highlights
Once you’ve laid down your base colors, you can bring your sketch to life with shading and highlights. Here’s a simple way to add depth without disturbing your line art or flat fills:
New Layer: Tap + in the Layers panel to create a layer above your base color.
Clipping Mask: Tap the new layer > select Clipping Mask. A clipping mask means the new layer will only show up inside the shapes of the layer directly below it—like coloring inside a stencil.
Blend Mode: Tap the little letter N on the new layer to open Blend Modes. Choose Multiply for shadows, or Overlay/Screen for highlights. Then paint with darker or lighter tones to add dimension.
Tip: Create separate layers for shadows and highlights. Separate layers enables different blend modes and independent adjusting or erasing.
3. Recoloring Made Easy
Fashion designers often need multiple colorways of the same sketch. Instead of repainting, use Procreate’s layer features:
Options:
Replace with ColorDrop: Drag a new color from the circle in the top-right and drop it into the fill layer. This will overwrite the previous color.
Clipping Mask: To test multiple color options on different layers, set the original fill layer to white. Then add a new layer above it, select Clipping Mask. On this new layer, drag a color into the sketch. The color will "clip" to the white fill layer below it (acting like a stencil.) You can repeat for each new color. Toggle these layers on and off with the checkmark in the Layers panel.
Hue/Saturation Adjustment: Go to Adjustments (magic wand) > Hue, Saturation, Brightness to shift the color of an entire layer at once.
Which Method Should You Use?
For flats: Color Drop is cleanest and most efficient.
For illustrations: Painting on a Multiply layer gives richness and style.
For colorways: Clipping Masks save you time
These methods let you sketch, fill, and reimagine designs without fear of ruining your linework.
👉 If you’re new to Procreate and want a step-by-step workflow tailored for fashion, my Procreate for Fashion Design Course covers brushes, templates, and all these coloring techniques in depth.