
Best Procreate Brushes for Fashion Design
Digital tools don’t have to feel flat.
With the right brushes, your fashion sketches can have the textured charm of hand-drawing.
This post lists five essential brushes to elevate every fashion designer’s Procreate toolbox—plus where to find them and how to install them.
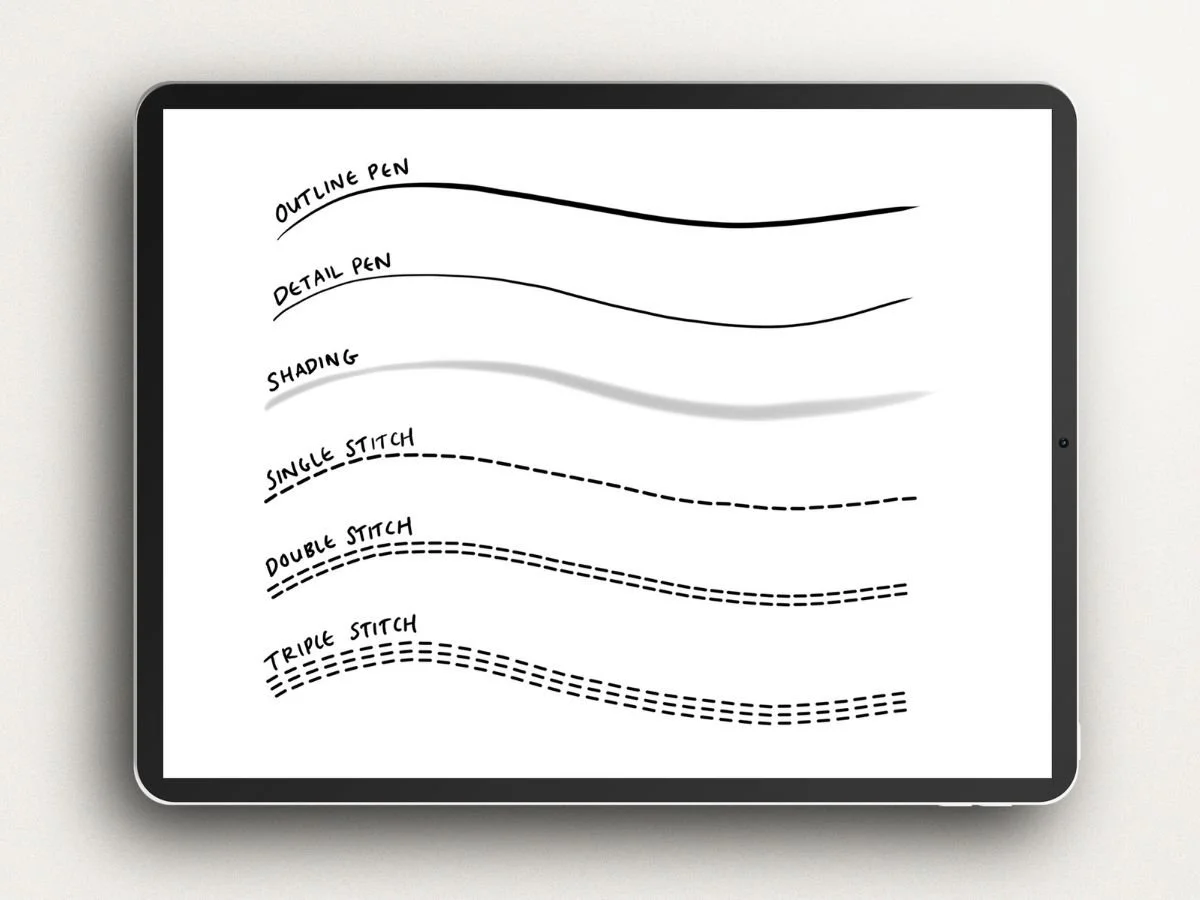
✏️ 1. Pencil and Pen Brushes (for Outlines and Sketching)
Start with a solid sketching brush. You’ll want something that mimics the feel of a real pencil or pen so your lines feel natural and precise. These are essential for:
Technical flats
Fashion illustrations
Freehand brainstorms
Tip: Look for brushes that respond well to Apple Pencil pressure for more dynamic line weight.
Procreate includes a few great starter brushes in the Sketching and Inking brush sets. Many designers love the built-in 6B Pencil or Studio Pen—but a custom brush with smooth pressure curves or subtle texture can take your sketches further.
The Fashion Procreate Brushes includes outline and detail brushes custom designed for fashion designers and technical flats.
📄 2. Paper Texture Brushes (for Backgrounds + Hand-Drawn Feel)
Paper brushes help give your digital sketch a warm, natural look—especially if you want your work to feel like it was done on real sketchbook paper.
Use them as subtle background texture beneath your sketch layer to emulate watercolor paper, kraft paper, or canvas texture.
This is especially helpful for:
Portfolio presentation pages
Giving prints or brush strokes a tactile effect
Making linework feel less "digital"
Try layering a paper texture brush on a low-opacity layer below your design to warm up your canvas.

The Pencil + Paper Brush Set includes a range of textured paper backgrounds—along with a custom pencil, blending sticks, and shading tools designed to match my real sketching tools. It’s useful for crisp, clean pencil sketches with a soft, shaded finish.

🧍♀️ 3. Croquis Stamps (Figures + Flats)
Croquis stamps are pre-drawn templates you can stamp onto your canvas and draw over. They’re incredibly useful for speeding up your workflow—especially if you:
Want consistency across multiple looks
Don’t want to redraw a figure every time
Need technical flats or garment outlines as a base
Some designers use full-body fashion figures, while others prefer modular stamps like just a jacket front or a dress flat.
The Croquis Kit includes ready-to-stamp fashion figures—perfect for quick concepts, repeating poses, and building out a collection. Interchangeable heads, hands, and feet make styling endlessly flexible.
For modular fashion flat stamps, I recommend checking out Etsy.

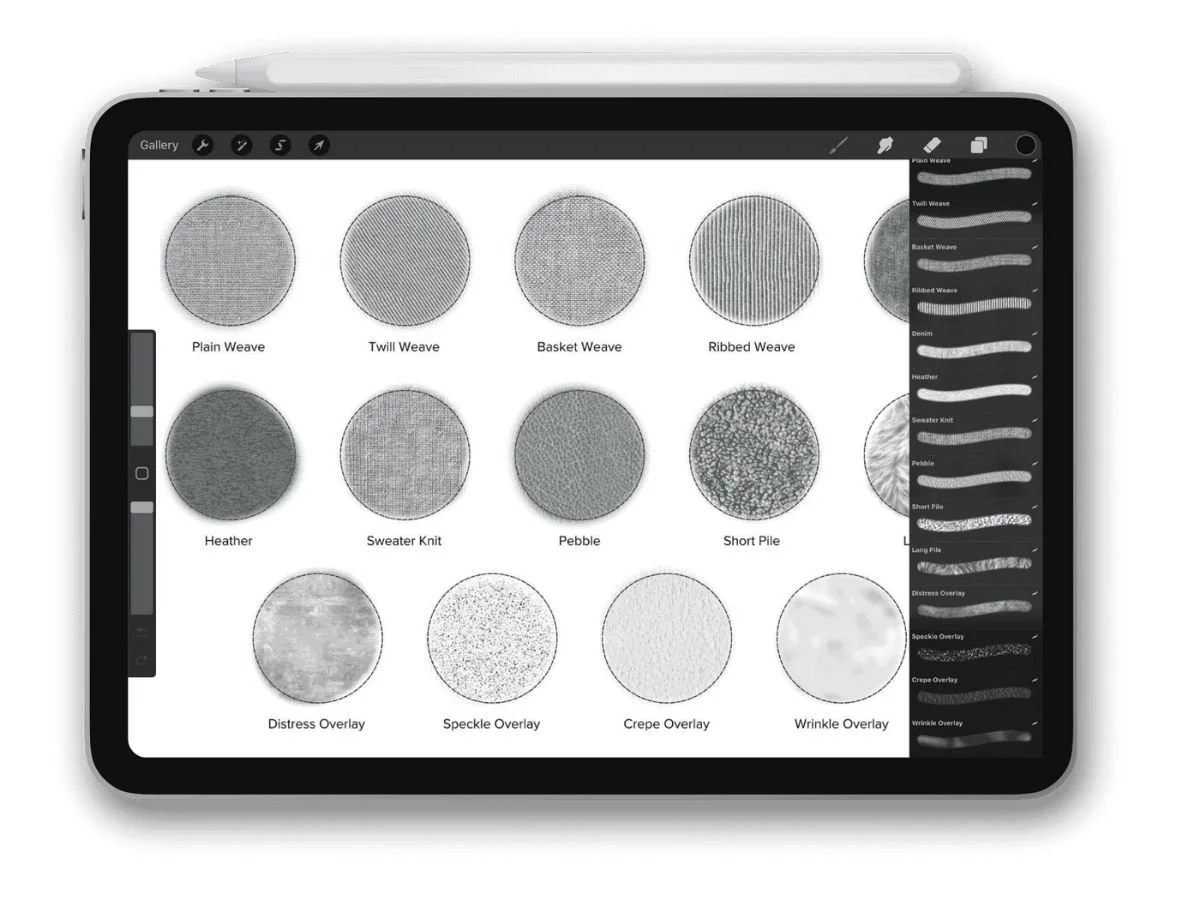
🧵 4. Fabric and Print Brushes
Adding fabric textures and prints helps communicate your design vision more clearly—especially when you're sketching collections, moodboards, or textile-focused looks.
There are two main ways to add fabric or print effects in Procreate:
Import an image or file
This could be a scanned fabric swatch, a digital print you’ve designed, or even a photo of a real textile. You can use clipping masks to keep the print neatly within your garment silhouette.Use a fabric or print brush
These brushes paint repeating textures or patterns directly onto your canvas—making it faster and more editable than working with image files.
💡 Tip: Look for textures labeled “seamless.”
Seamless textures repeat cleanly without harsh edges or visible borders. This makes your sketch look more realistic and prevents distractions from broken patterns.
You can try my free Fabric + Print Brush Set—it includes 6 seamless textures like denim, linen, gingham, plaid, ditsy floral, and a mystery bonus brush.
These brushes are especially useful when:
Testing different print options within a single silhouette
Building a cohesive textile story across multiple looks
For a step-by-step method to add fabric texture and prints, check out this post.

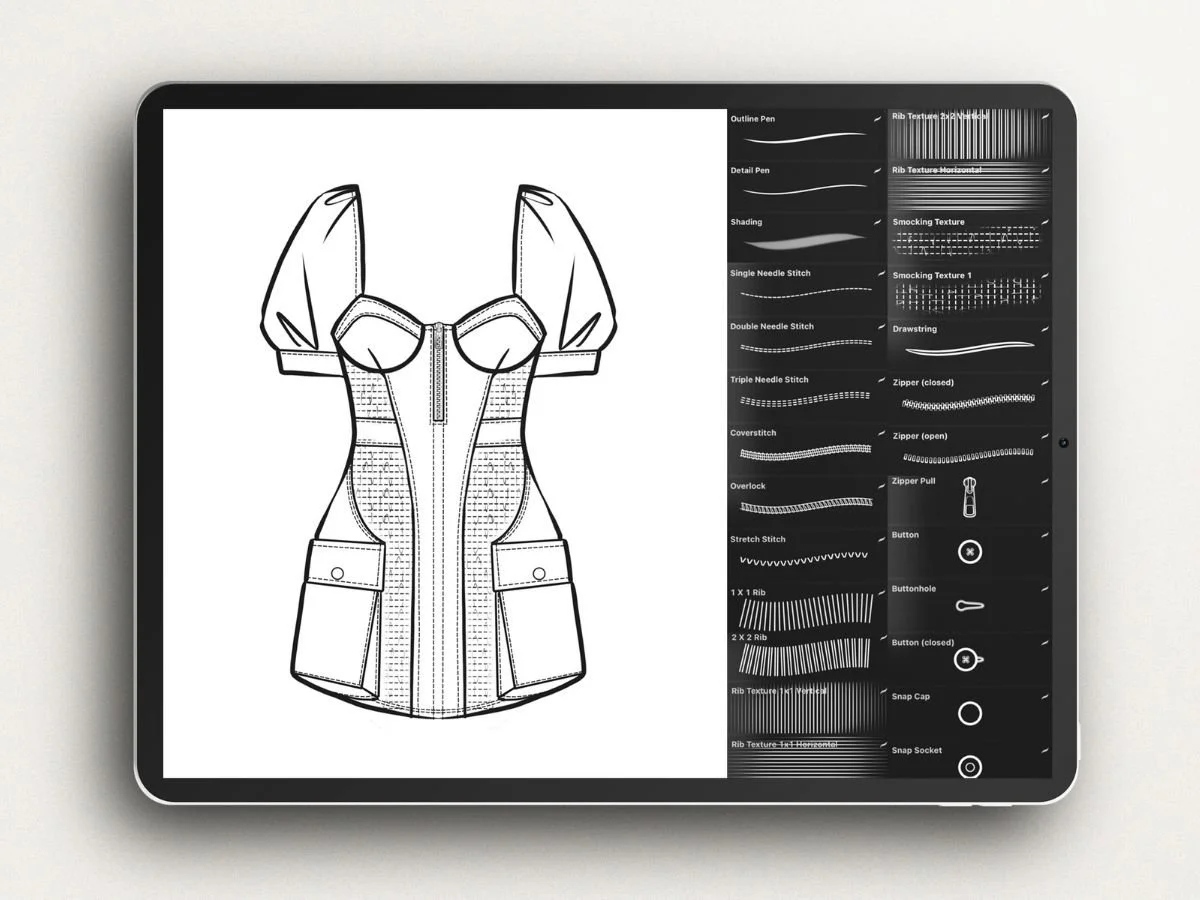
✂️ 5. Trim Brushes (Stitching, Zippers, Buttons)
Trim brushes save time when adding detail. Instead of drawing each topstitch or zipper tooth by hand, you can:
Swipe a stitching brush along a seam
Add snap buttons or zipper pulls with a stamp
Quickly build smocking panels, ribbed cuffs, or drawstring closures
For fashion tech packs, these can also help communicate construction details clearly.
The Fashion Procreate Brushes include stitch lines, zipper teeth, buttons, trims, and more—designed to make your technical sketches cleaner and more detailed. The kit also includes custom designed outline and detail pens for precise lifework.

🔎 Where to Find Fashion-Friendly Procreate Brushes
You can find a variety of Procreate brushes on the following sites and marketplaces:
🚀 For an all-in-one toolkit, the Procreate for Fashion Design Course includes every essential brush set to get started—croquis stamps, flat templates, stitching, realistic pencil + paper, marker, and fabric textures—all pre-organized and ready to sketch.
📥 How to Import Brushes into Procreate
Once you’ve downloaded a .brush or .brushset file, there are a few ways to bring it into Procreate:
Option 1: Import from the Files App or Email
Locate the file in your iPad’s Files app or from an email attachment.
Tap the file. If Procreate is installed, it will automatically open and import the brush.
Open Procreate, and you’ll find it at the top of your Brush Library
Option 2: Manual Import Inside Procreate
You can also import brushes from within Procreate:
1.Open your Brush Library (tap the paintbrush icon).
2.Tap the “+” (top right) to open the Brush Studio.

3.In the Brush Studio, tap “Import” in the top right.

4.Navigate to your downloaded file and select it.
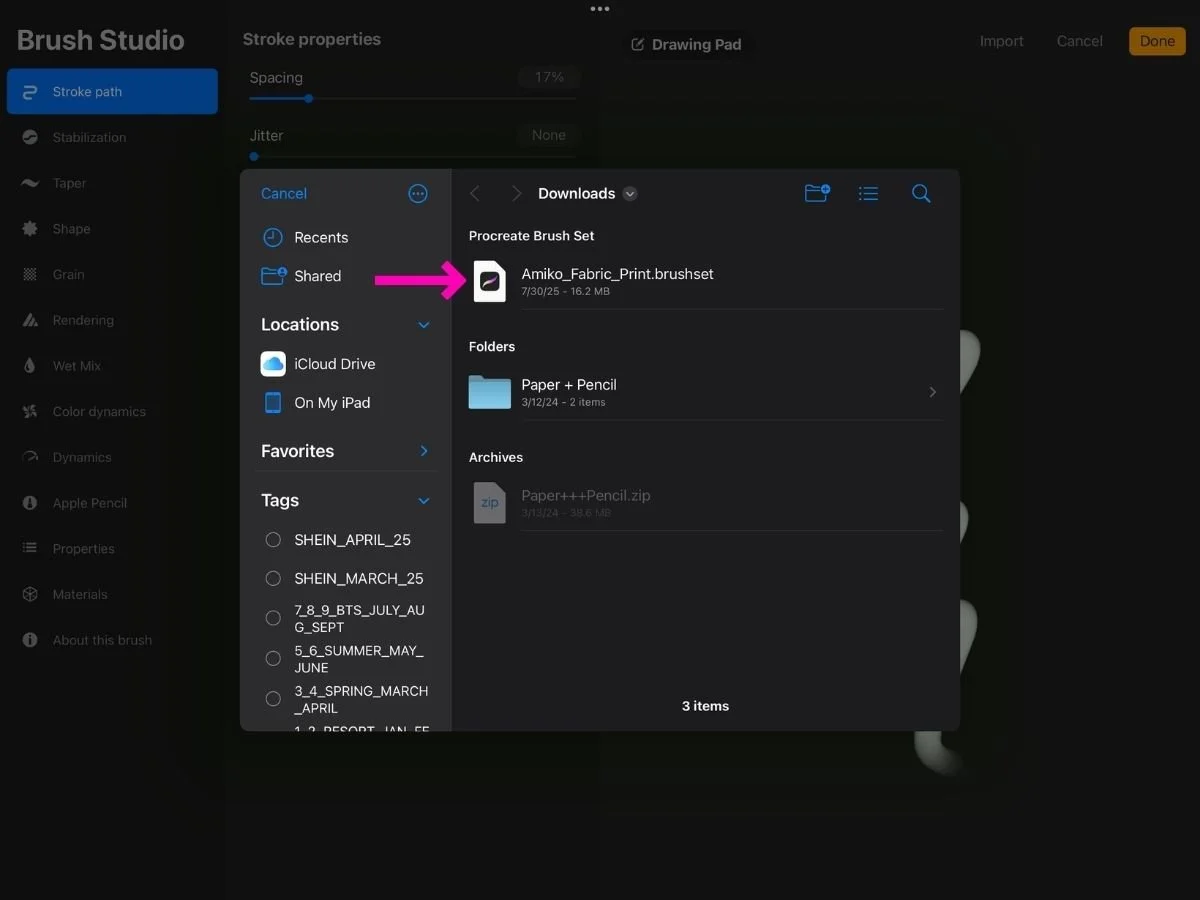
5.Scroll to the top of your Brush Library to find your new set.
🧵 Recap
Having the right brushes can add personality and precision to your fashion sketches.
Key brushes to add to your library:
Pencil + pen brushes for crisp sketching
Paper texture brushes to add warmth
Croquis stamps for consistent proportions and speed
Fabric + print brushes for realistic sketches
Trim brushes to add construction details for sampling or tech packs
Want to get even more out of your brushes? This guide to Procreate Brush Settings walks you through how to adjust size, pressure, texture scale, and more- so your brushes feel just right.